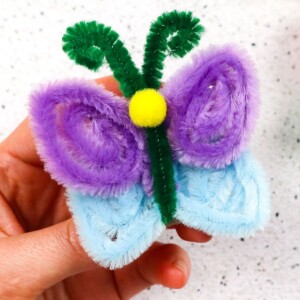
DIY Pipe Cleaner Butterflies
Use pipe cleaners to make this cute DIY butterfly. A perfect pipe cleaner craft!
Equipment
Materials
- 2 x 12-inch colorful pipe cleaners
- 1 x 6-inch pipe cleaner
- 1 x small clothespin
- 1 x pom pom
Instructions
- Bend your two colorful pipe cleaners into “V” shapes. Make sure they are even.
- Invert one of the “V’s” and interlock them, having their middle meet, creating an “X” shape.
- Once the “X” is on, twist either side of the shape a few times. This step secures the butterfly’s body.
Also, decide what wings are top and bottom and curl them inward toward the butterfly's body. - Reshape and organize the situating place of the butterfly’s wings.
This step could involve pinching the wings to a specific shape or moving the wings forward or back, etc. - The six-inch pipe cleaner gets the same treatment as the twelve-inch ones–a “V” shape but a little squished.
- Slip the butterfly's body into the “V” so the center supports its bottom.
- Once even, twist the pipe cleaner at the top a few times to secure the body fully.
Directly after twisting the six-inch pipe cleaner into place, bend the antennae to your liking. - Set aside the butterfly–grab the glue and mini clip and add adhesive to the back.
Make sure you situate the clip according to your needs. - Add the clip to the butterfly's body immediately with the hot glue and let it sit.
- The same idea applies to the pom pom–add hot glue and immediately add it to the front to represent the head.
Once dry and completed, add it anywhere or to anything that needs a fun and colorful pop of Springtime colors!
Tried this craft?Leave a comment below with your rating! I love the feedback and respond to every comment!