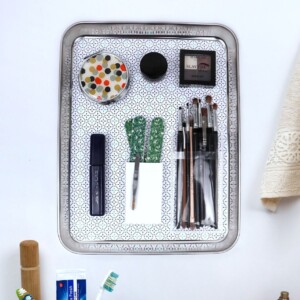
DIY Magnetic Organizer
Make your very own magnetic organizer! It will give you a chance to organize your makeup products and more! An easy project for anyone!
Video Tutorial
Equipment
- Scissors
- Ruler
- Pencil
- Painting brush
Materials
- Stainless steel baking tray or metal cookie tray
- Decorative paper thin
- Magnets
- Hot glue gun
- Mod podge
Instructions
- Prepare your work area and gather your supplies.
- Measure the dimensions of your stainless-steel tray.
- Cut out your decorative paper as per those measurements.
- Coat an adequate amount of mod podge over the tray using a flathead paintbrush.
- Carefully stick the paper over the mod podge and smoothen out any wrinkles. Allow it to dry.
- Apply another layer of Mod podge over the paper to set it.
- Next, go ahead and grab your cosmetics.
- Use your hot glue gun to add a blob of glue to the back of your makeup container.
- Firmly press the magnetic pellets in and hold them down until you’ve secured them to the back of your cosmetics.
- Now all that’s left to do is tag the magnet onto the tray, and you’ve successfully completed this DIY project!
Tried this craft?Leave a comment below with your rating! I love the feedback and respond to every comment!