DIY Macrame Plant Hanger (Step-by-Step Tutorial)
Love macrame? This super relaxing DIY macrame plant hanger is a beautiful decoration anyone can make.
Video Tutorial
Materials
- 3 mm cotton cord
- 2 " wooden ring*
- Beads optional
Instructions
- Gather all your supplies to get started.
- Cut 8 cords of 170 inches(14ft) and 2 cords of 40 inches(3.5 ft).
- Pull all eight strands through a wooden ring and align the ends. You should have 16 equal cords, each 85” long.
- Gather all the cords right under the ring and use a 40” cord to make a gathering knot. Tug the ends to secure the gathering knot.
- Divide the 16 cords into four sections of 4 strands each. Hold the two cords in the middle in place as you make a number of spiraling knots with the left cord as the lead. Repeat this step with the other three sections.
- Make sure that all four sections are of the same length and that you make the same number of spiraling knots for each section.
- Next, it’s time to attach a bead to each of the four sections. First, take one section of spiral knots. Leaving a gap of 2 to three inches from the last spiral knot, make one half of a square knot (with the left strand).
- Insert the bead through the middle strands and secure it in place with the second half of the square knot (with the right strand). Repeat this for the three remaining sections.
- Once again, leave a gap of 2 to 3 inches and make another smaller set of spiraling knots along all for sections.
- Now, grab two sections and take two strands on the right side of the first and two strands on the left of the second section—effectively, the four strands in the middle.
- Leave a couple of inches gap and make one square knot.
- Then, grab the two strands on the right from the second section and two strands from the left of the third section and make another square knot. Work your way around the four sections till you have a row of four square knots, all aligned.
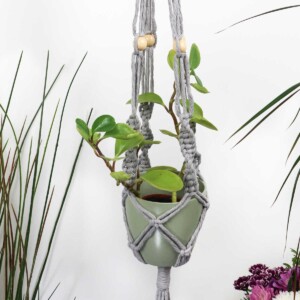
- It’s time to place your pot in this hanger to determine exactly where you need to fasten off, so to speak.
- So, grab your pot and line it so that the rim sits right under the last of the spiraling knots. The row of square knots should be along the body of the pot.
- Next, gather two strands each from two consecutive sections and make another square knot. This one should be directly under the spiral knot and in between two square knots from the previous row. Refer to the picture to confirm the placement.
- Make three more square knots to complete another row.
- It’s time to fasten off your strands.
- Hold the pot in place and gather the strands under the base of the pot. Carefully remove the pot without moving the strands.
- Using the second 40” cord, make another gathering knot. Tug the ends to secure the knot in place under the wrapped cords.
- You can trim off the excess cords evenly. If you want your hanger to have a tail, feel free to leave a few inches before you trim the ends off.
Tried this craft?Leave a comment below with your rating! I love the feedback and respond to every comment!