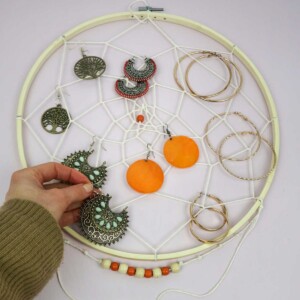
DIY Jewelry Organizer
Need to keep your jewelry more organized? Make your very own DIY jewelry organizer out of an embroidery hoop.
Video Tutorial
Equipment
- Scissors
- Pencil (optional)
Materials
- Embroidery hoop
- Cotton string
- Beads
Instructions
- Gather all your supplies to get started on this DIY jewelry organizer.
- Use a pen or marker to divide the ring/frame into eight equal parts.
- Tie your embroidery thread in a firm knot at the top of the ring and secure it firmly in place.
- Next, start looping the thread over and around the ring at every one of the pointers you had marked earlier.
- Remember to loop the thread around the center of the actual thread from the previous round when you start the second round.
- Ensure that the loops stay in place and that the thread doesn’t sag or become loose.
- Keep looping the thread and make your way towards the center.
- When it’s time to fasten off the knot, you can choose to insert a bead to hold it in place. Tuck the ends into the bead or use a tiny bit of glue to fasten off.
- You can add any decorative beads, danglers, and the likes at this stage.
- Finally, make a loop at the top of the ring and use it to hang the dream catcher organizer on the wall.
Tried this craft?Leave a comment below with your rating! I love the feedback and respond to every comment!