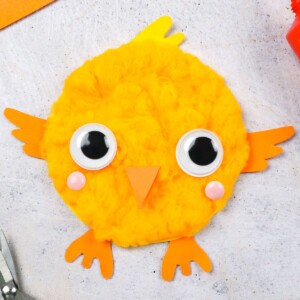
Cutest DIY Chick Craft
Create adorable DIY chick crafts with your kids using simple materials. Perfect for kids and as a family activity to do together.
Video Tutorial
Equipment
- Scissors
- Jar lid large
- Pencil
Materials
Instructions
- Grab your lid and trace it onto the yellow cardstock to make your chick’s body.
- Leave a small gap at the top of your circle.
- Draw a chick’s comb at the top.
- Cut the chick’s body out.
- Fold your orange cardstock in half and draw a beak, wing, and leg.
- Cut out the beak, wing, and leg, and then cut the wings and legs in half so that you have two. Keep the beak as one piece.
- Glue your chick’s wings and legs onto the back of the yellow cardstock.
- Once the wings and legs are attached, set the beak aside for later.
- Grab a pom pom and cut the center thread so that the pom pom comes apart.
- Spread the pom pom “fur” out and glue it onto the chick’s body in batches.
- You will be finished creating the fur when your chick’s body is fully covered with fur.
- Glue on your eyes and beak.
- Add two stickers to your chick’s face to make cheeks (or glue on two small pink circles if you don’t have stickers).
- Enjoy your cute new chick!
Tried this craft?Leave a comment below with your rating! I love the feedback and respond to every comment!