

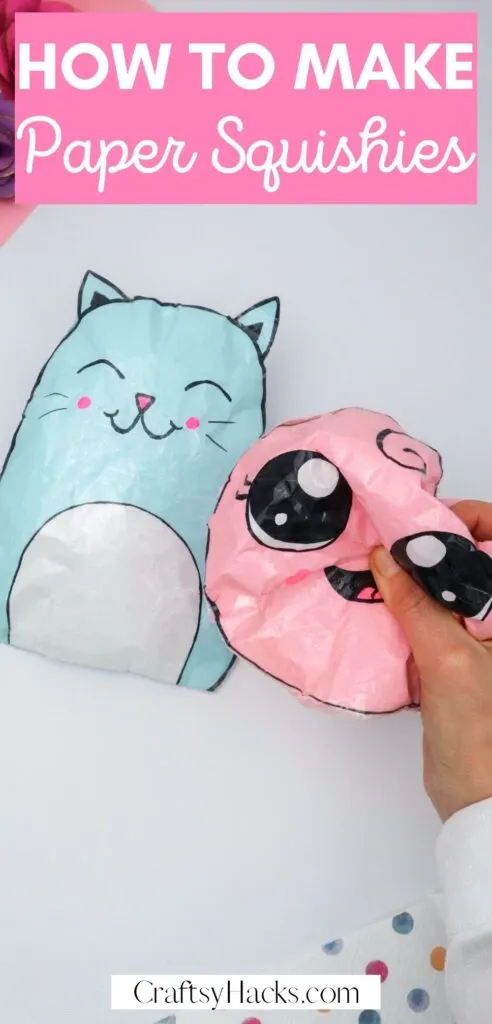
Paper squishies are a fun craft to make with your kids! Here is a full tutorial on how to make a paper squishy exactly.
If you had a craft project lined up for your next craft session, then just shelf it. Trust me, because this DIY is definitely worth it. You’re going to make…paper squishies!
Can you imagine a world without squishies? They’re super cute, squiggly, puffy, squishy, and the best part? On top of it, super easy to make!

They’re also a great craft activity for kids and can keep them occupied for hours playing with them. So, if you have kids you can rope them into making a ton of these DIY paper squishies!
Supplies You’ll Need for Paper Squishies
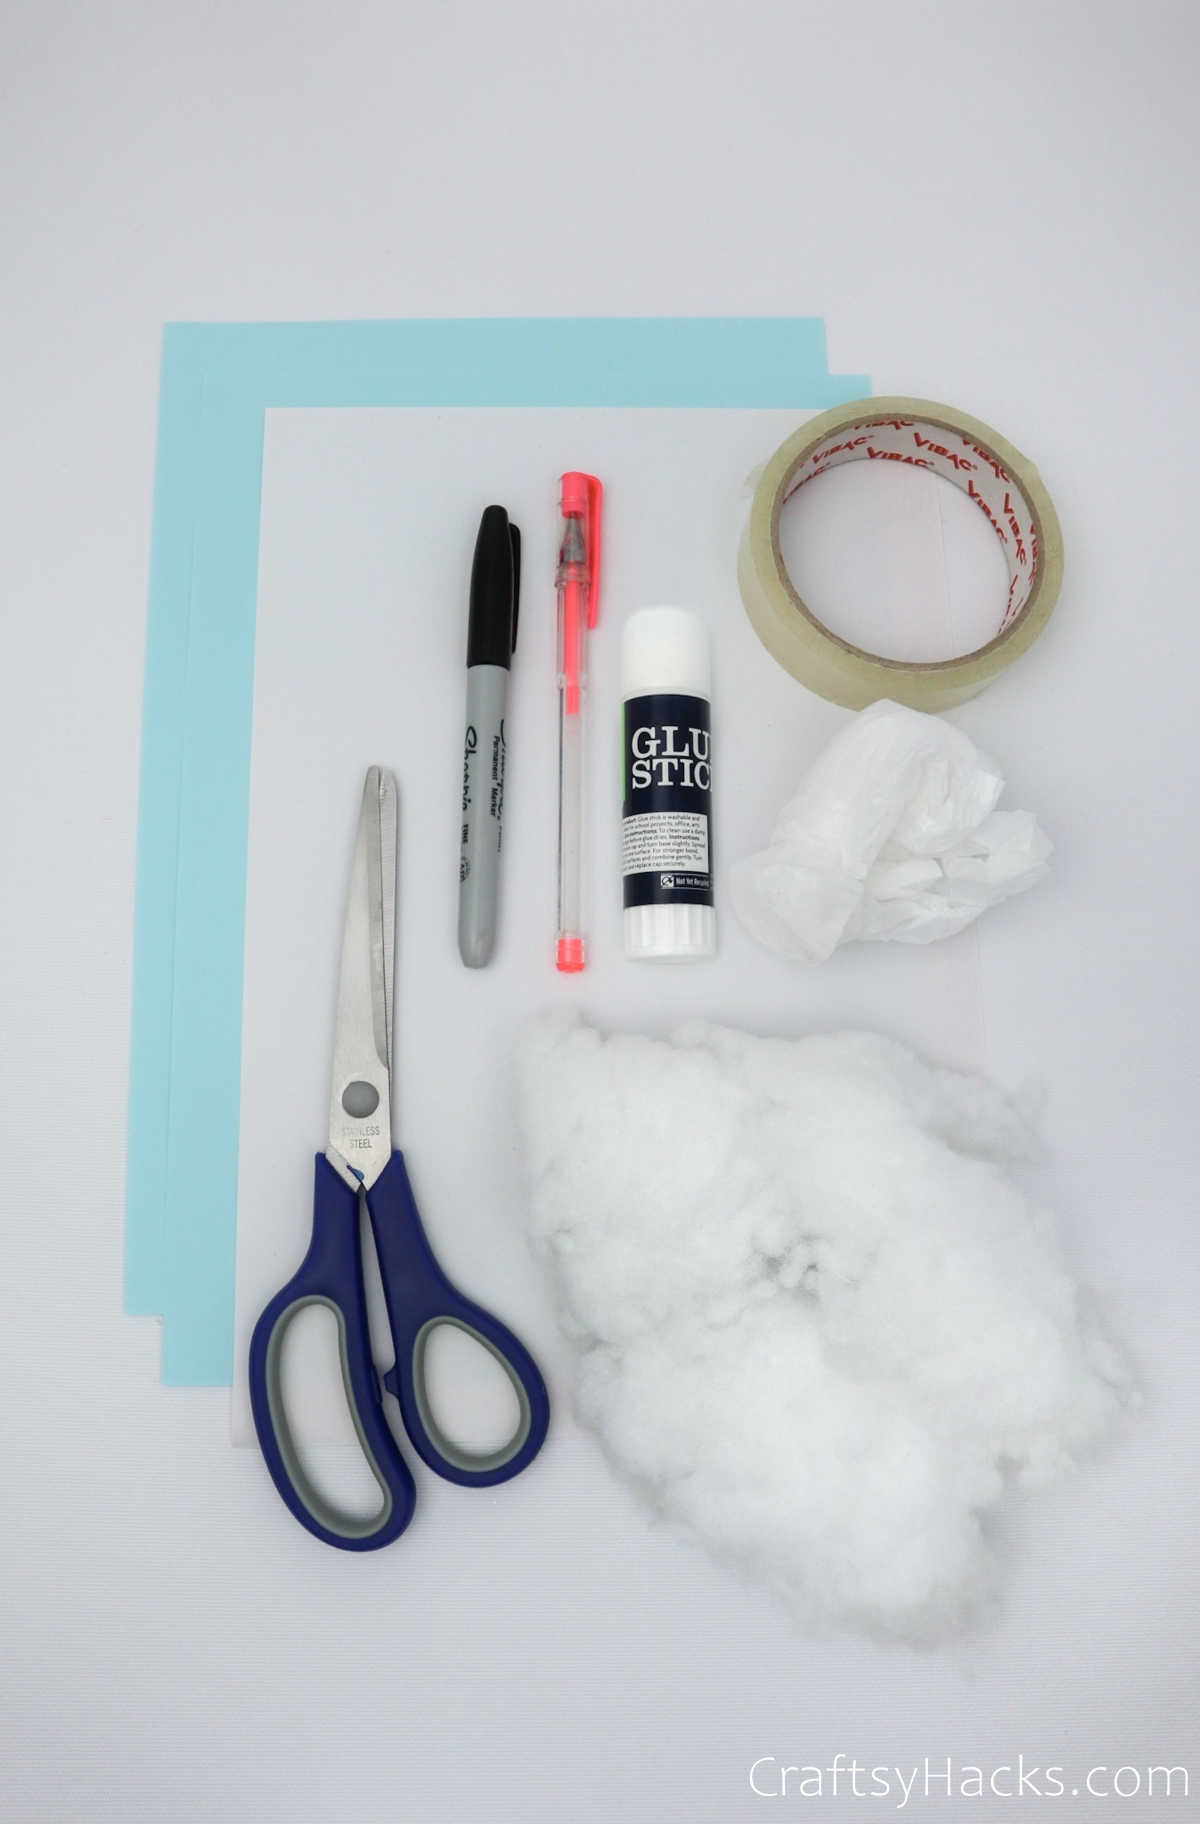
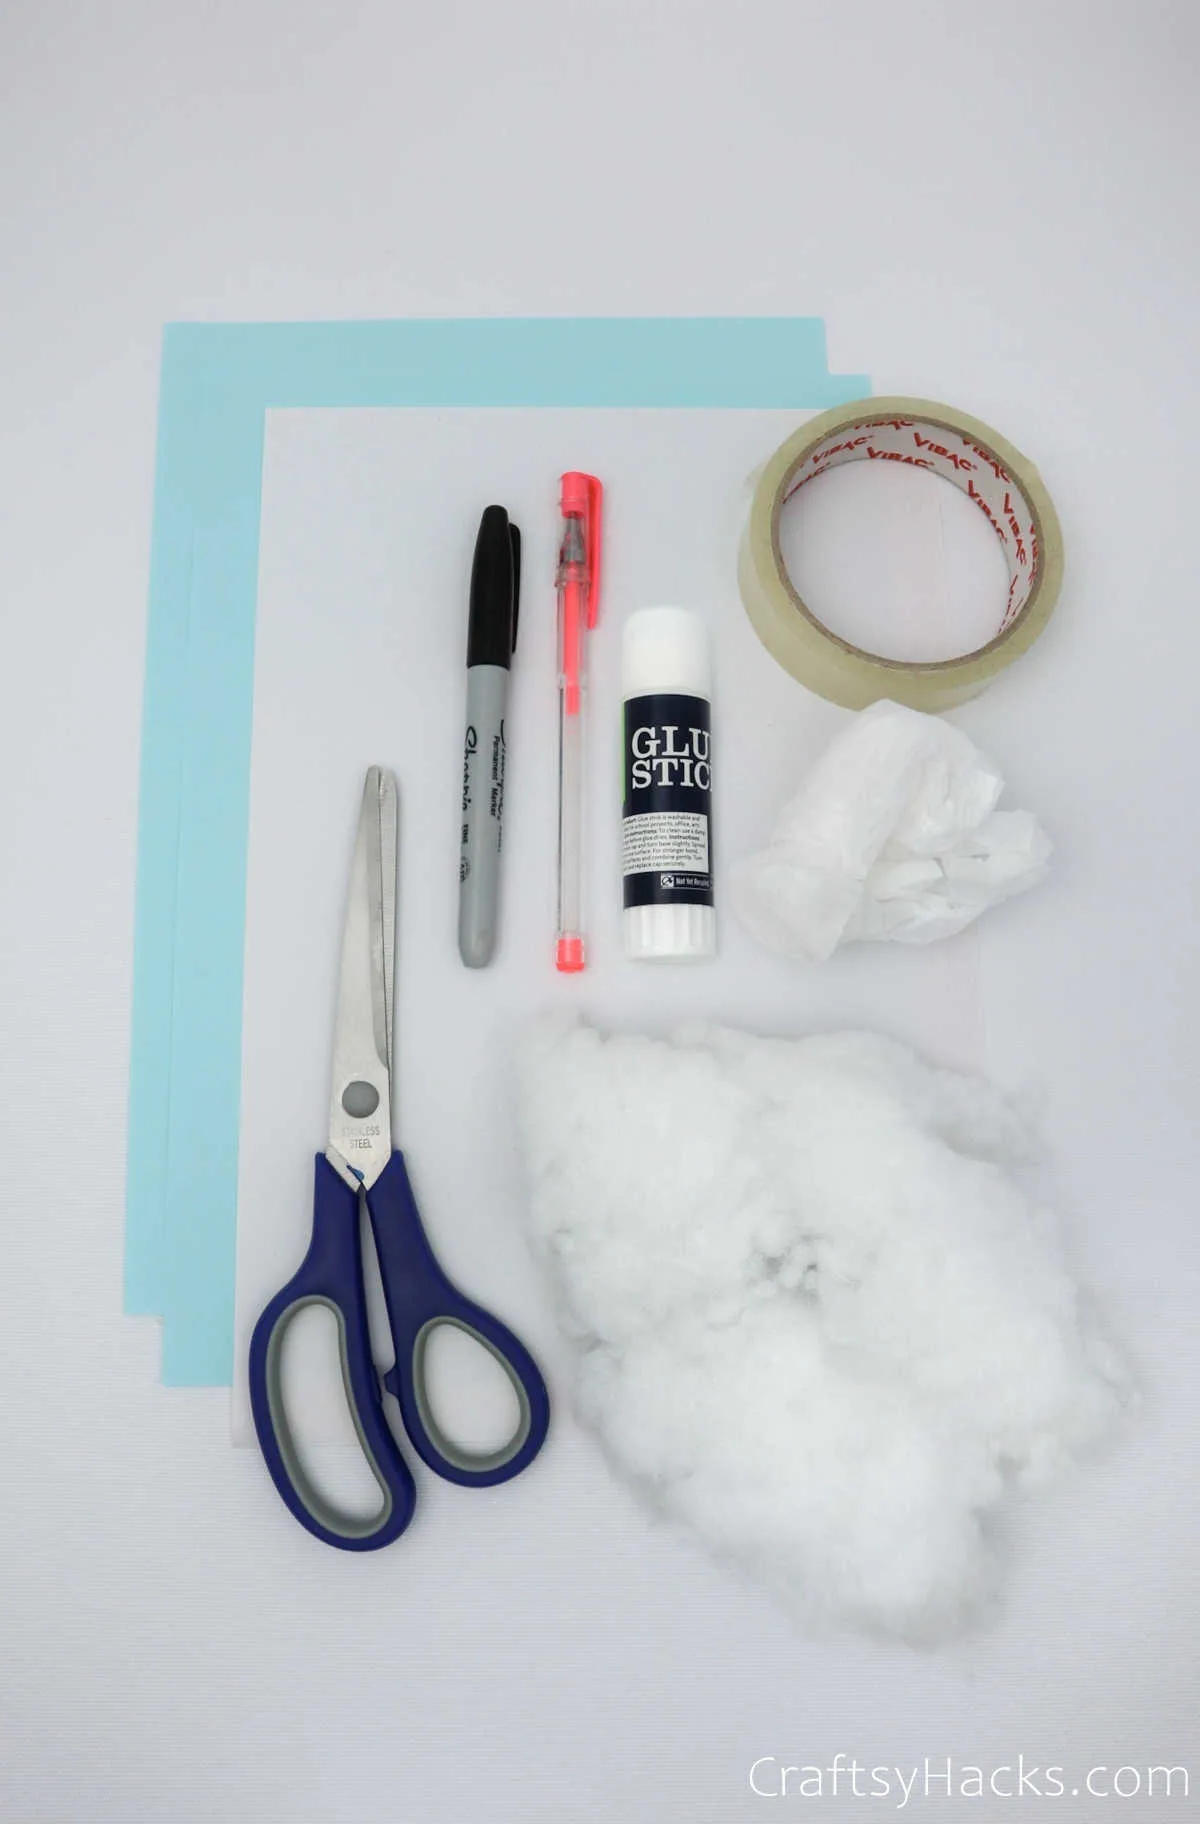
First, take a look at all the supplies you’ll need to make your paper squishy.
- 2x colored paper sheets
- White paper
- Black marker
- Transparent tape
- Glue stick
- Scissors
- Toy filling
- Small plastic bag (optional)
Once you’ve gathered them all, you can lay them out on your work table and read ahead to find out how to make paper squishies!
How Do You Make Paper Squishies
The biggest challenge with making these DIY squishies? It’s having to choose your drawing or design. You’ve got a ton of adorable cartoon characters to choose from.
Alternatively, you can keep it simple and pick out inanimate objects.
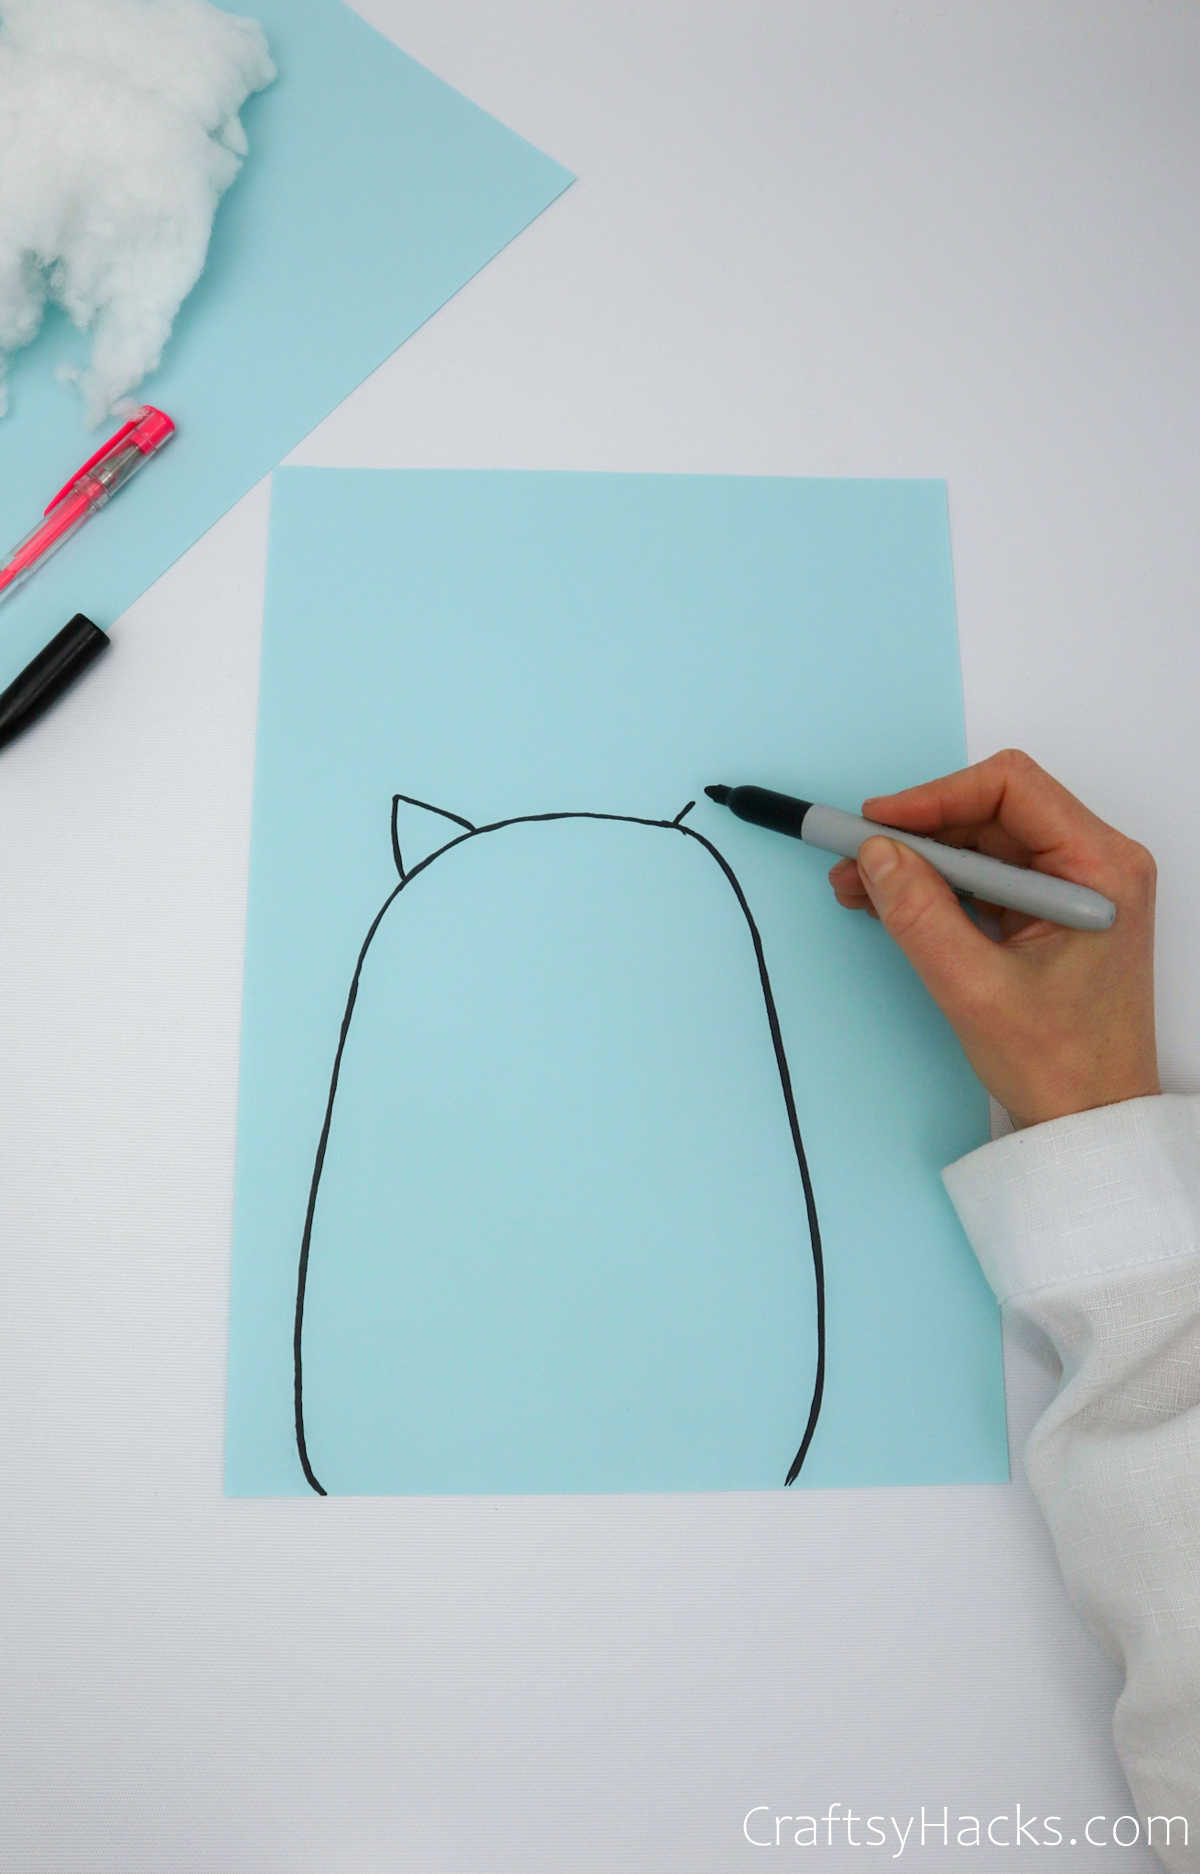
Step 1
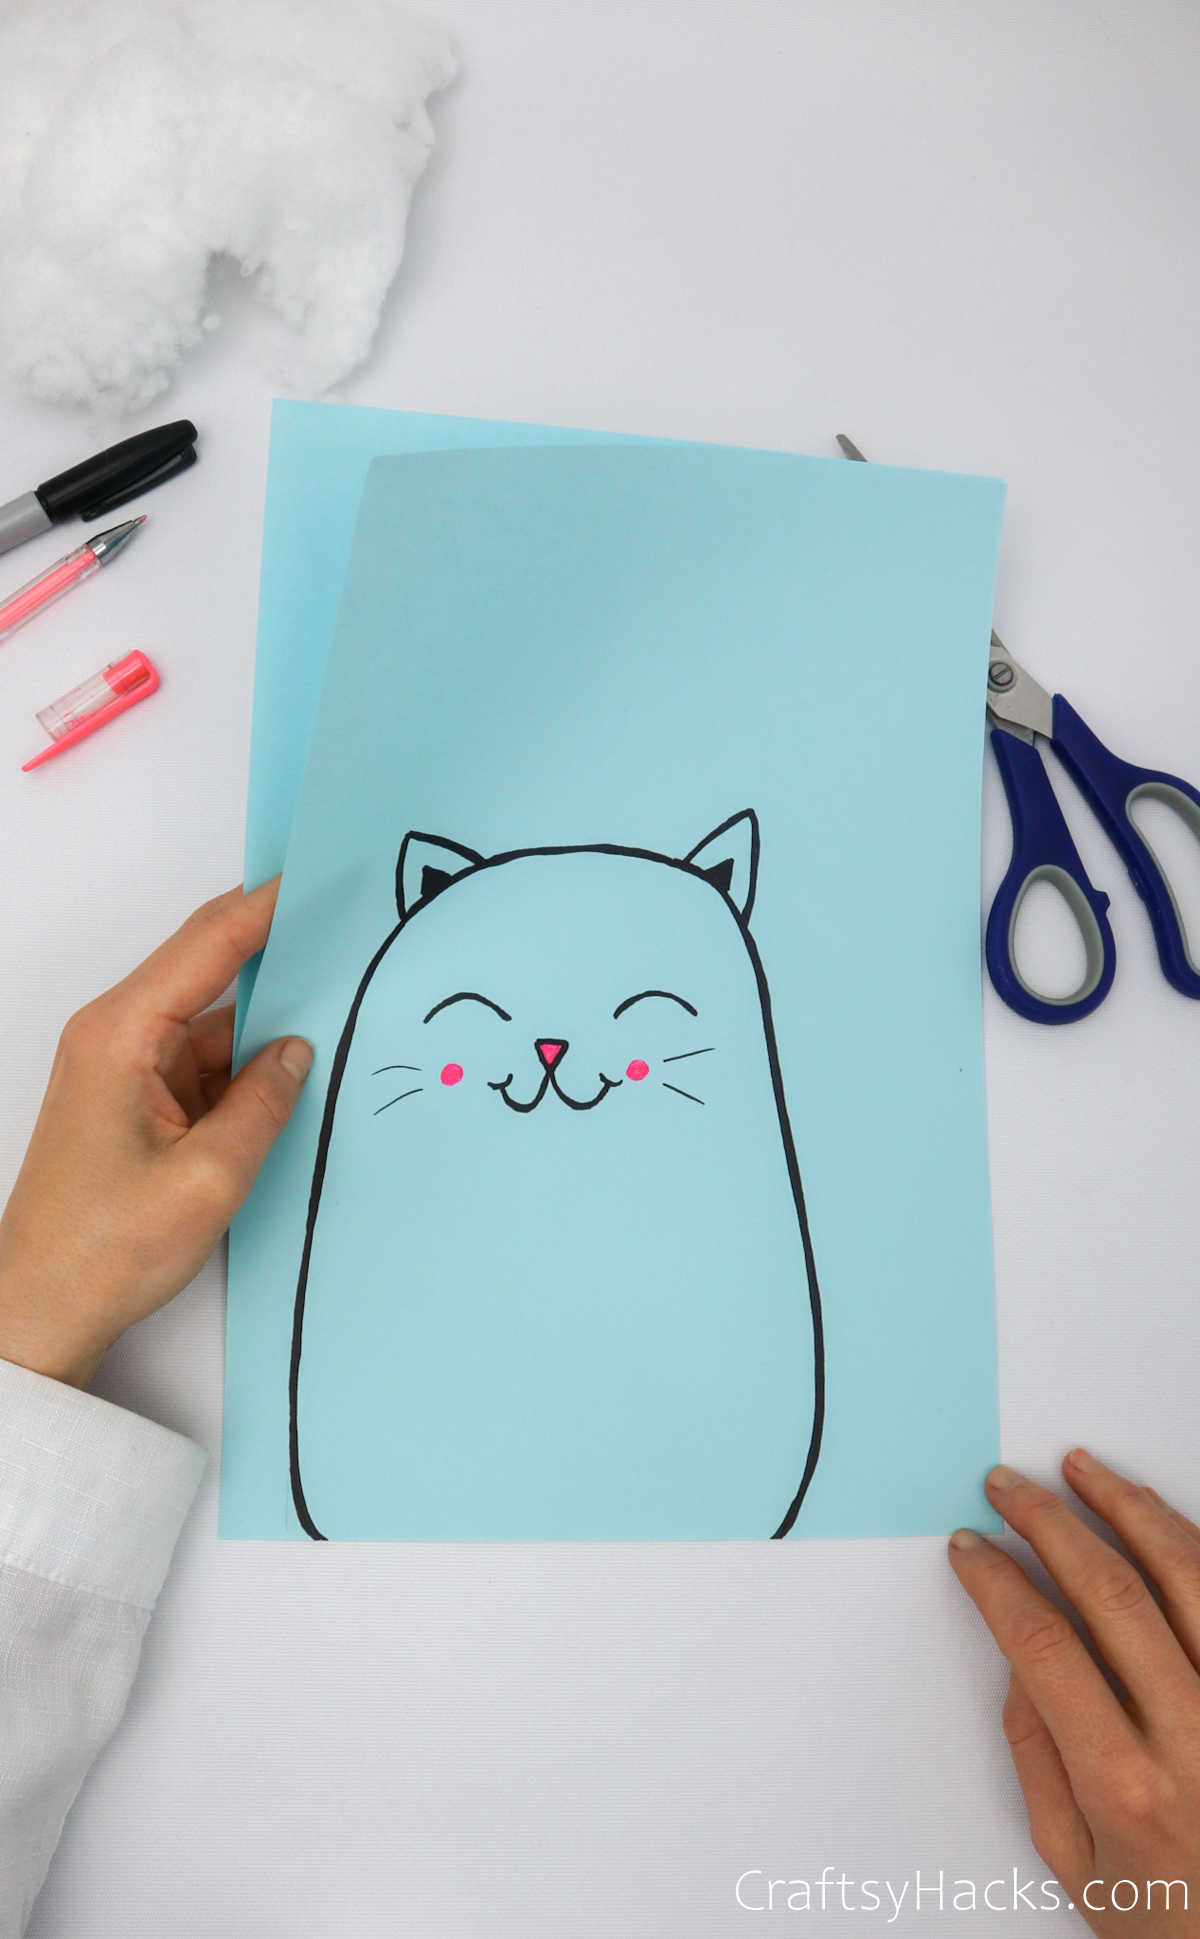
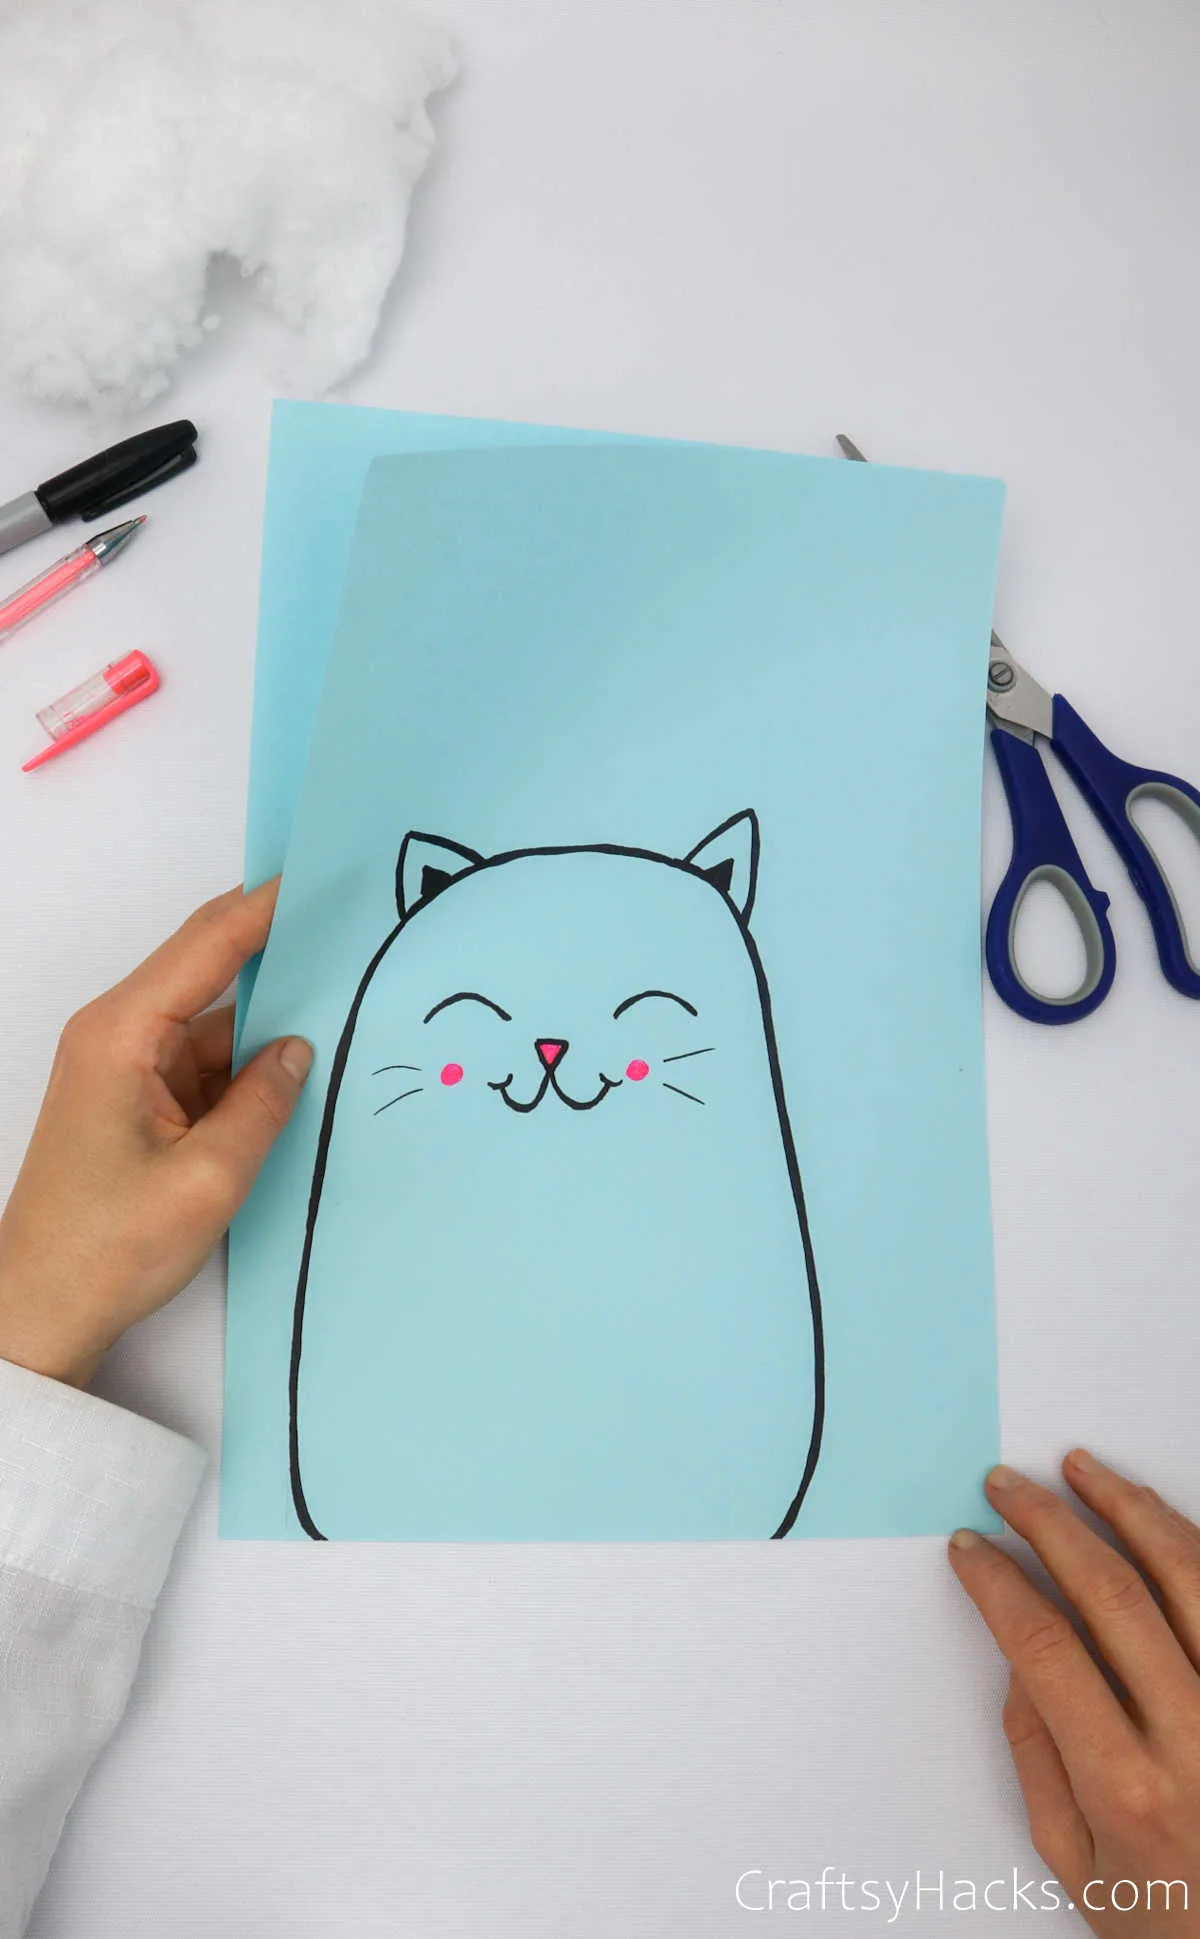
On your colored paper, draw or trace your design with a marker. If you would rather not spend time drawing your design, you can easily download the pattern here and print it.

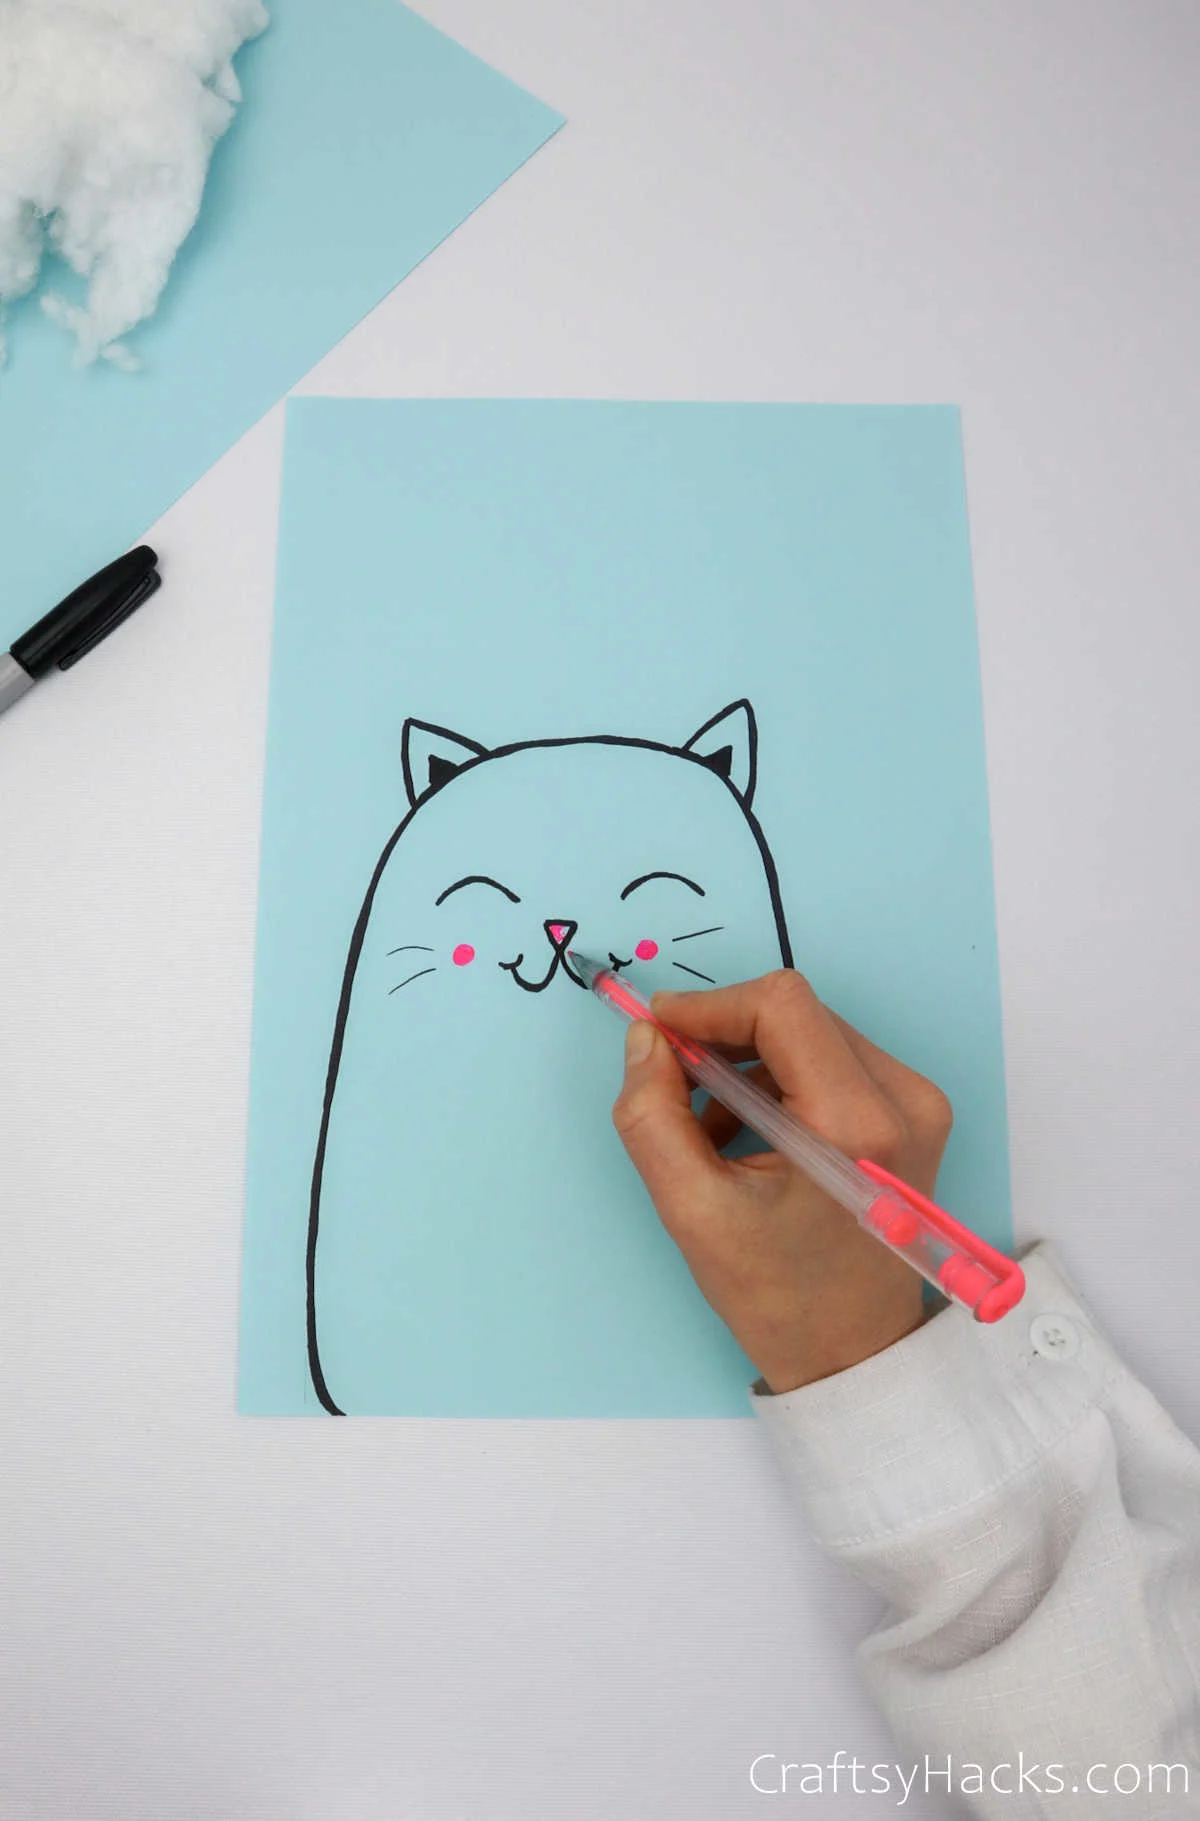
Step 2
If, however, you plan to draw it yourself, you’ve got a ton of room to be as creative as you like! Use different colored pens to make your drawing as colorful and creative as you can!

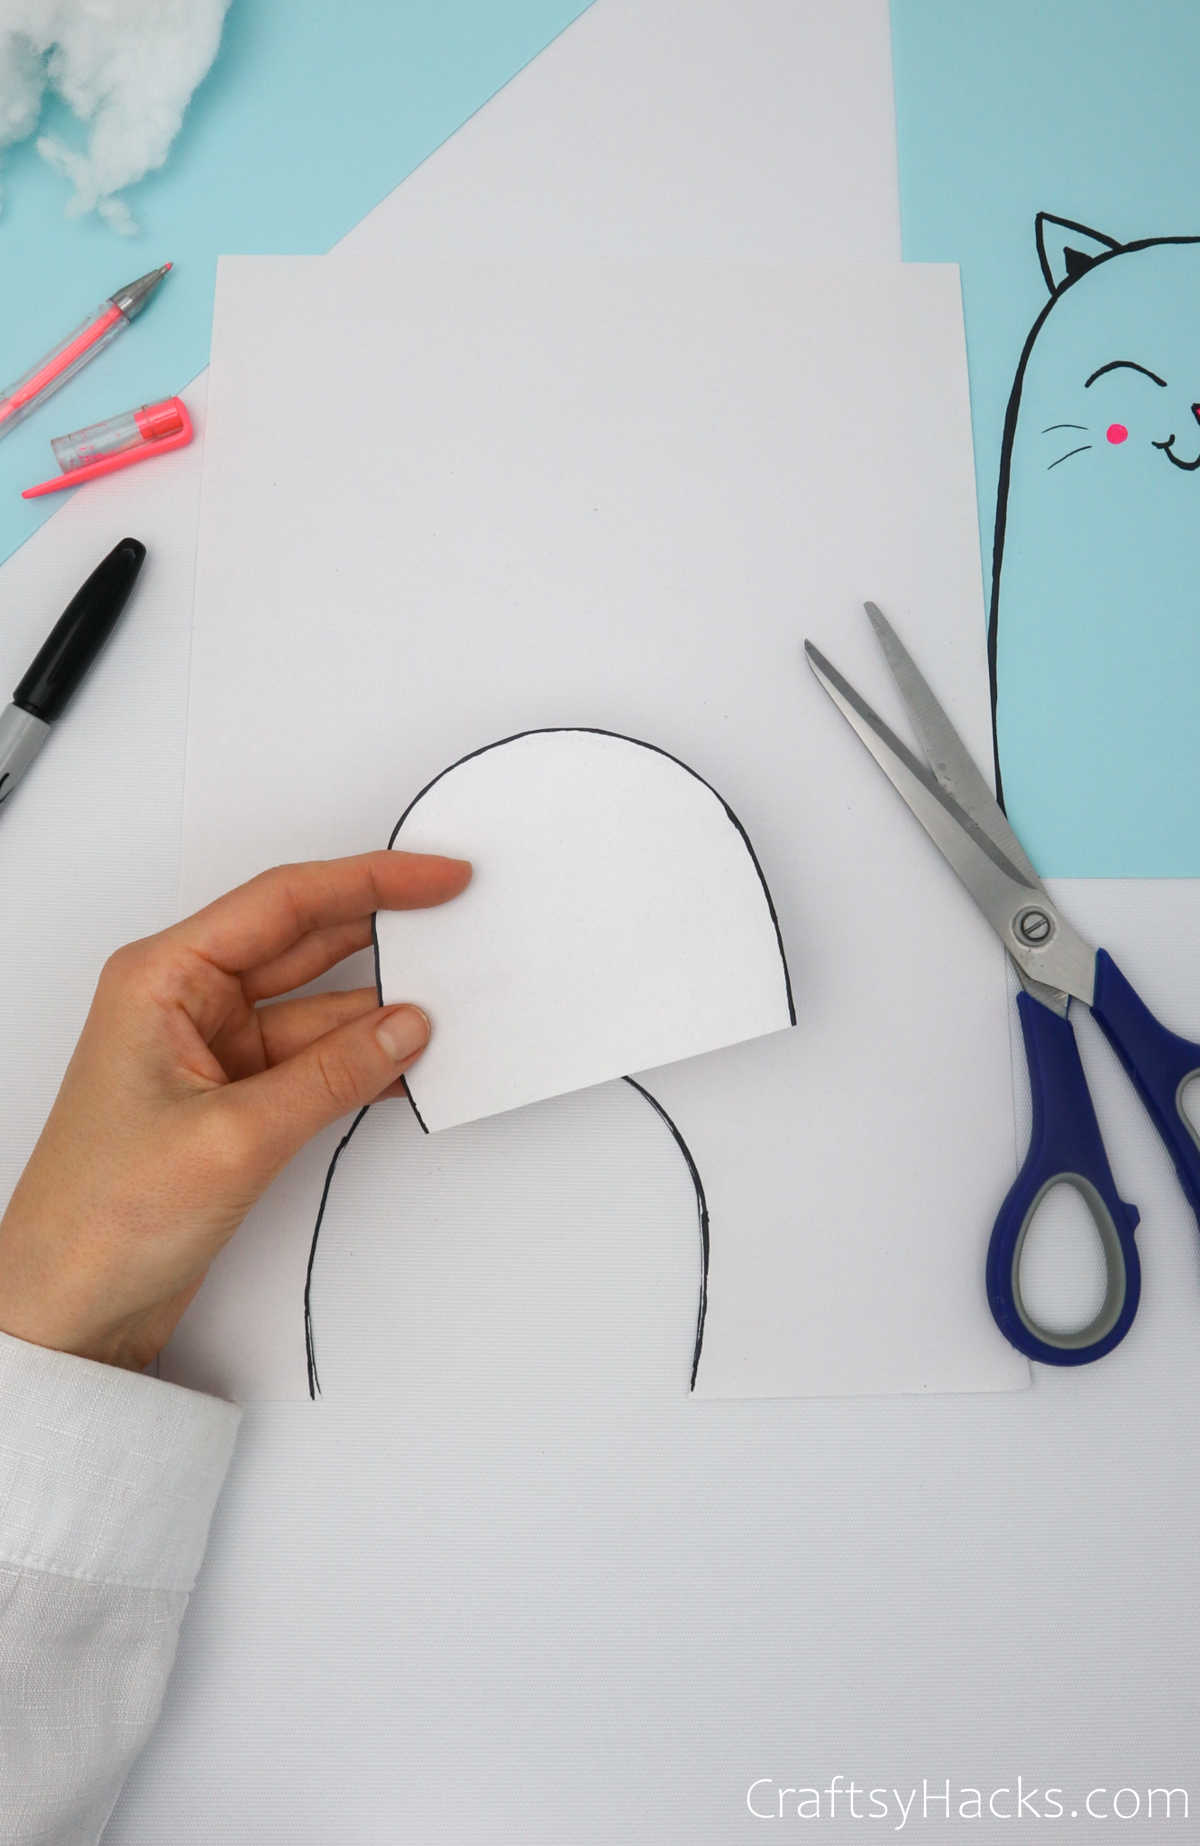
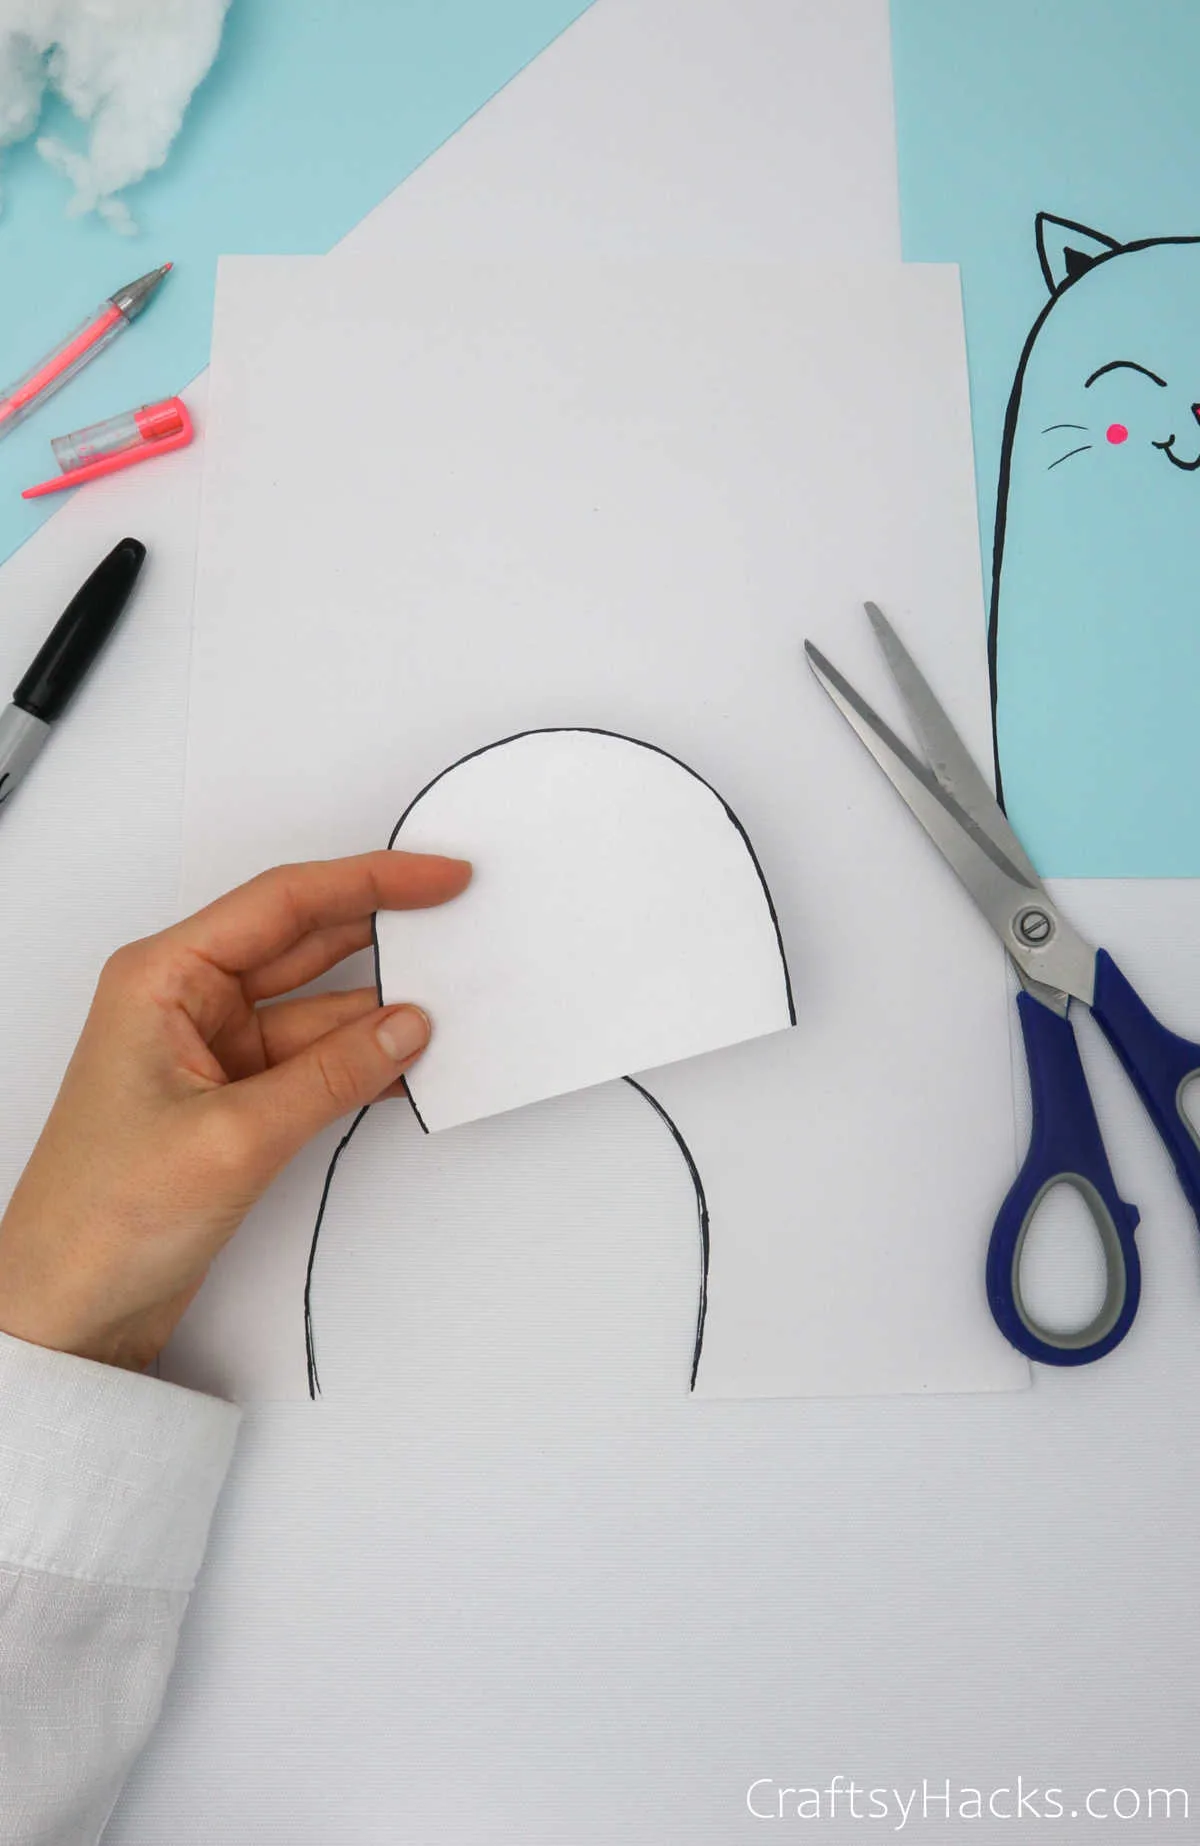
Step 3
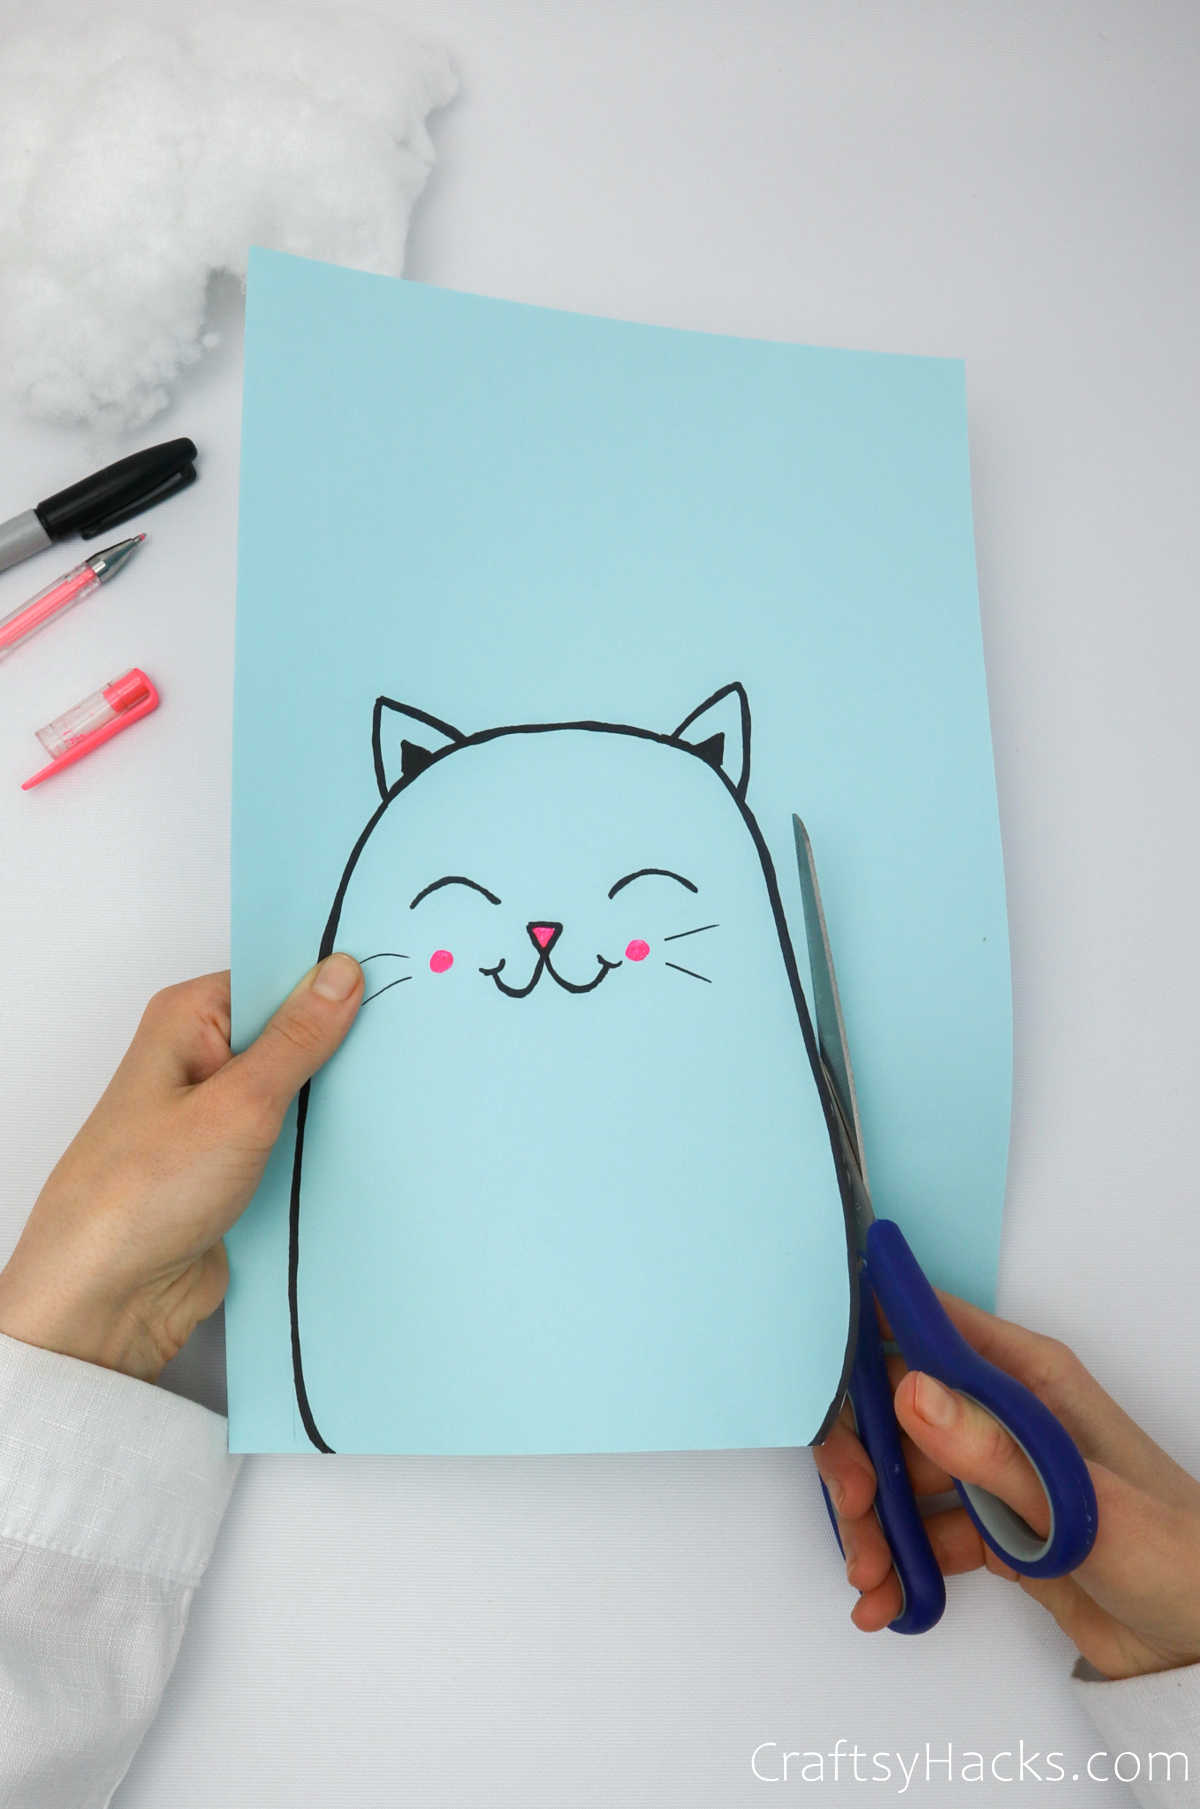
Take another sheet of paper and draw outlines of the body and ears of your cartoon character. Cut the drawn pattern out with a pair of scissors and set it aside for now.
Step 4
Once you are done designing your cartoon drawing, carefully cut out the outline. Also cut out the back of the pattern and set aside.

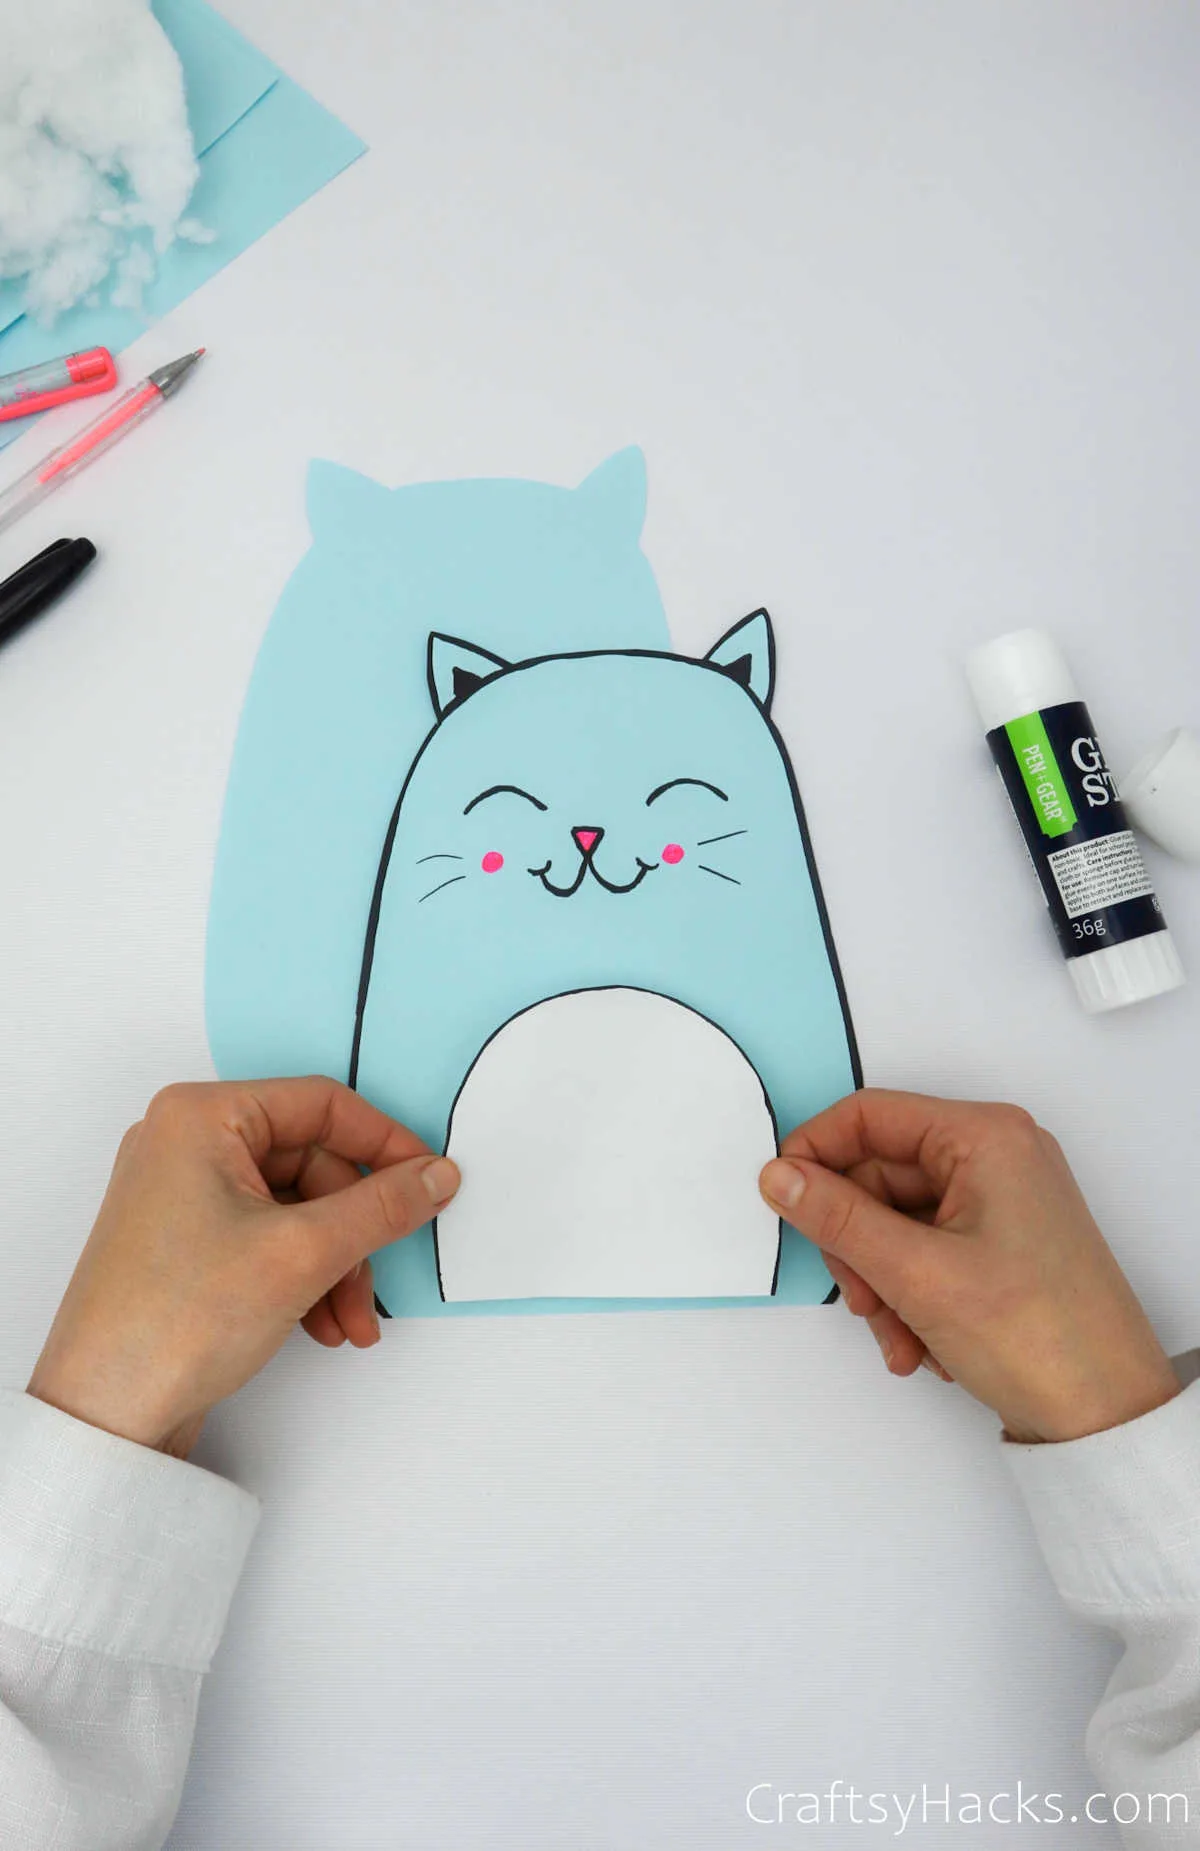
Step 5
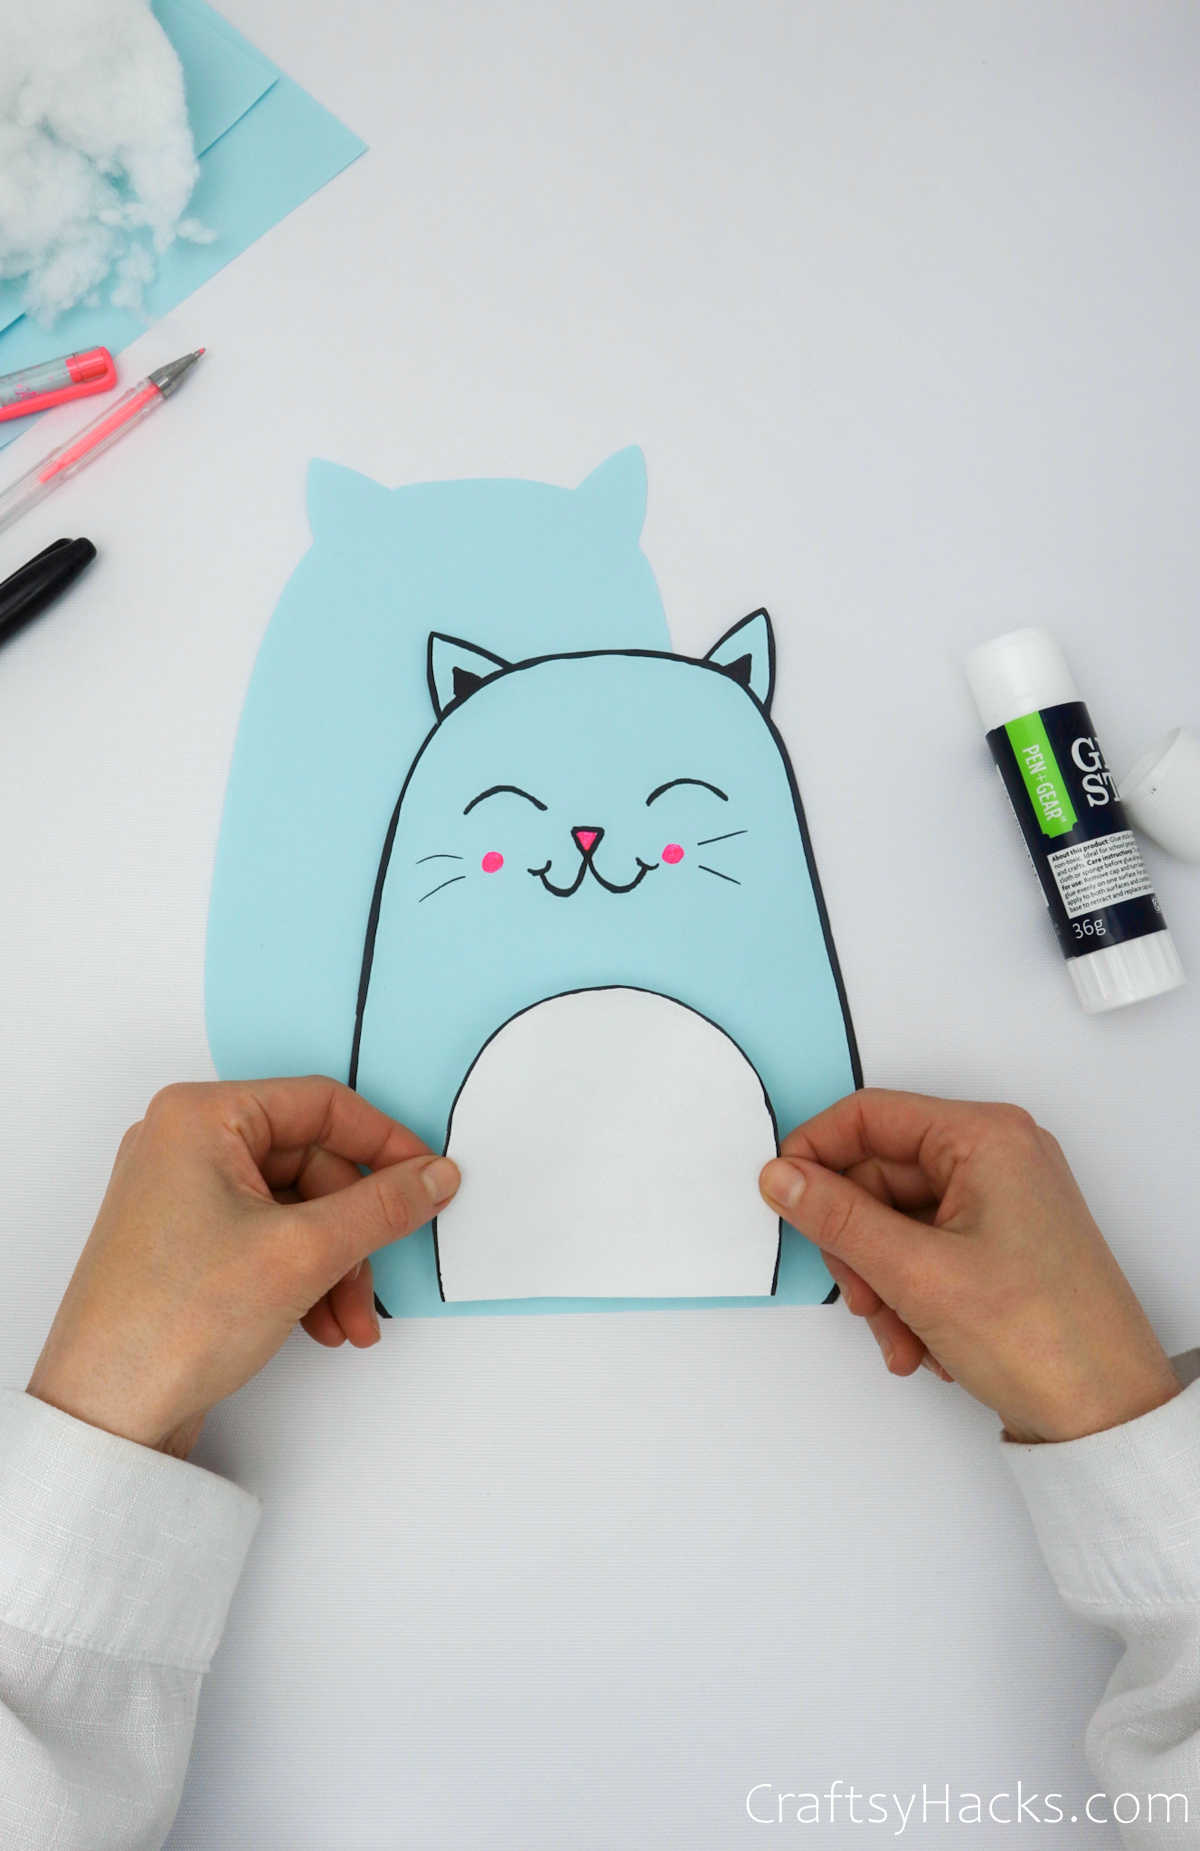
Grab the smaller cutouts you’d set aside earlier and stick it on to the main component, as seen below.
Step 6
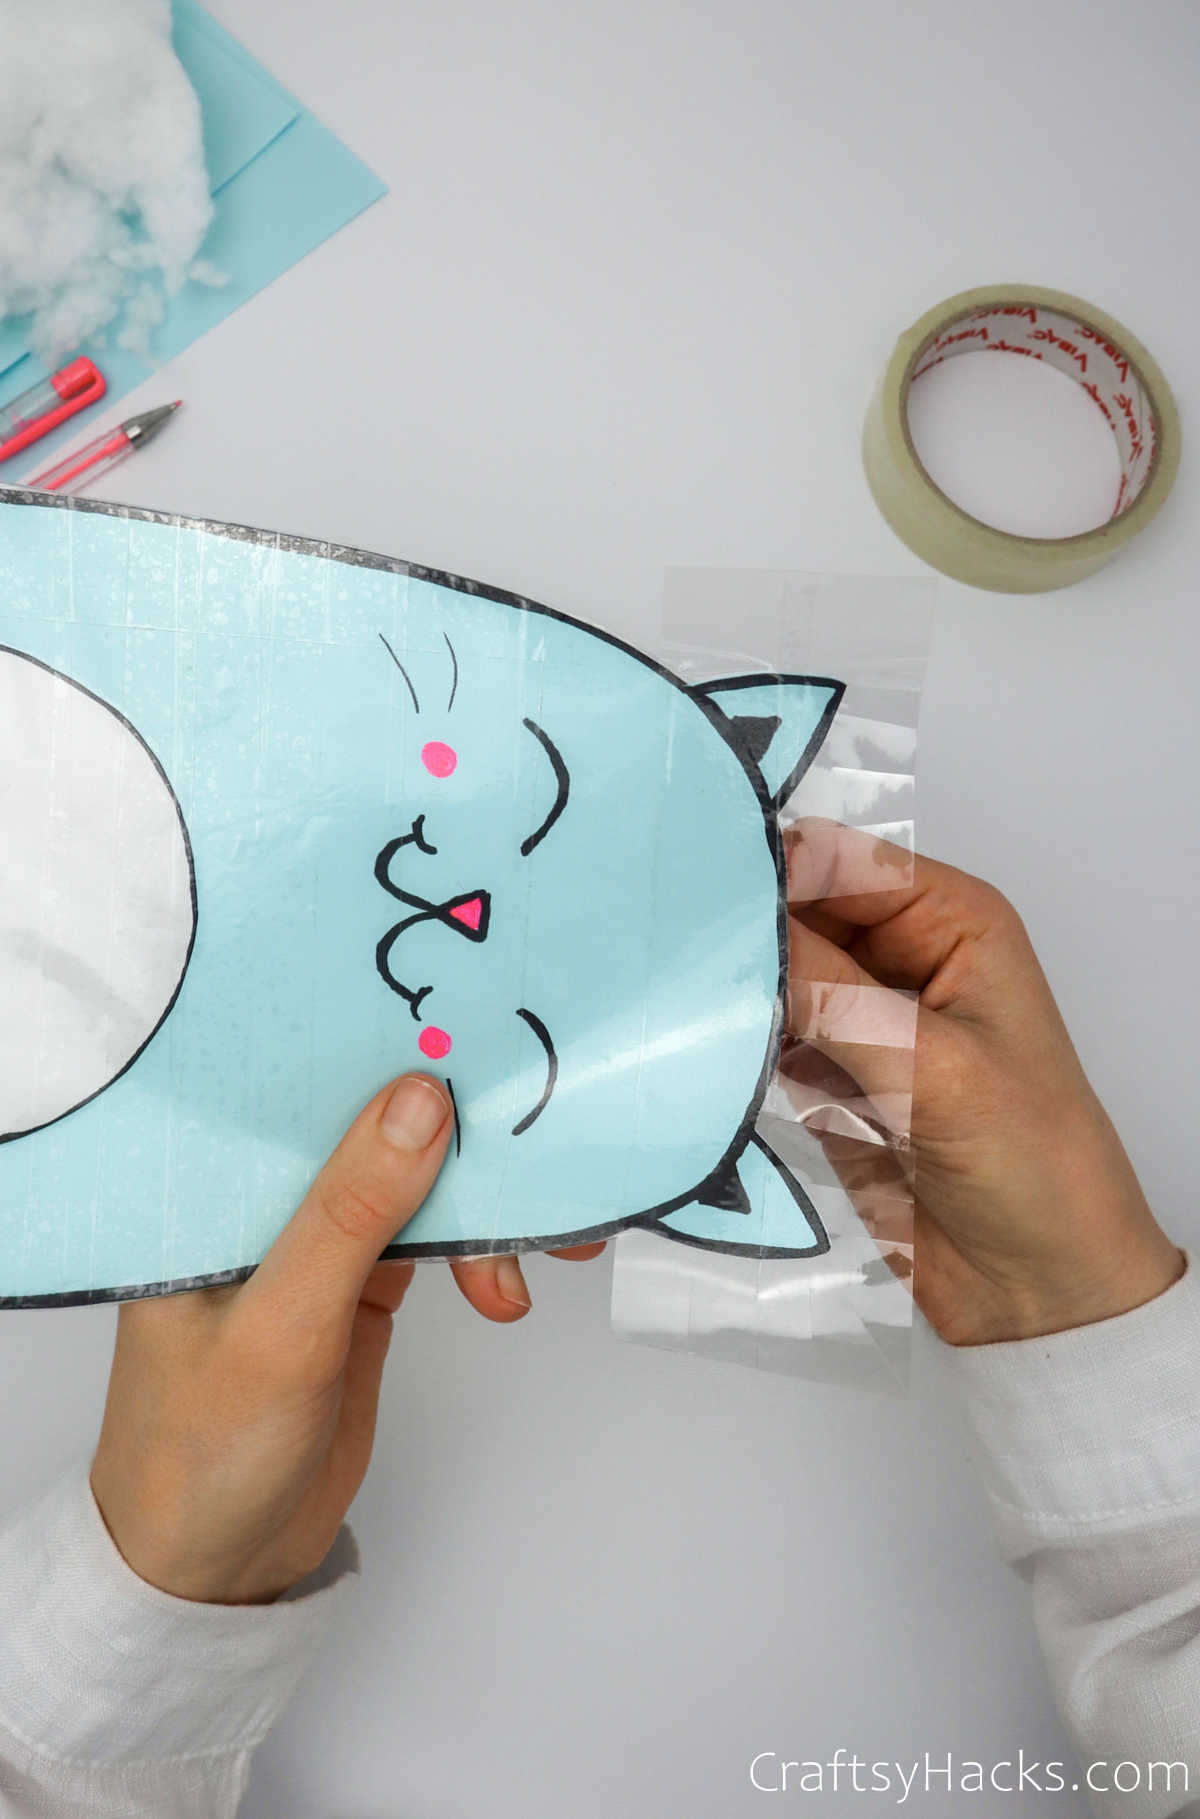
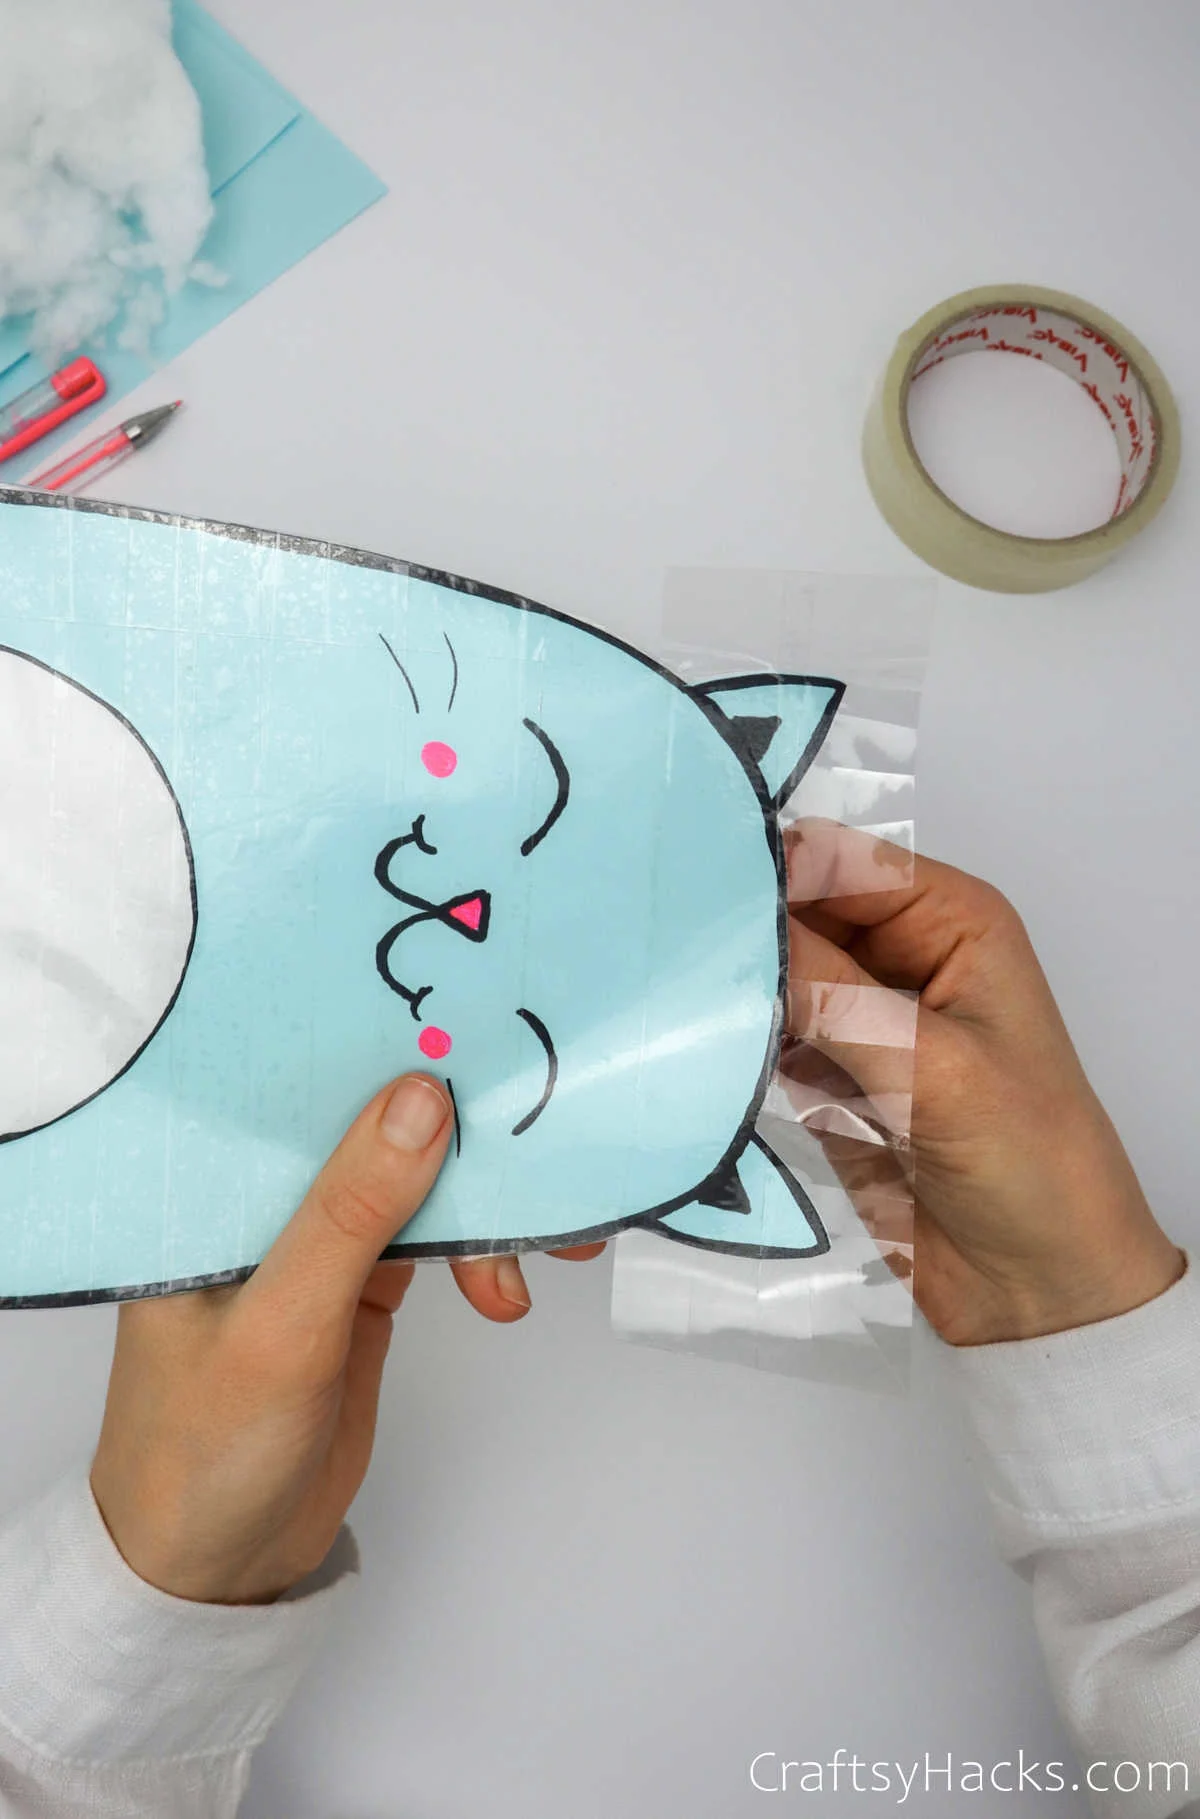
This next step will require a little more effort, but it’s still pretty fun! Grab a roll of scotch. You’ll be covering the entire cutout with strips of tape from head to toe, as seen below.

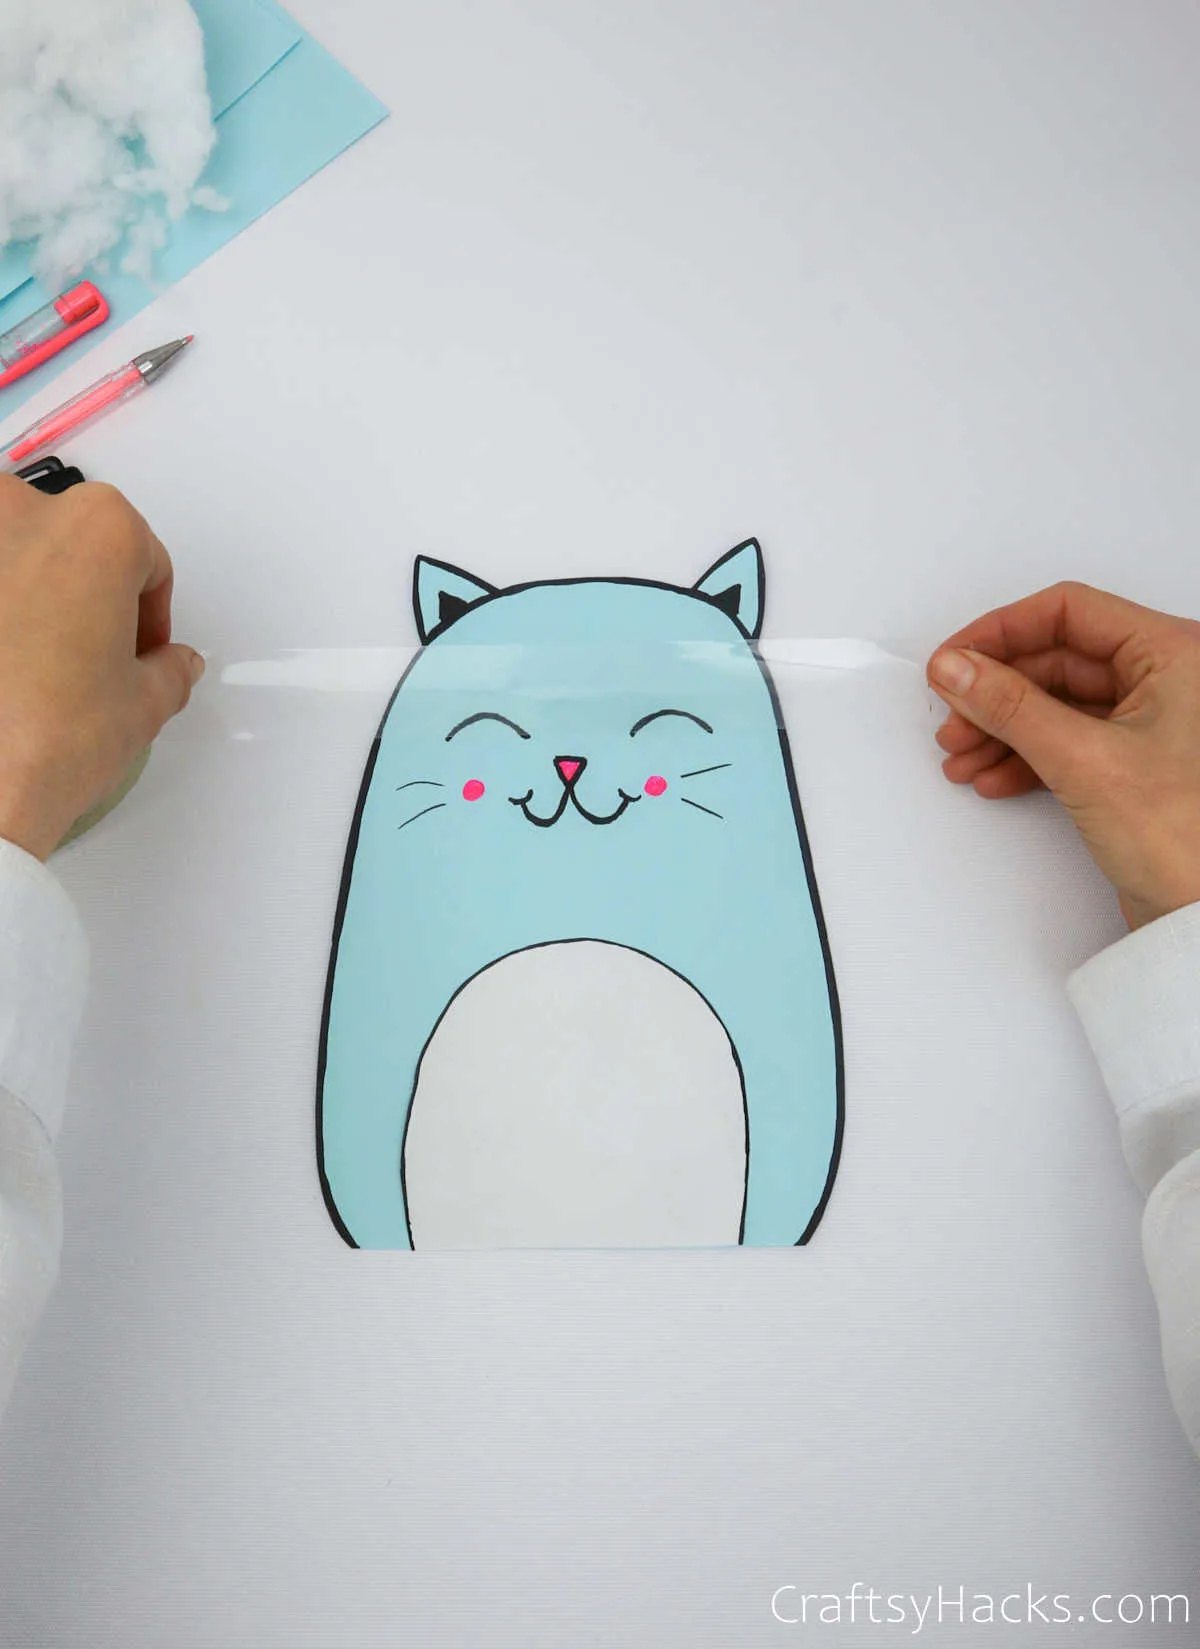
Don’t worry about the ends, you can always tuck them in later. You will, however, need to watch out for any gaps between the tape.
So keep in mind that it’s vital you stick each strip as close together as possible to avoid any wrinkles and tears in the paper.
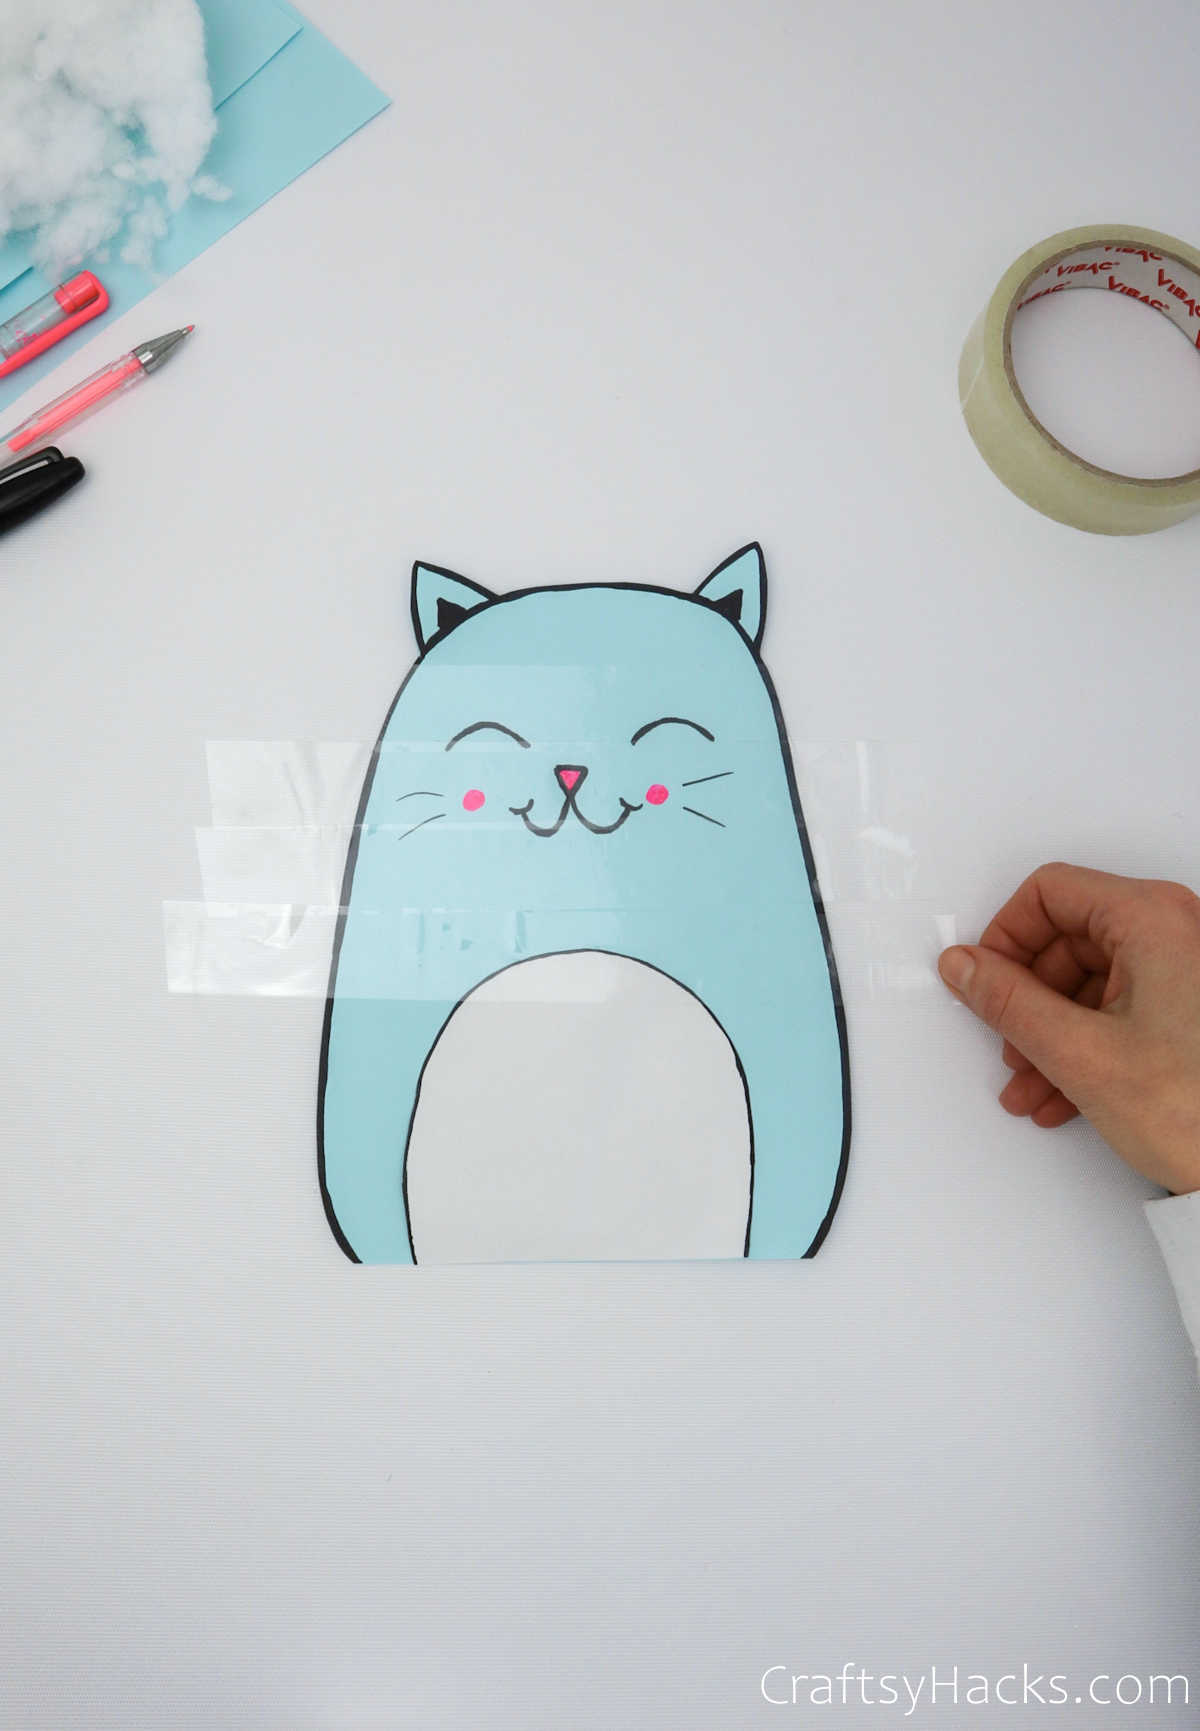
Speaking of wrinkles, also try to smoothen out any possible creases and air bubbles under the tape. Laying the cut out flat on a table and taping it in place will help you eliminate these issues.


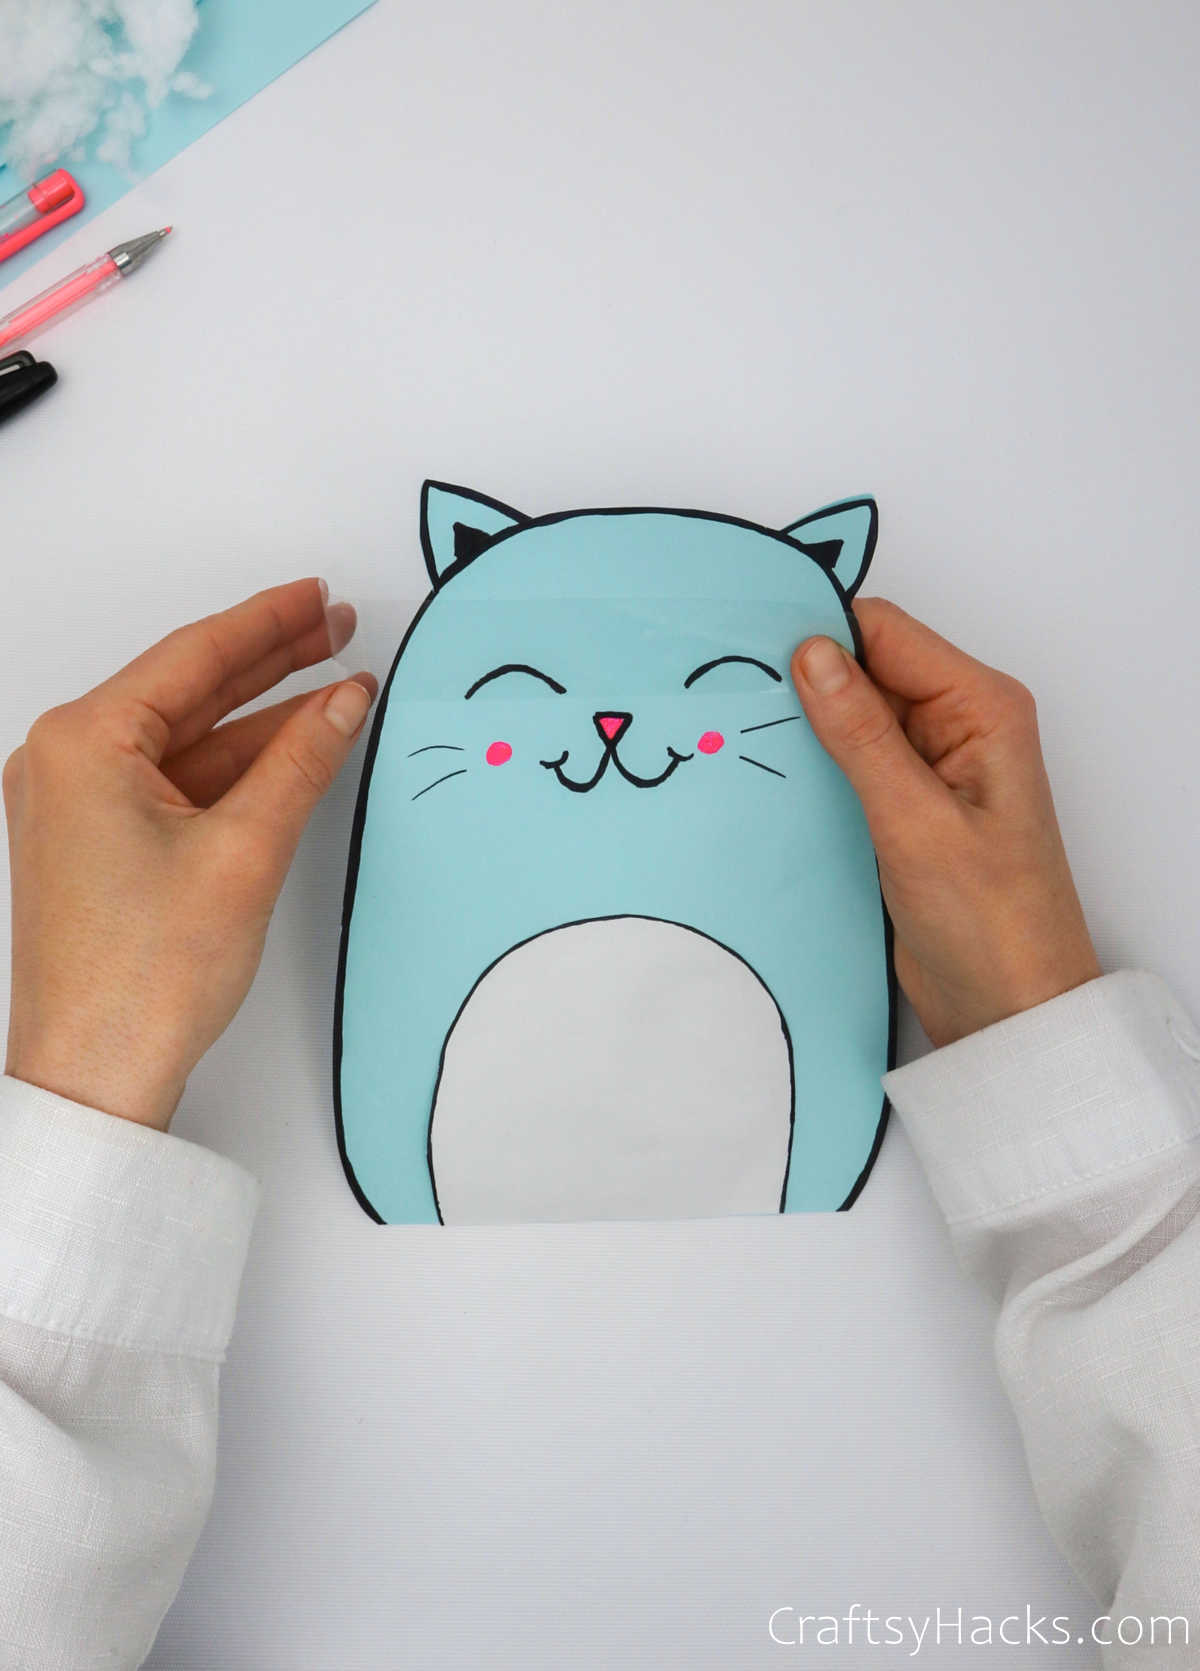
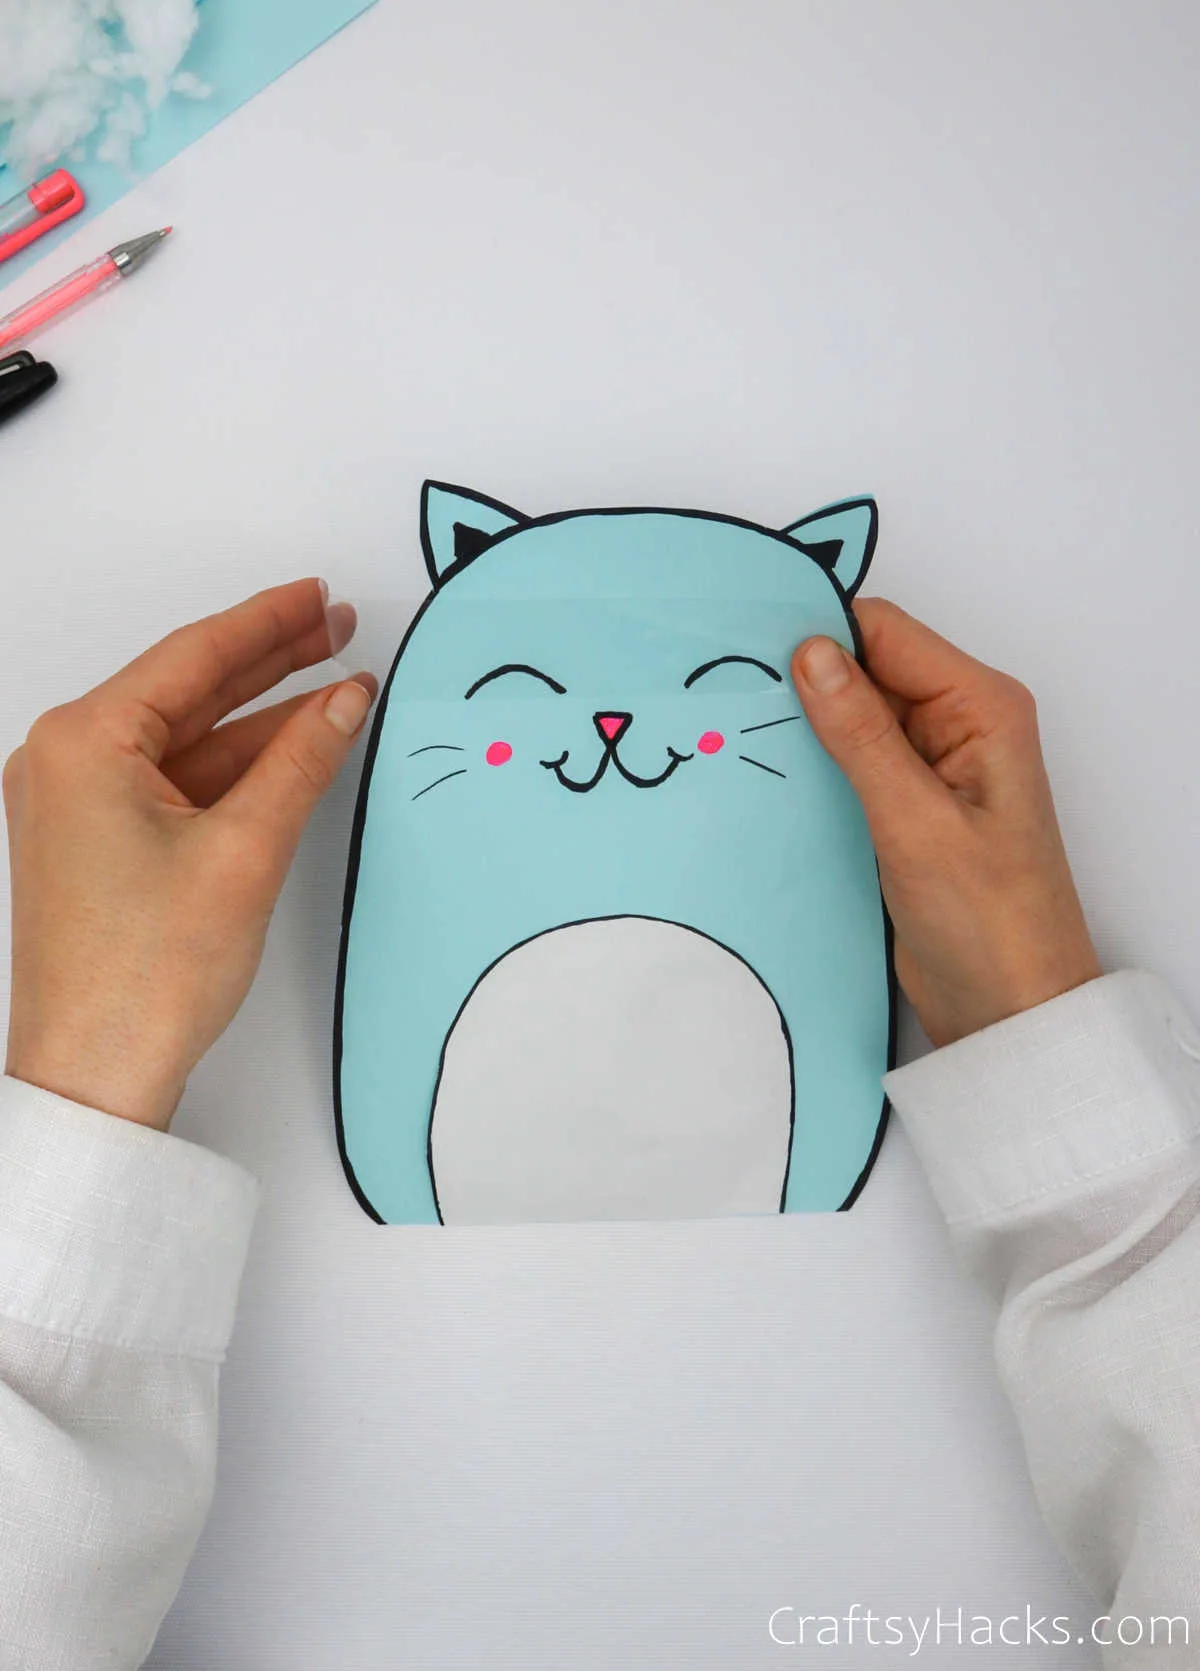
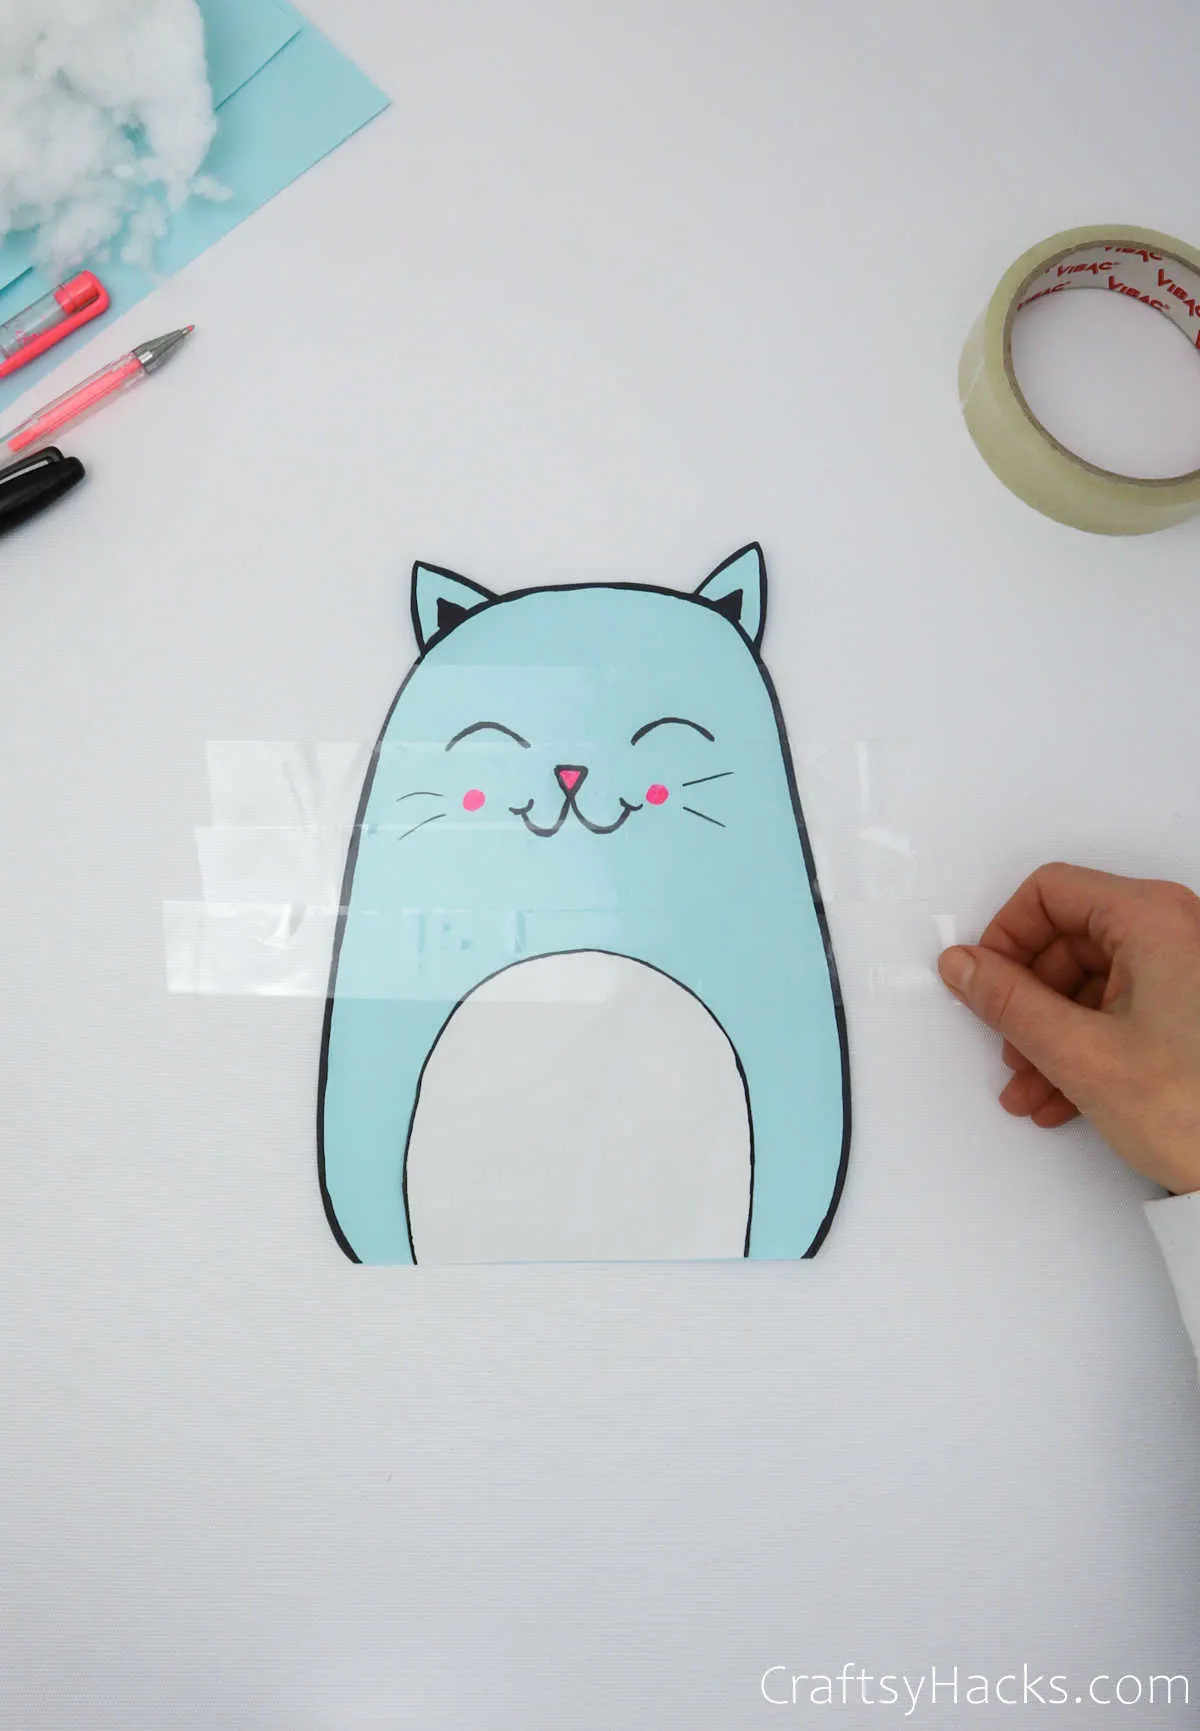
Step 7
Just remember to leave the bottom of the paper squishy uncovered. You’ll need that hole to stuff your toy filling inside it.

When you’re taping the area around the ears, carefully tuck the tape into the nooks as close to the paper as possible.

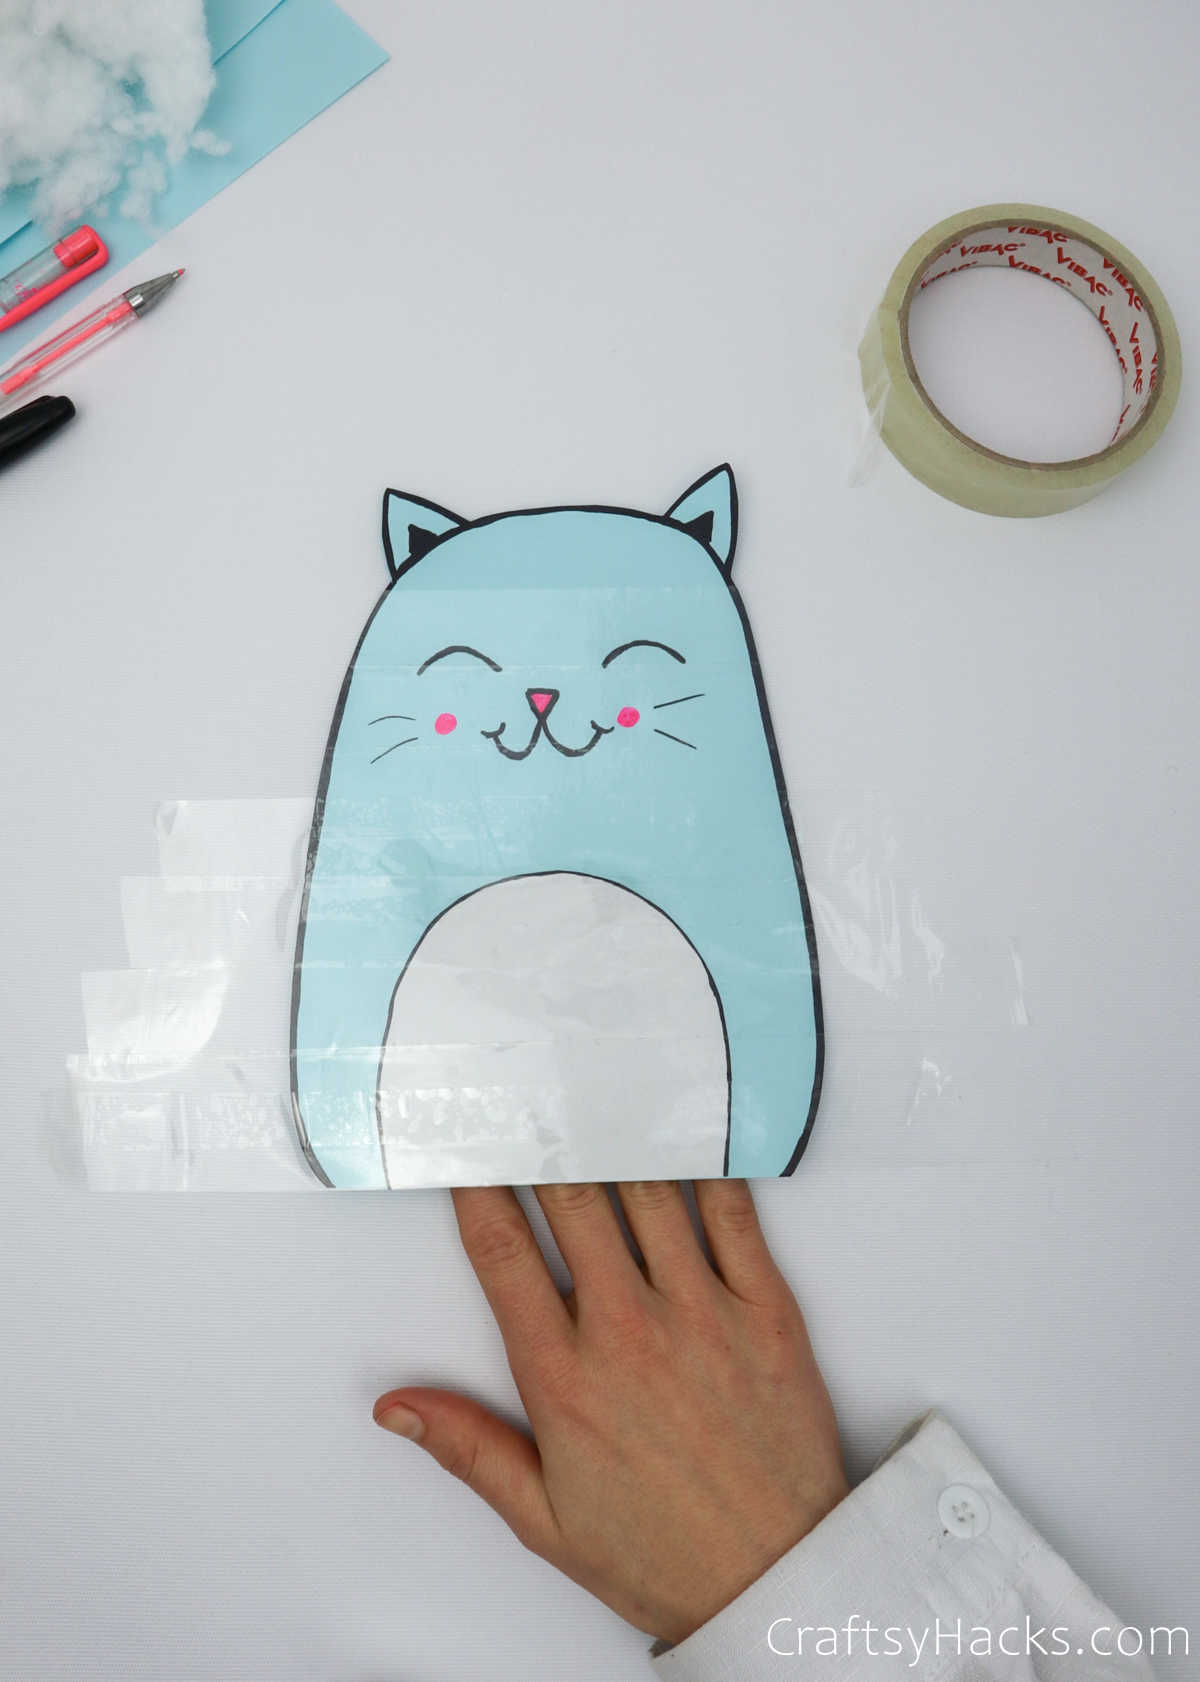
Step 8
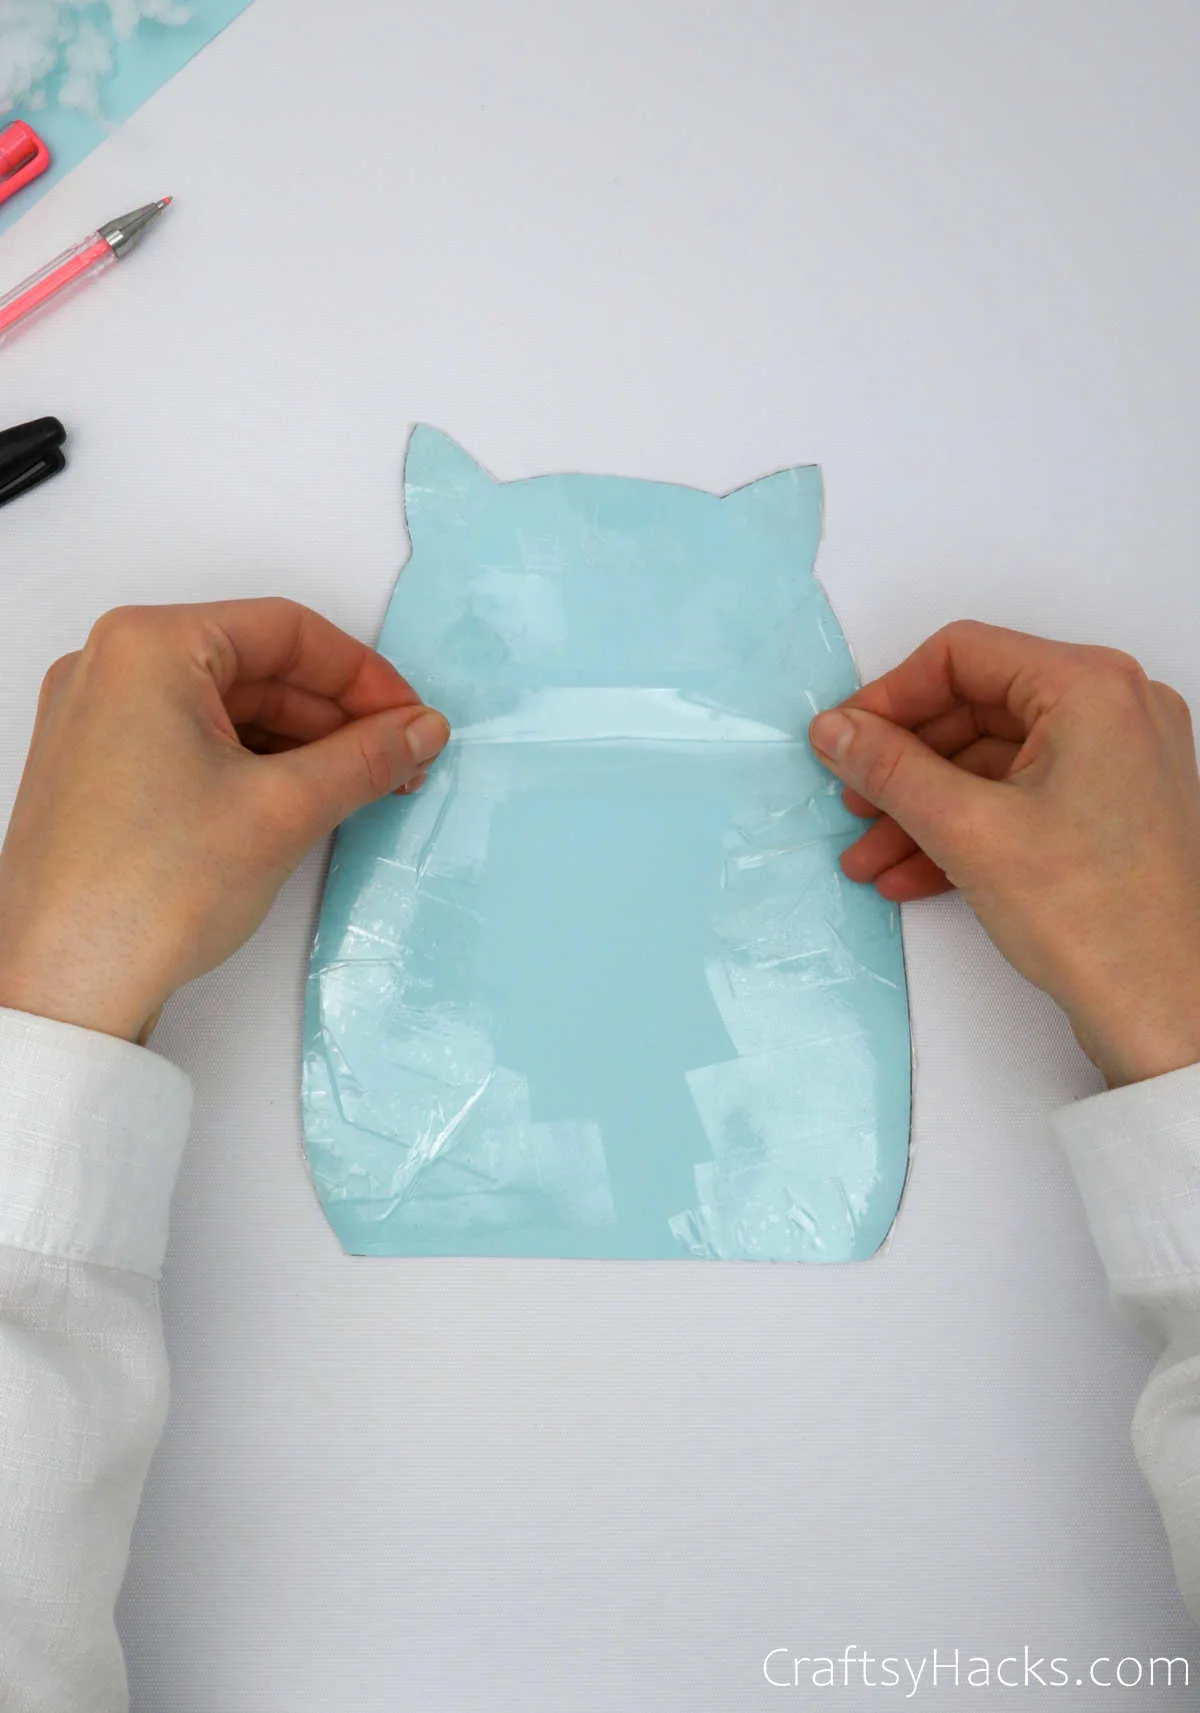
Repeat this process once again for the back of the squishy, taping the cutout you’d set aside earlier. Tuck the ends of the tape as you go.

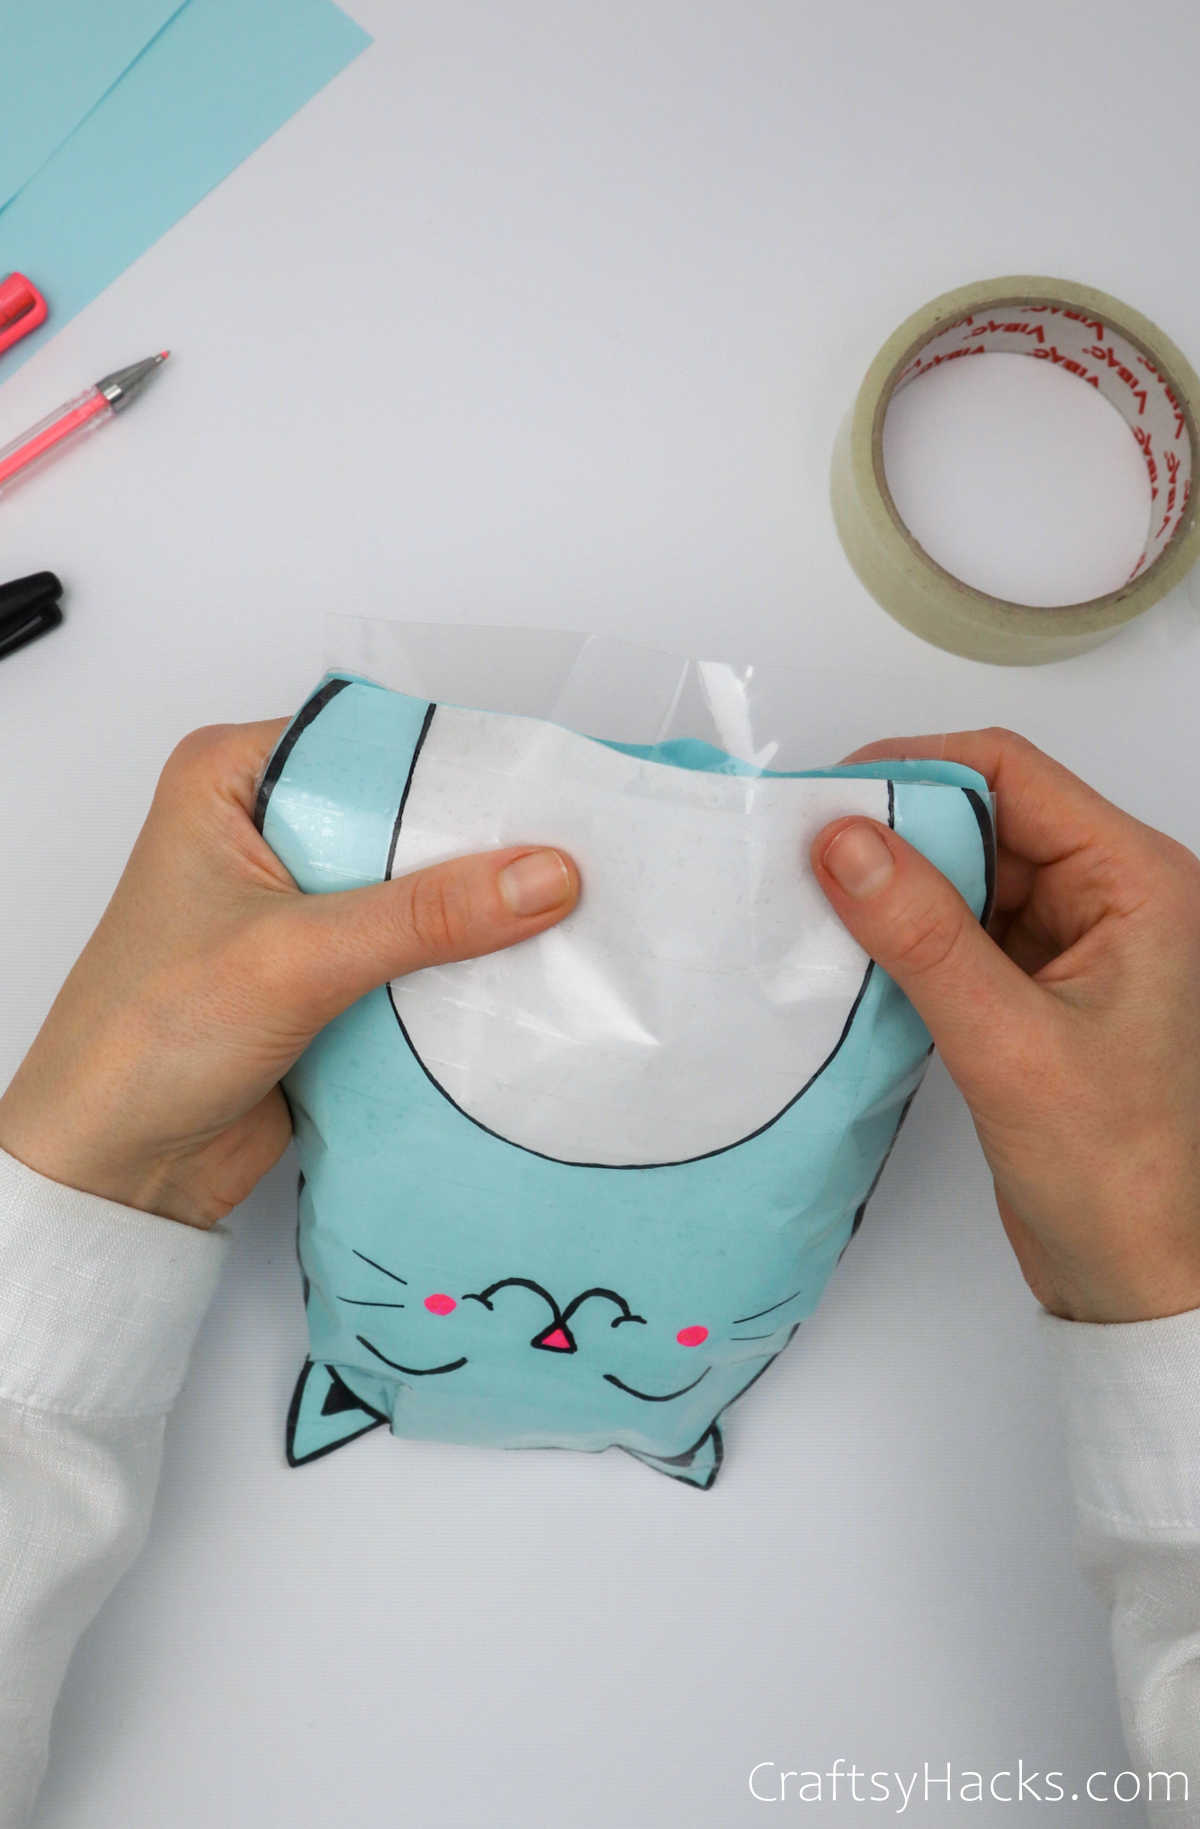
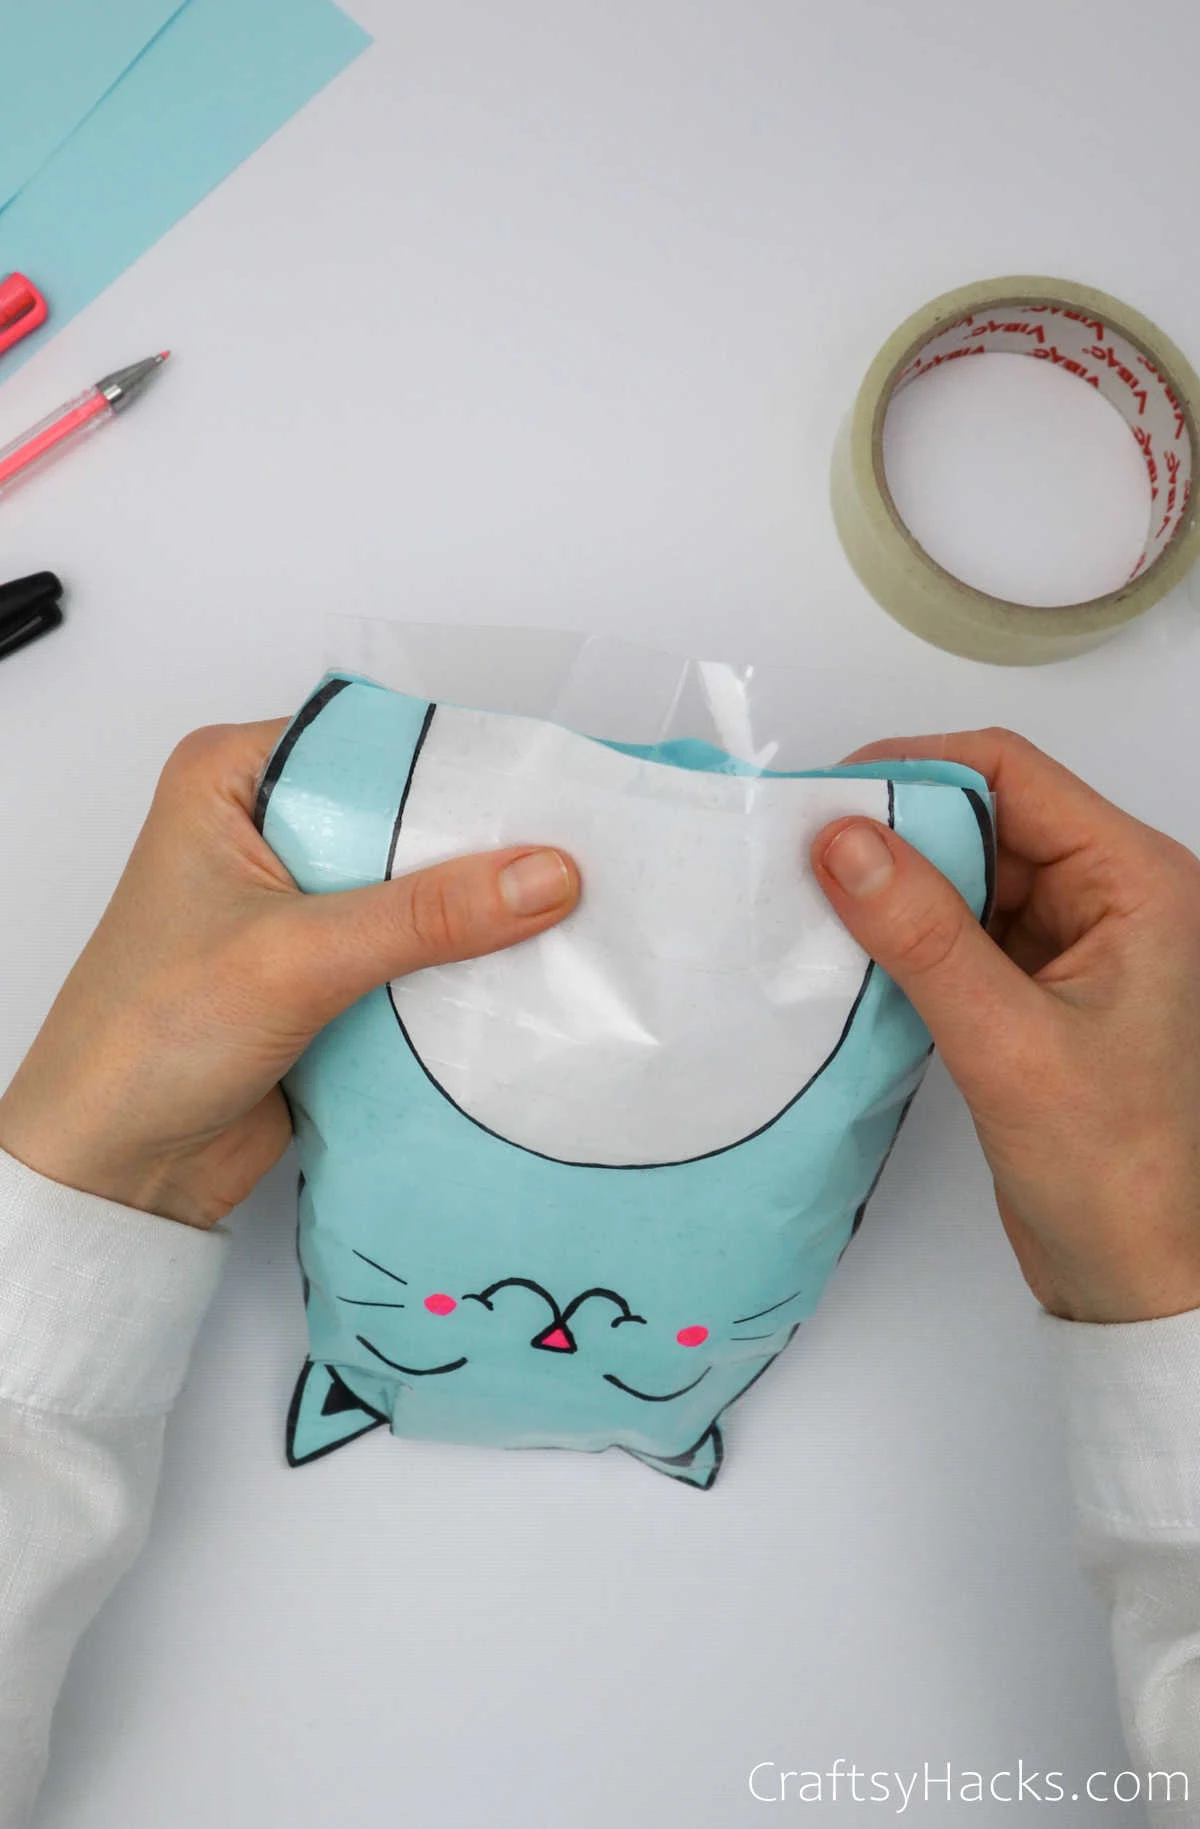
Step 9
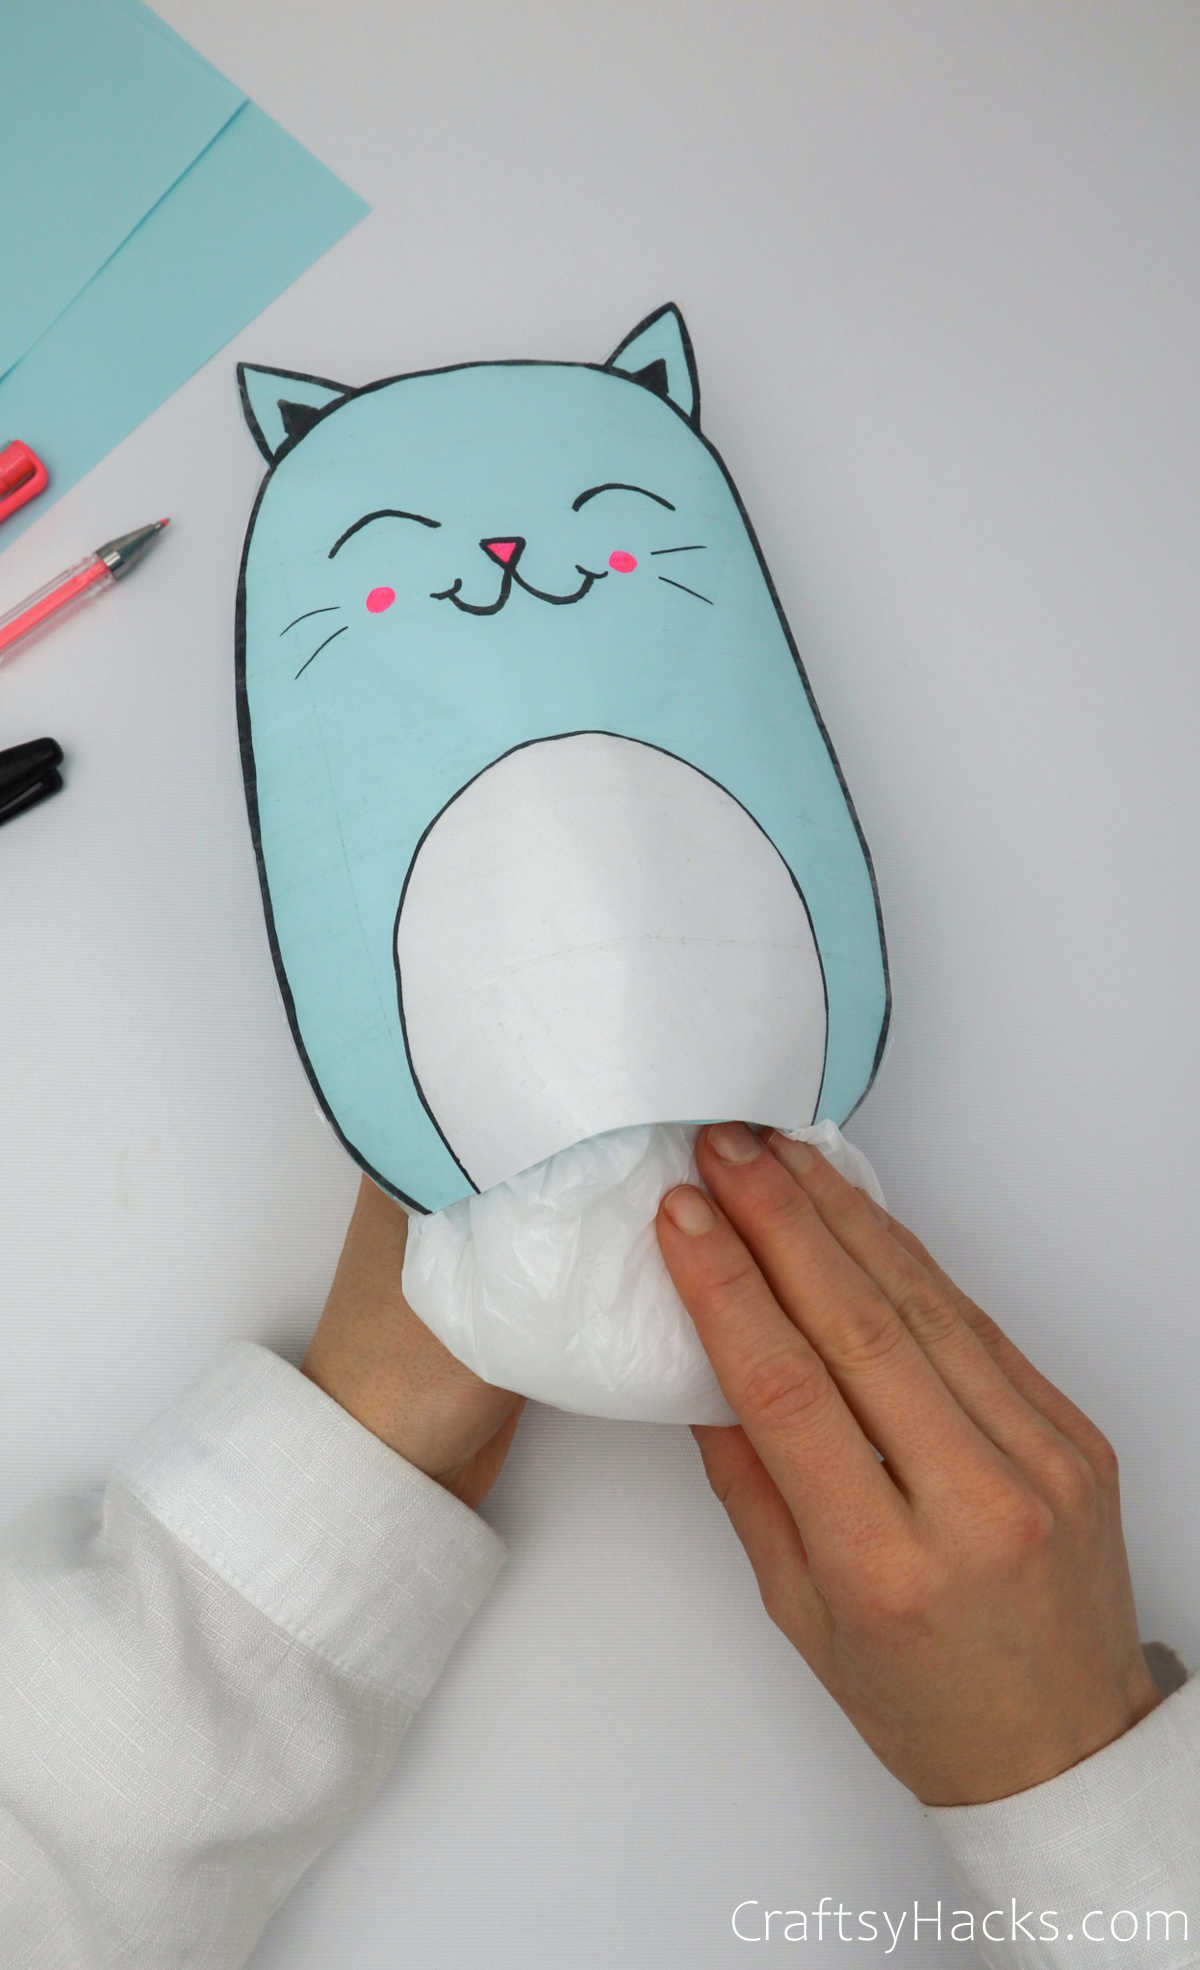
When you’re done with step 8, grab your bag of stuffing. You can place the stuffing into a plastic bag and stuff it into the squishy or just scoop the bits into the squish as is.


The trick is to only use as much of the stuffing as required, and not overstuff it. It might be tempting to have a really squishy and cuddly squishy toy.
But remember that this DIY squishy is made from paper and is not as durable as, say, a plastic squishy.

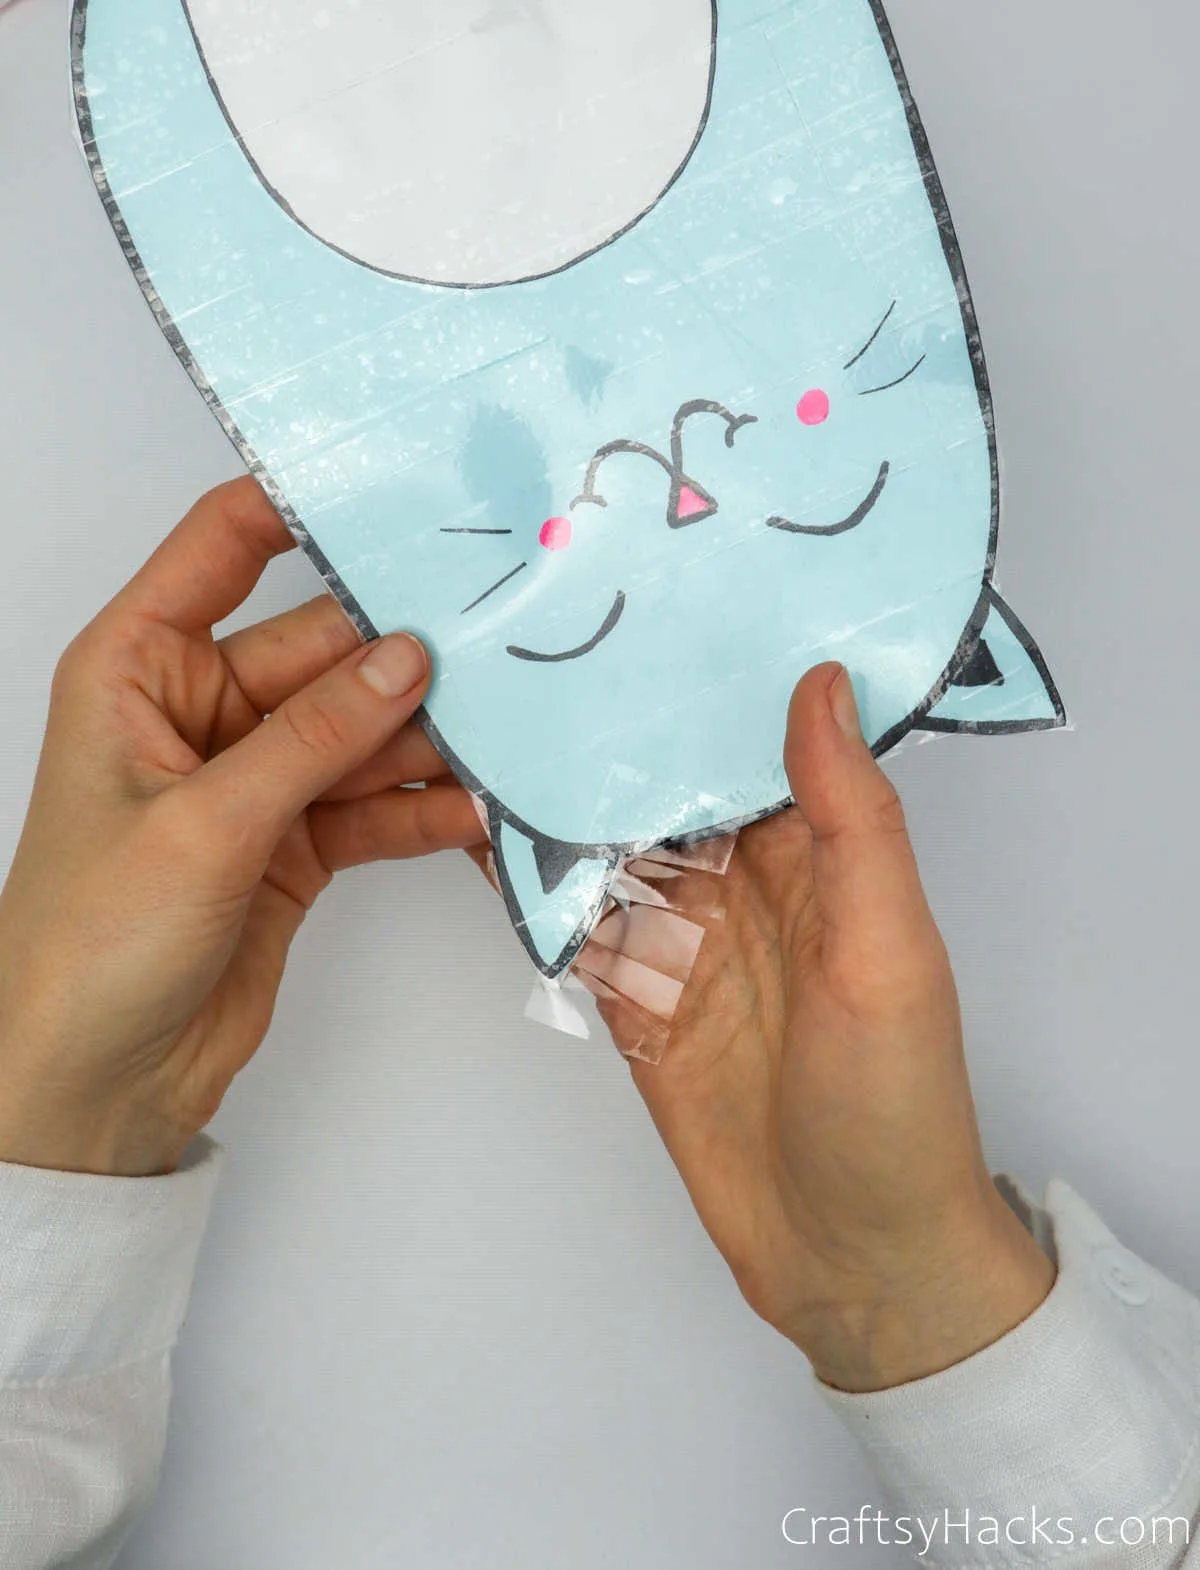
Step 10
Once you’ve stuffed the squishy, it’s time to tape the ends shut. Carefully line the end of the paper with scotch tape, with the tape sticking out, as seen below.
Then tuck them into each other and seal the tape in a neat fold.
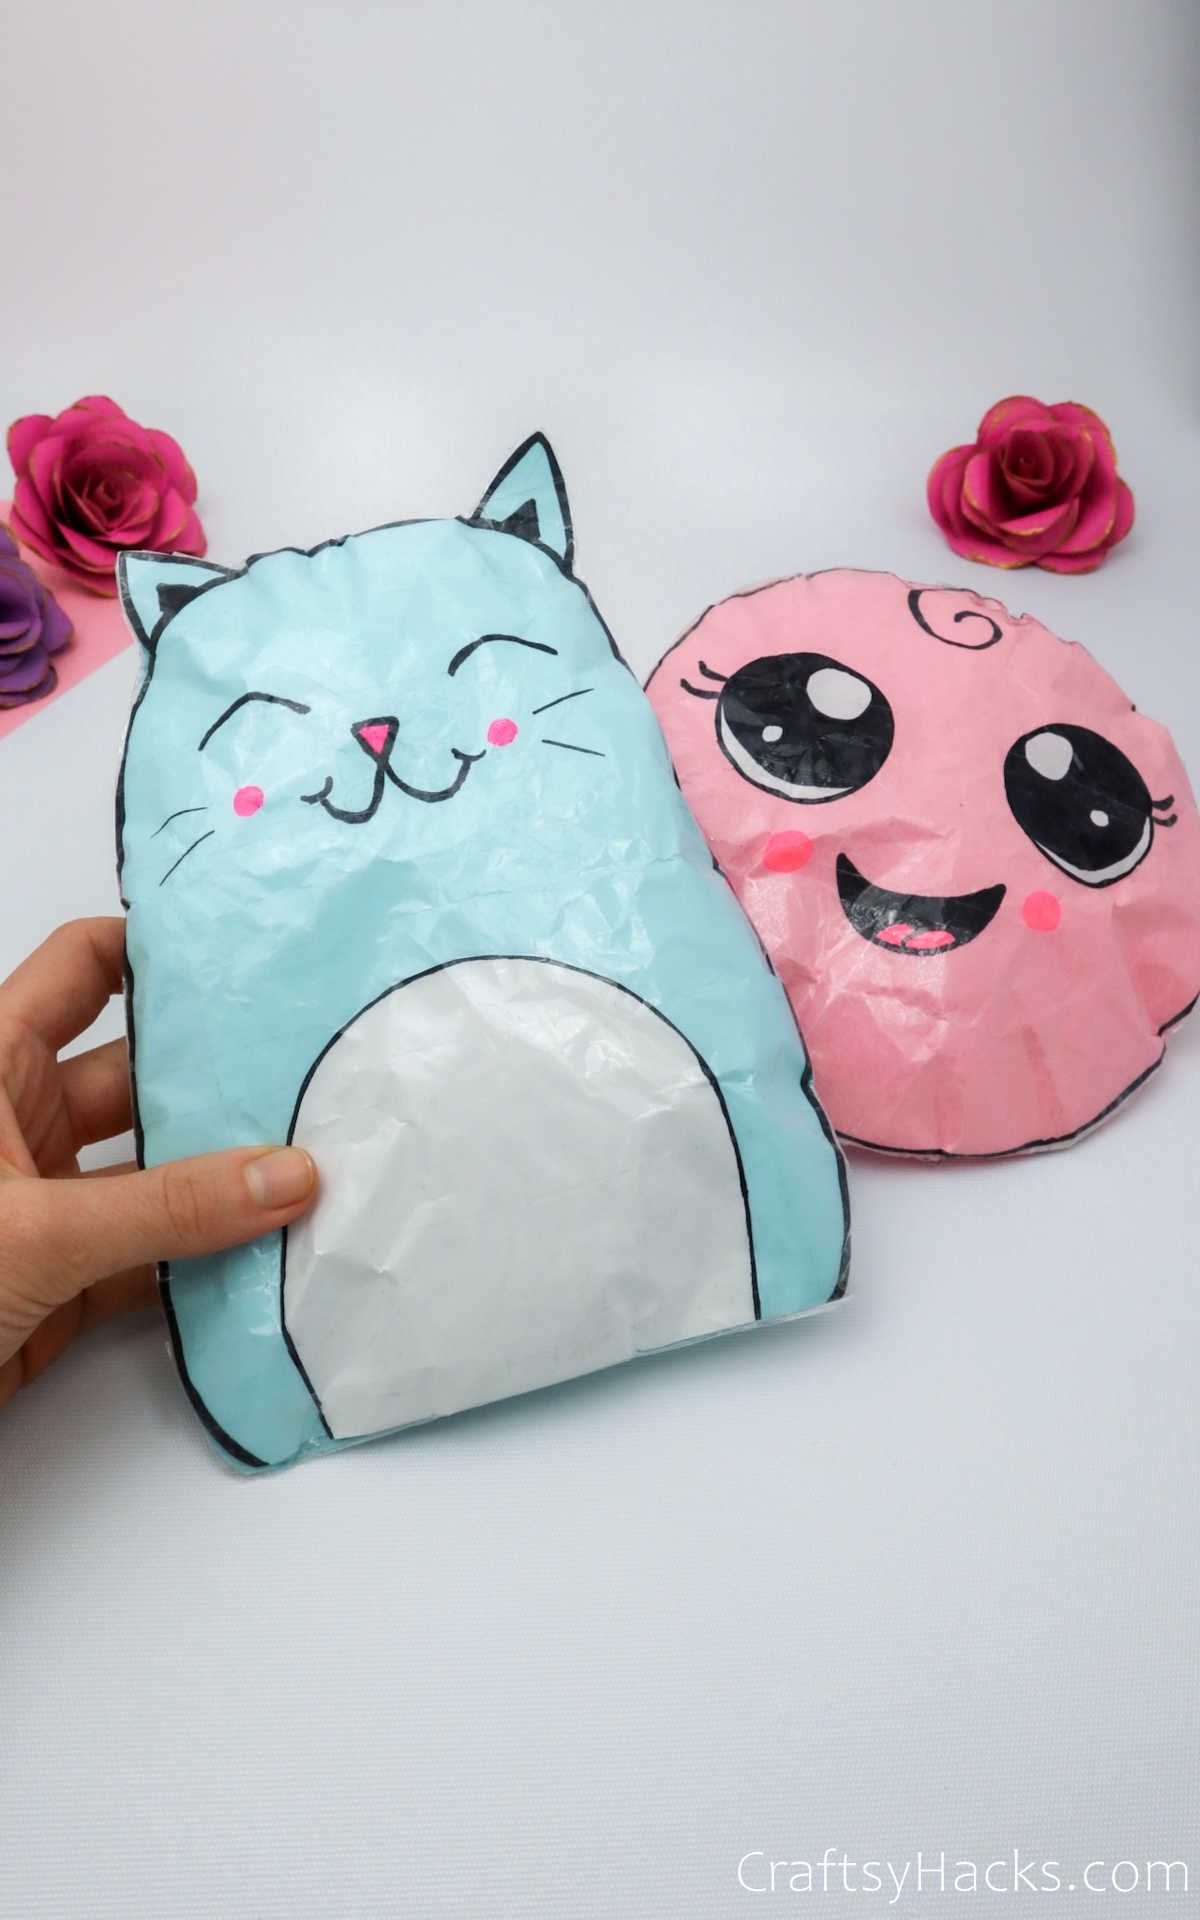
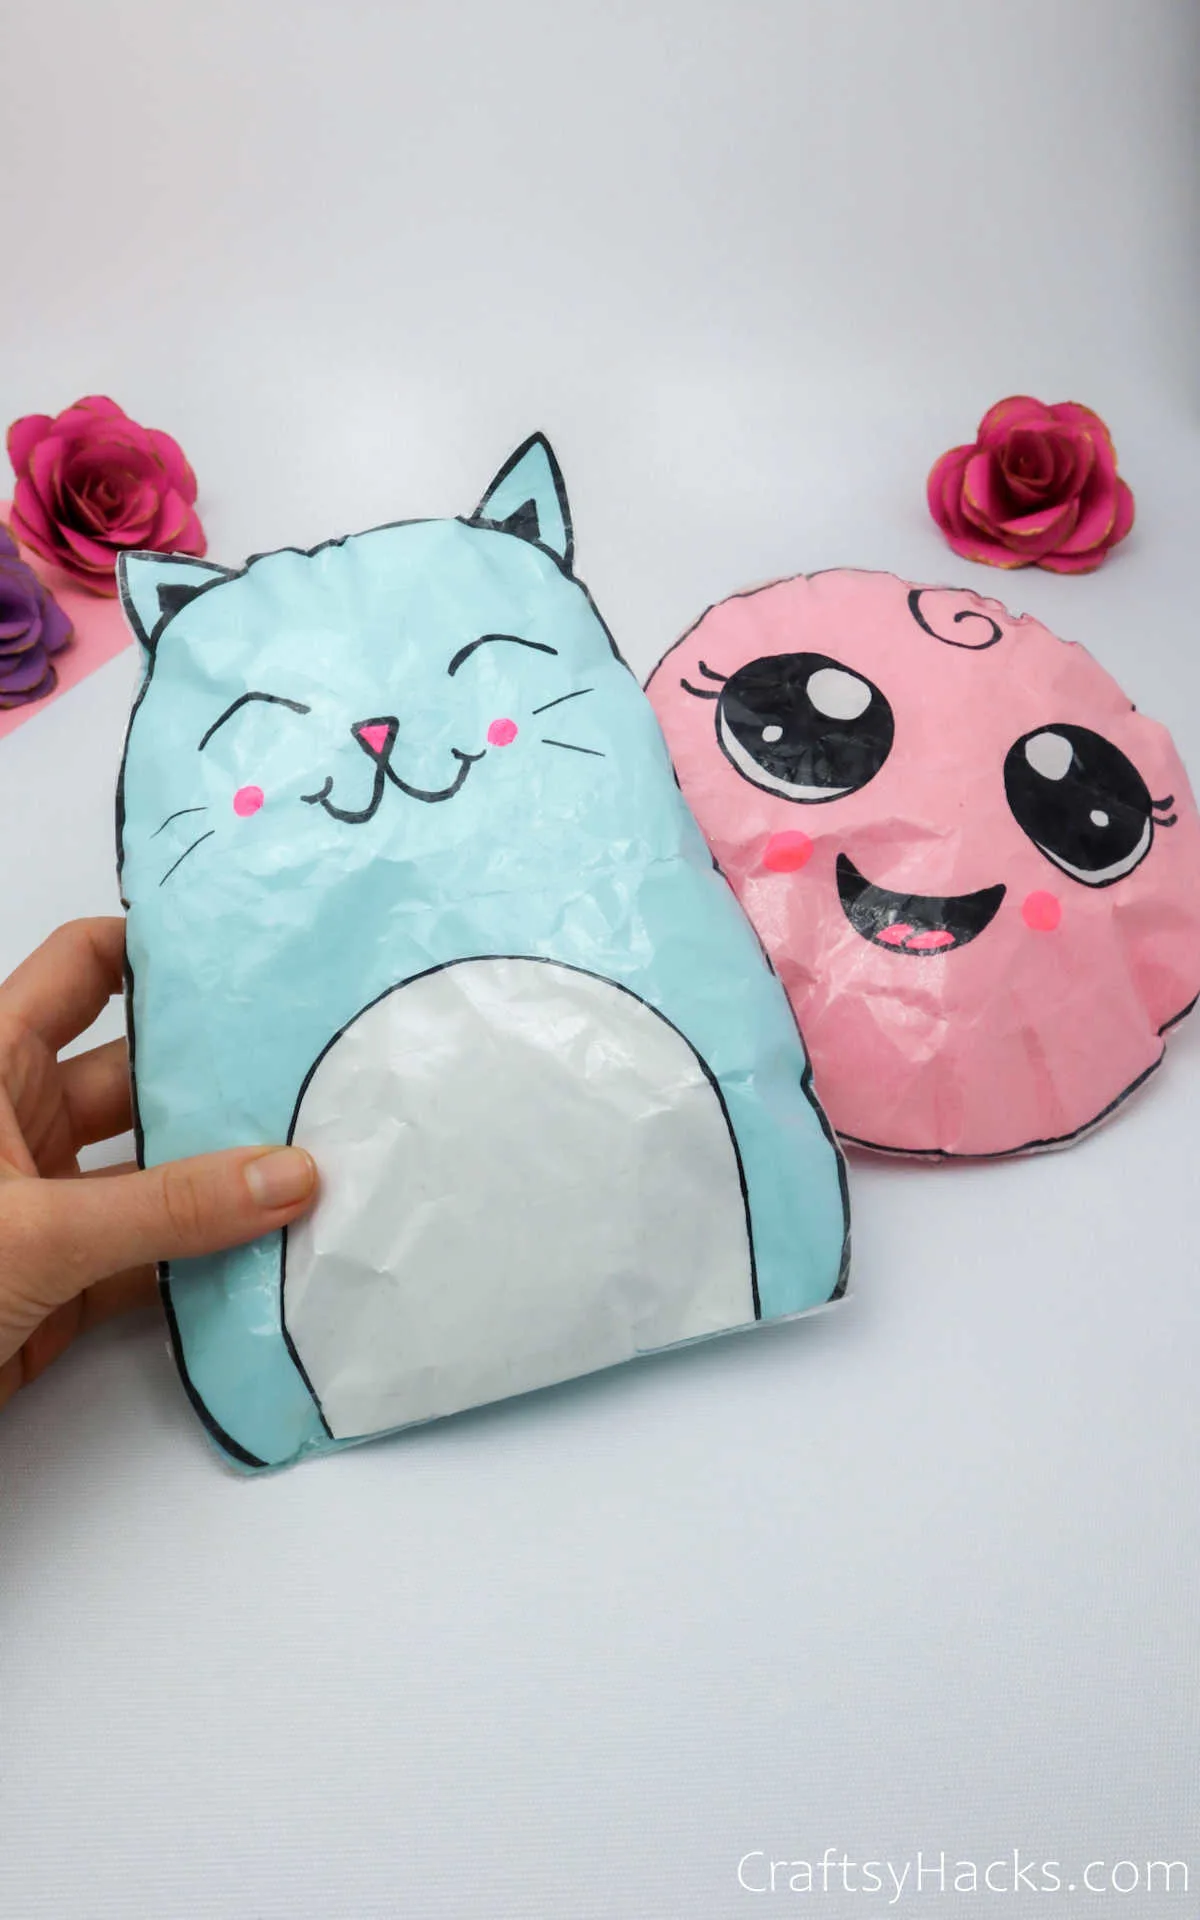
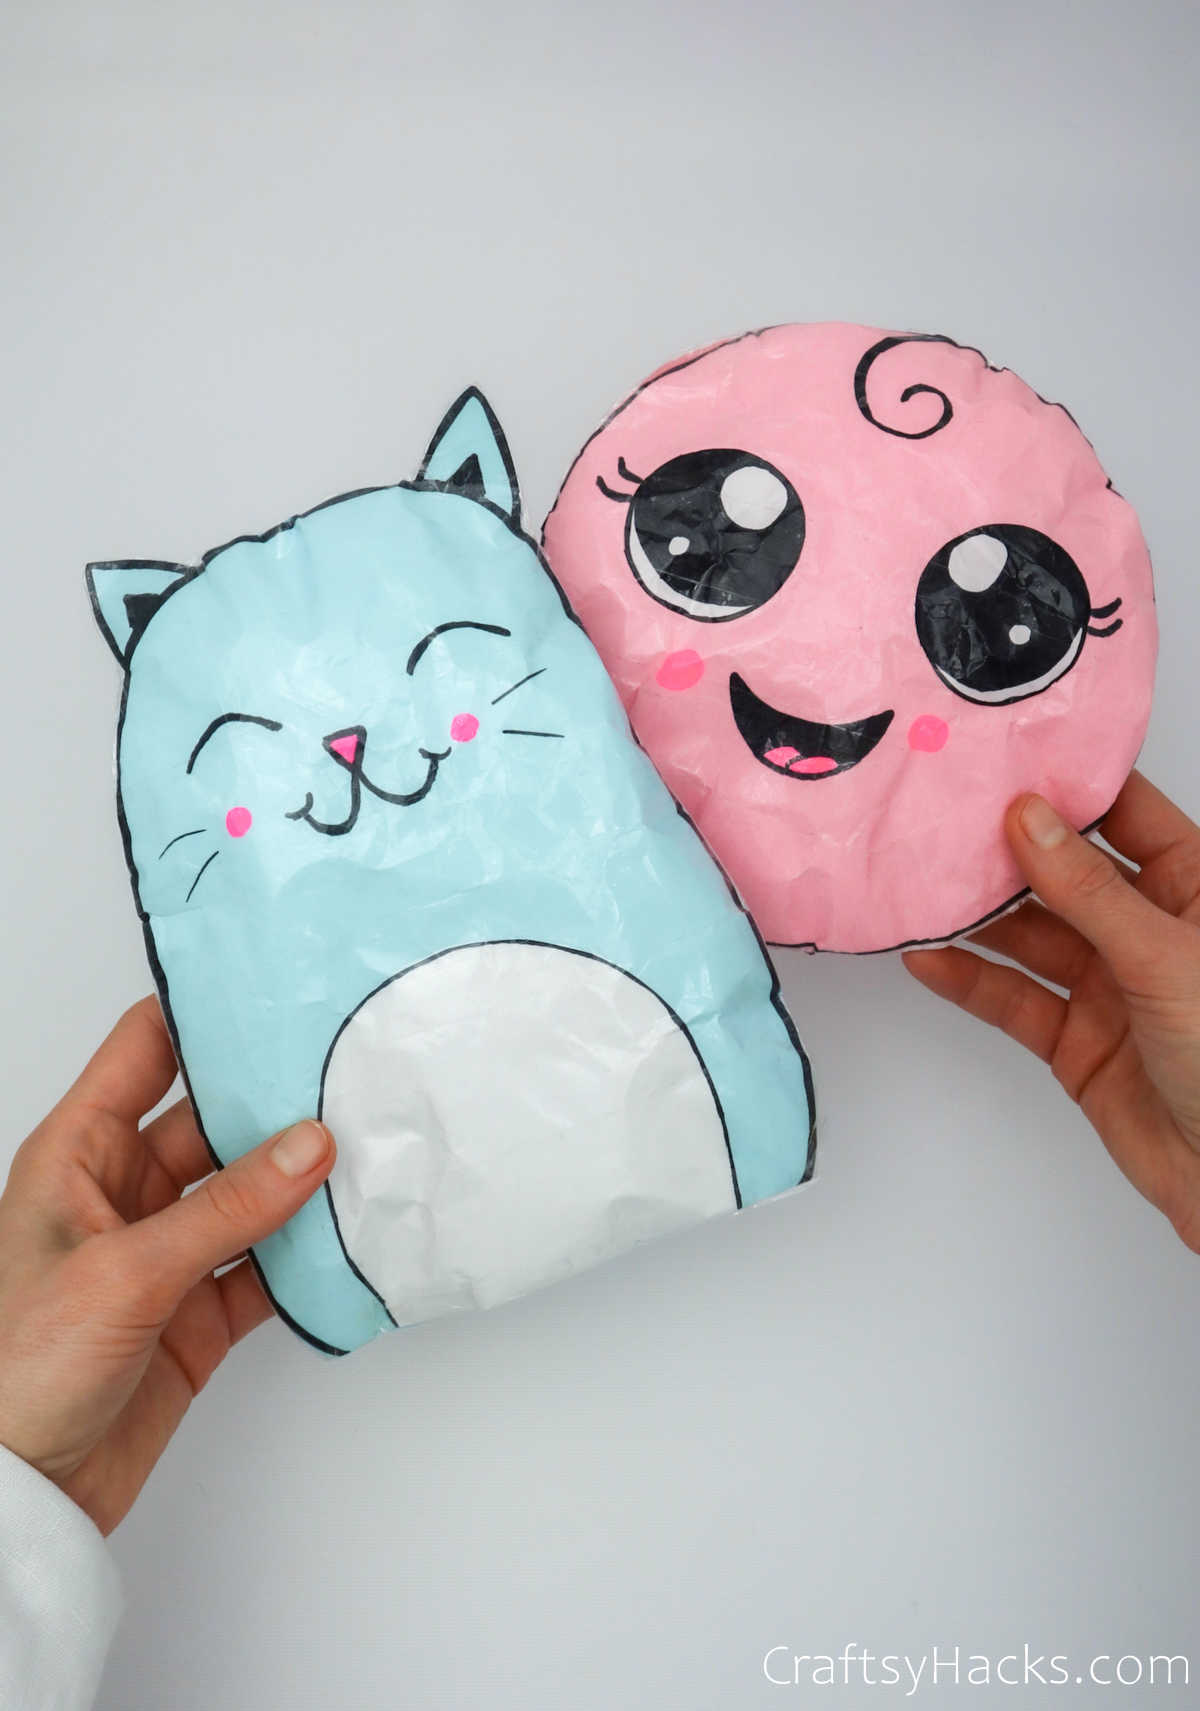
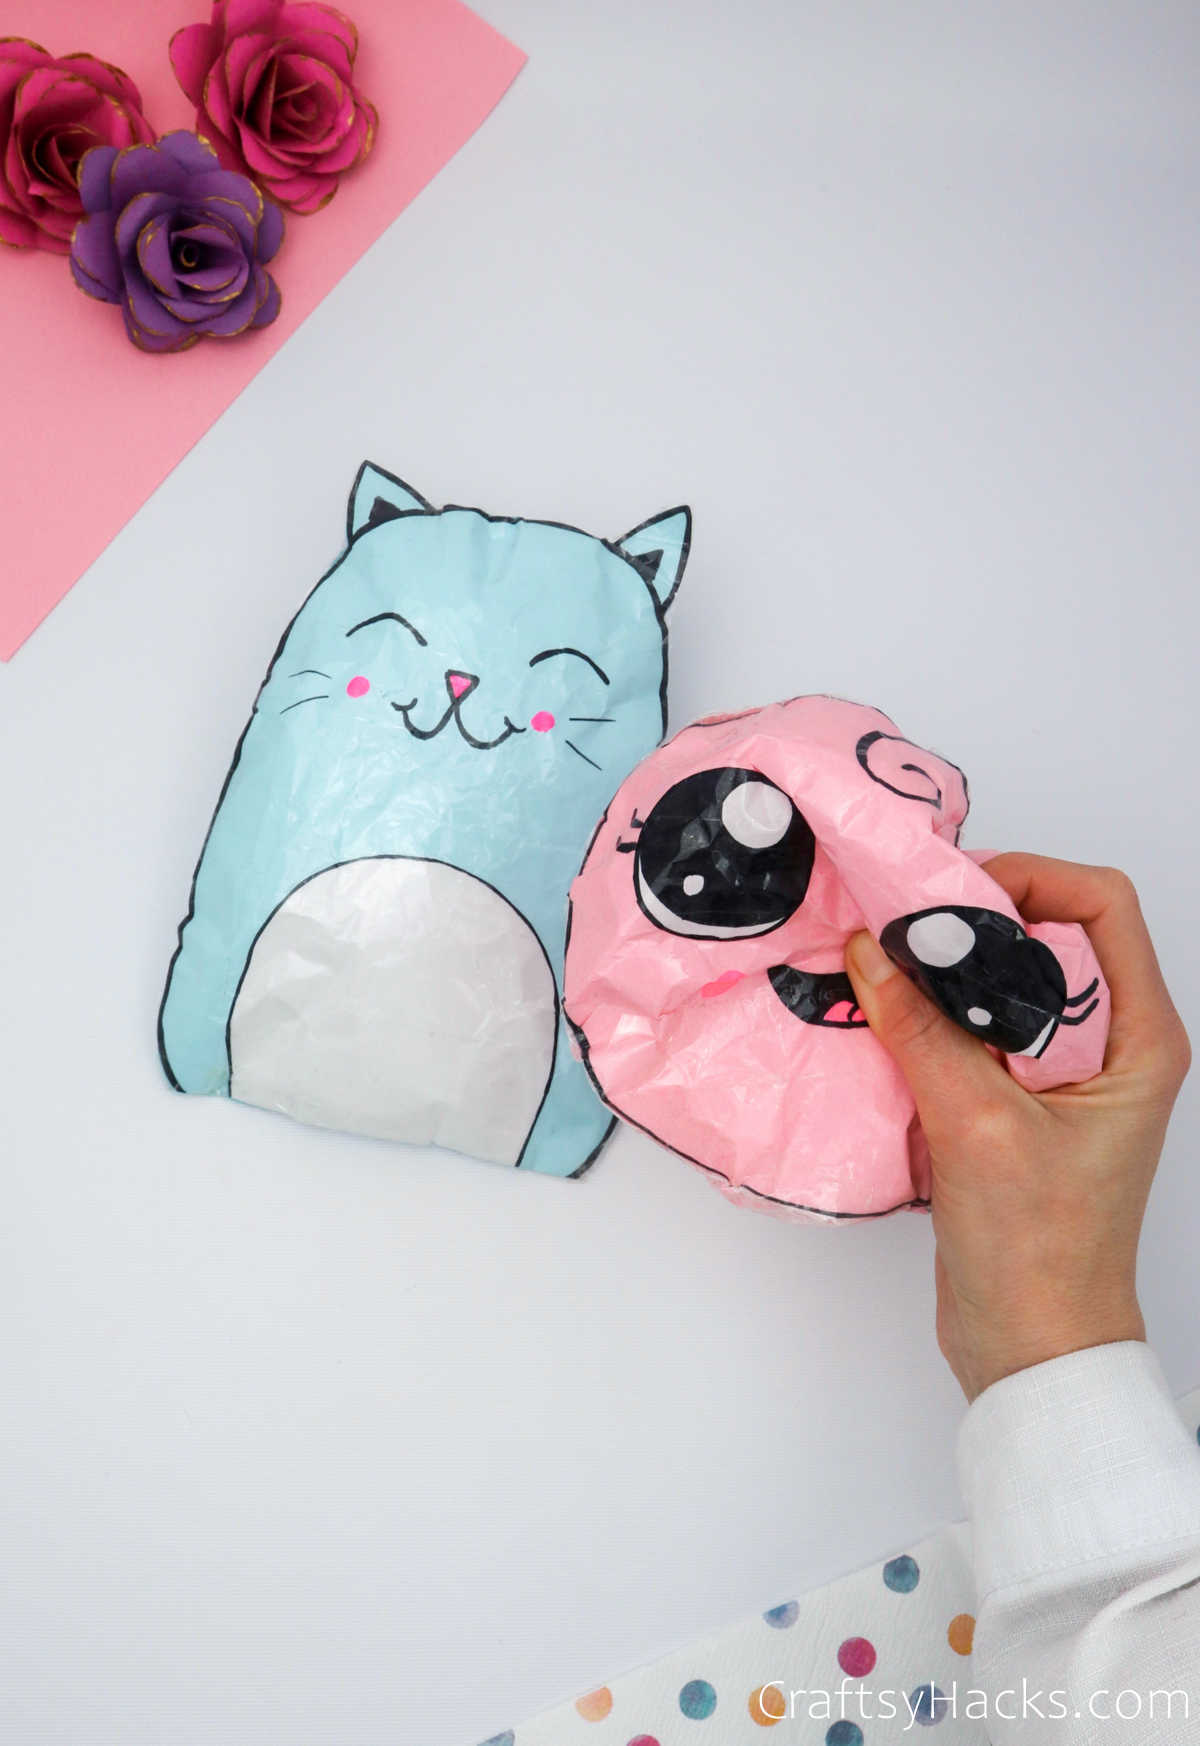
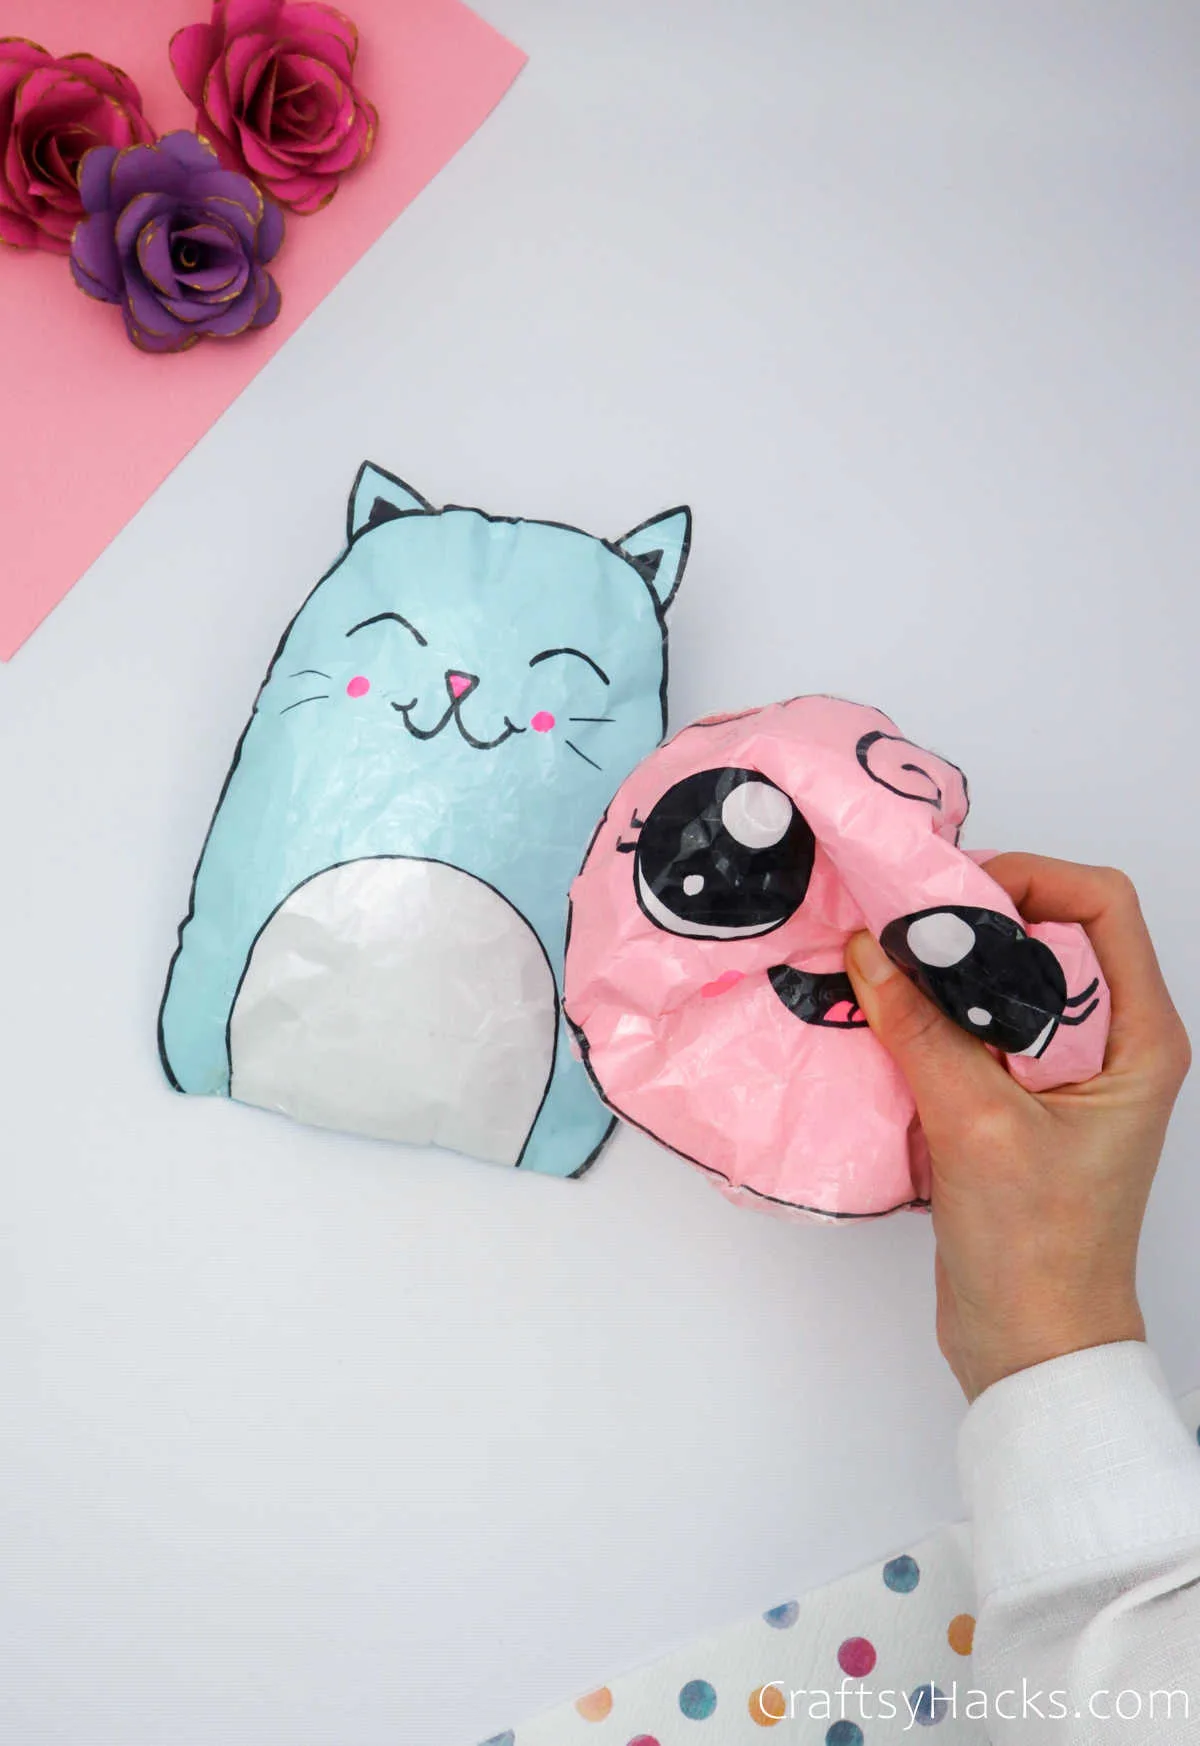
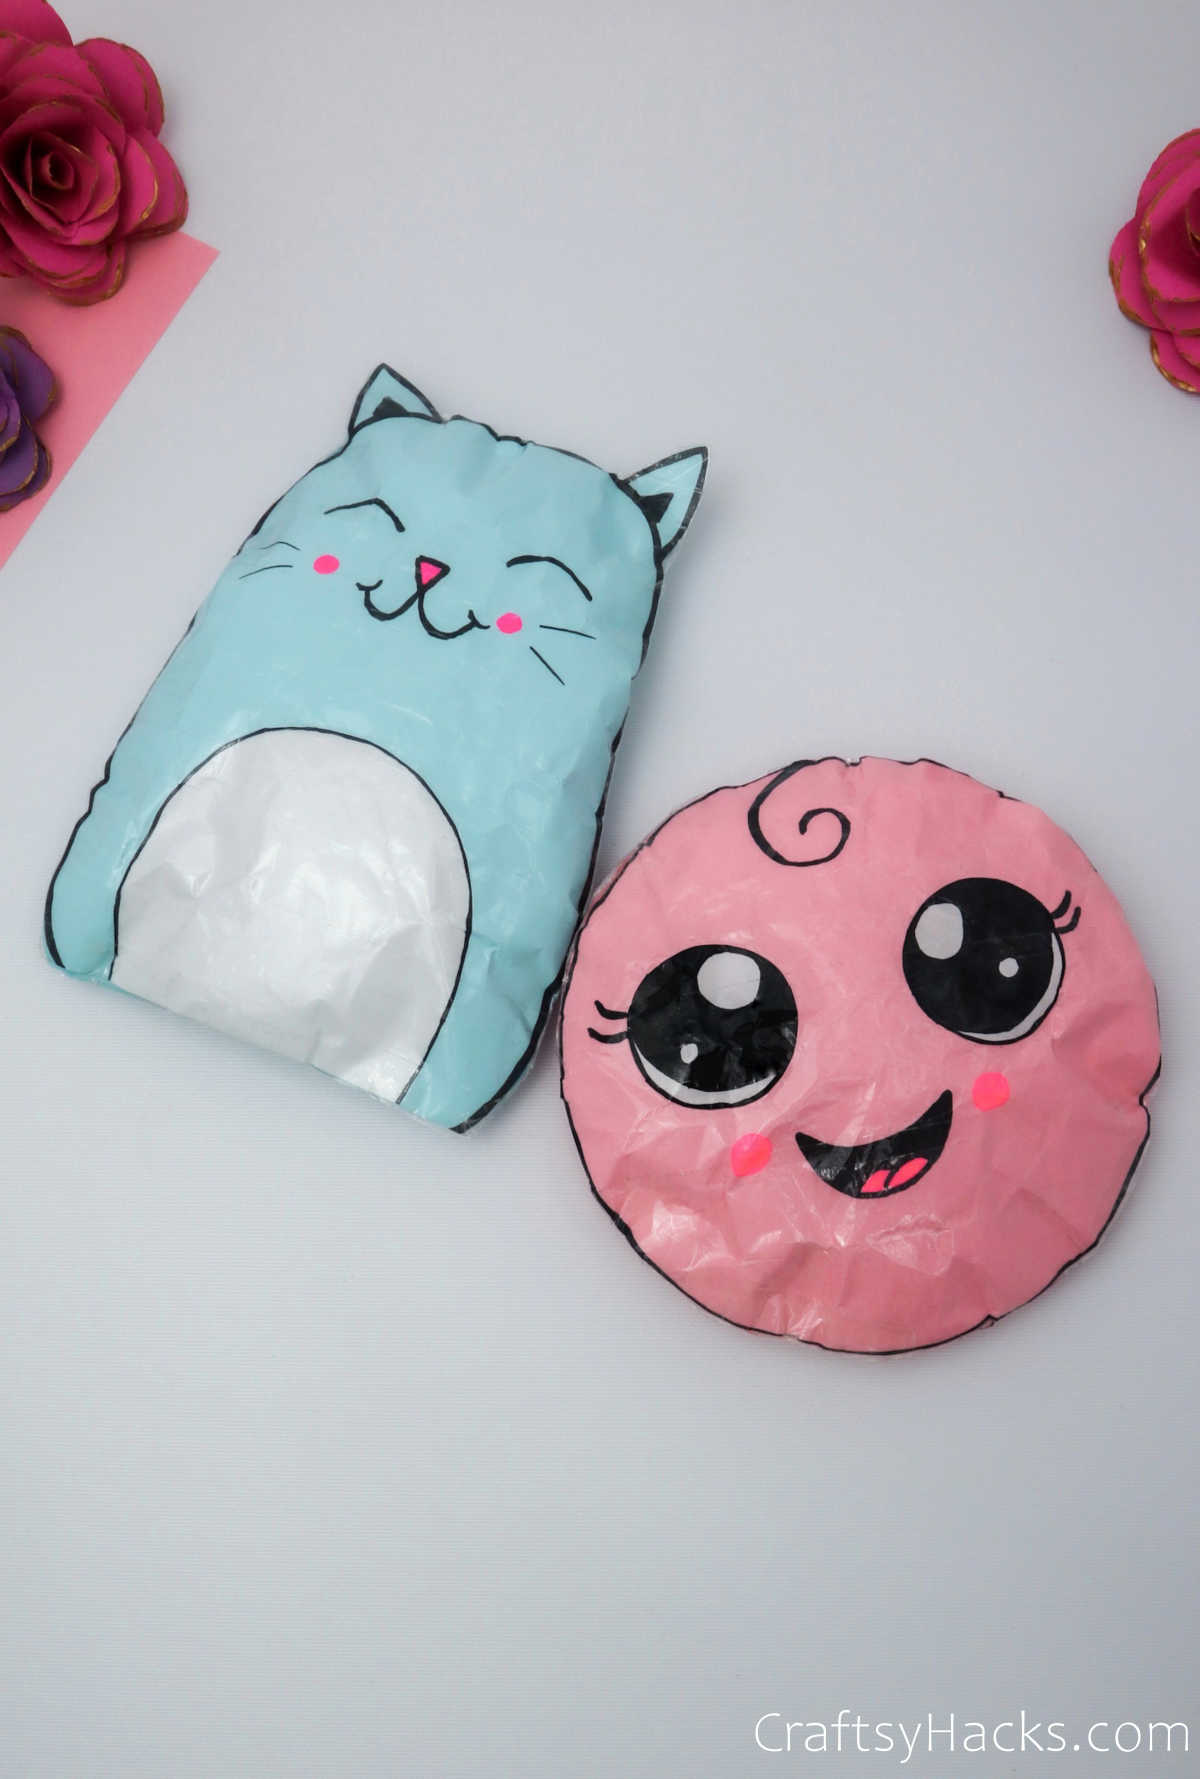
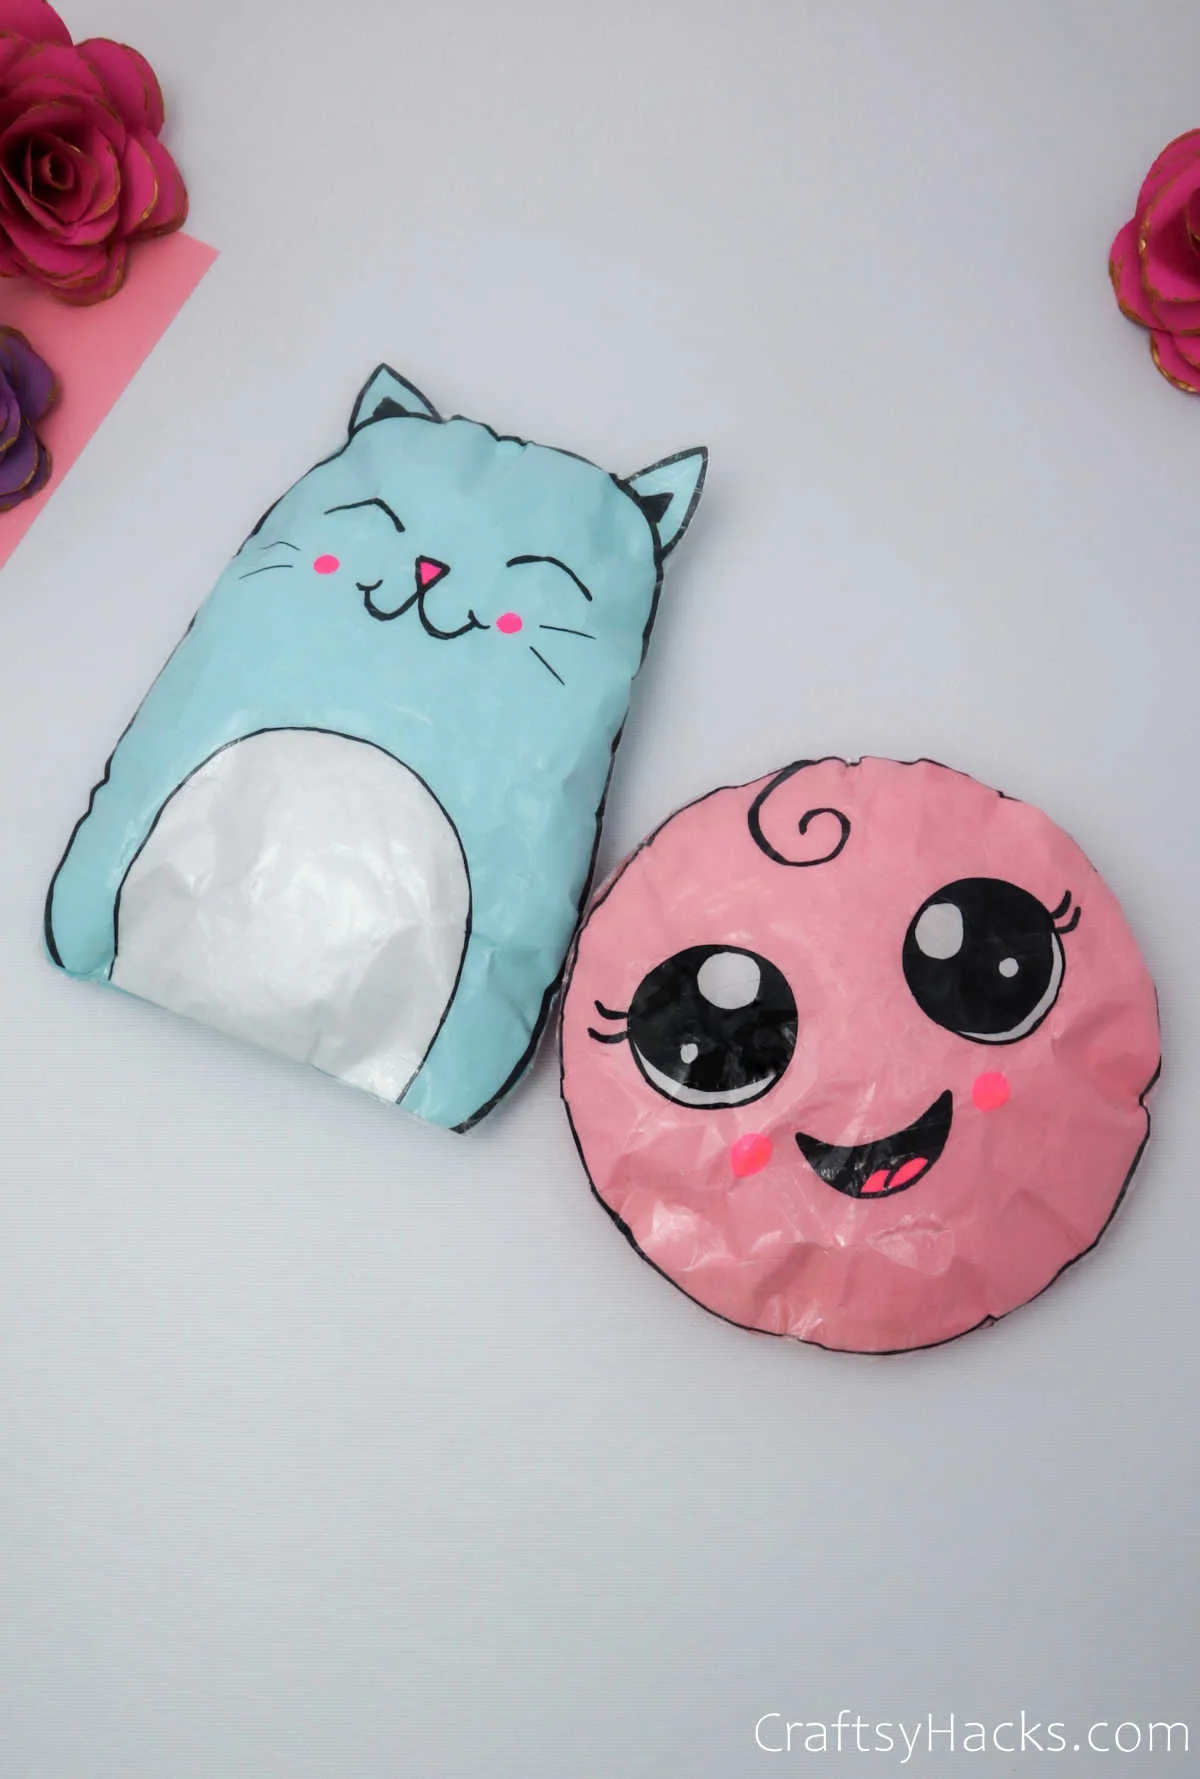
There you go! Your paper squishy is all done! I just bet your kids are going to love playing with it. They can also help you make these squishies!
Here’s 36 construction paper craft ideas for you to explore if you’ve got some extra paper tucked away after this DIY project.


Other DIY Ideas You Might Want to See
- Crafts for Toddlers
- Summer Crafts for Kids
- Duct Tape Crafts
- Paper Crafts
- Crafts for Girls
- How to Make a Paper Envelope
- Fish Crafts
- DIY Bookmarks
- Paper Plate Flower Craft
- How to Make Tissue Paper Pom Poms
- Tissue Paper Crafts
- Unicorn Crafts
Full Video Tutorial
If you’re more of a video person, check out the full video on how to make these paper squishies on our Youtube channel.
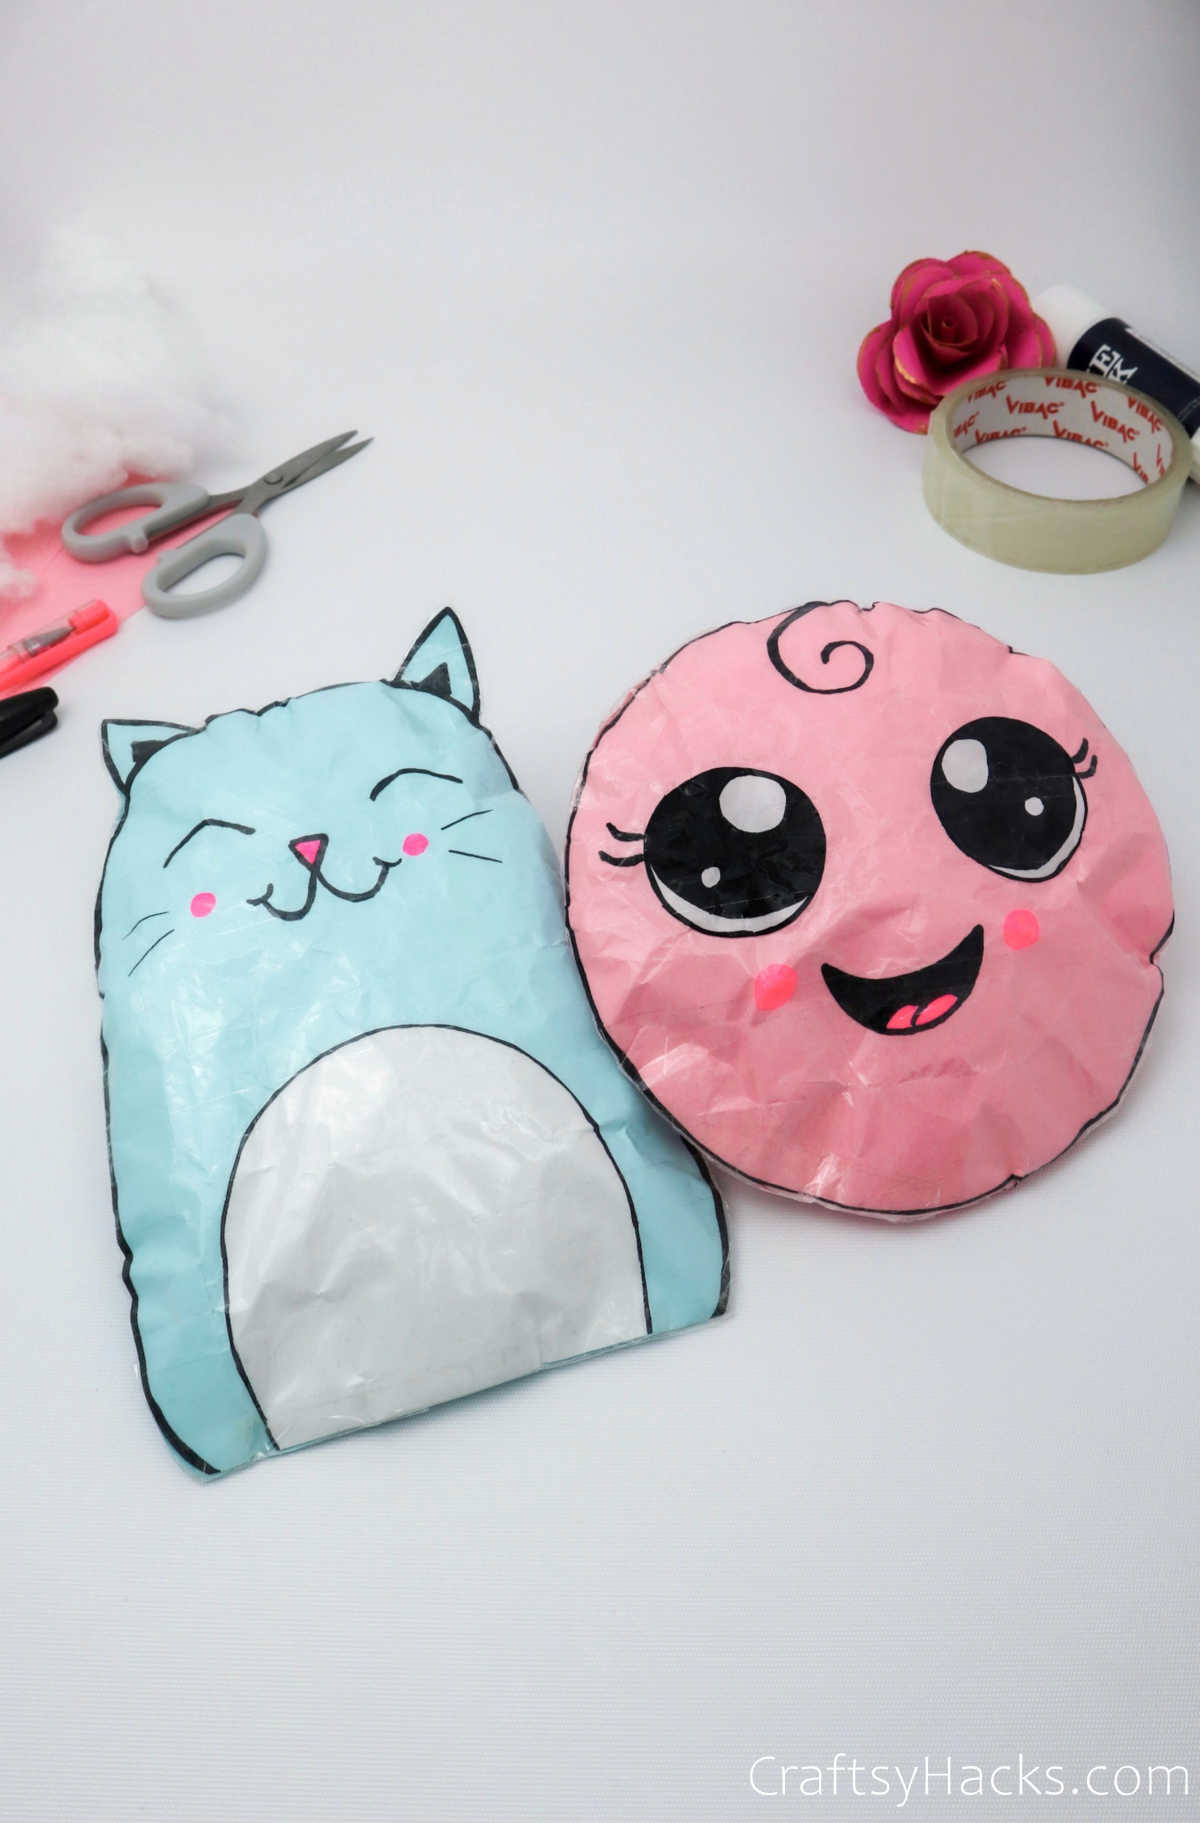

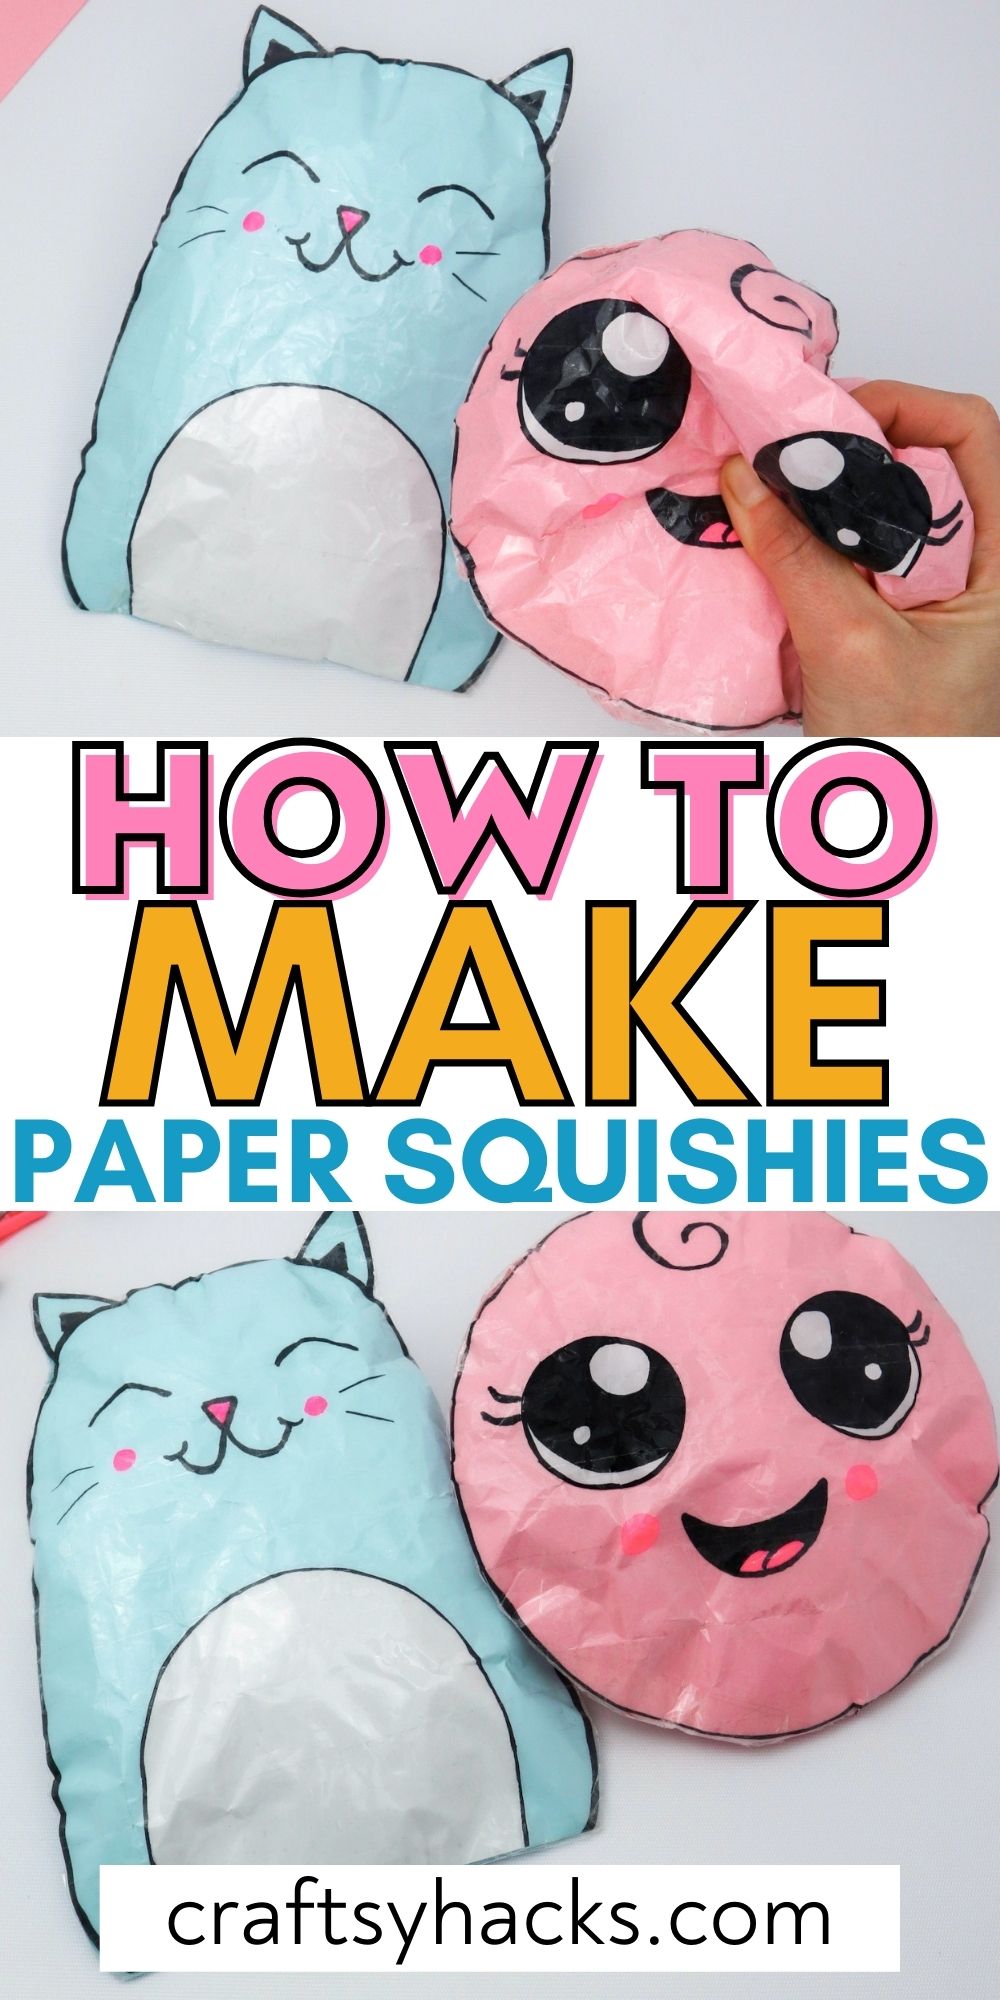


How to Make Paper Squishies
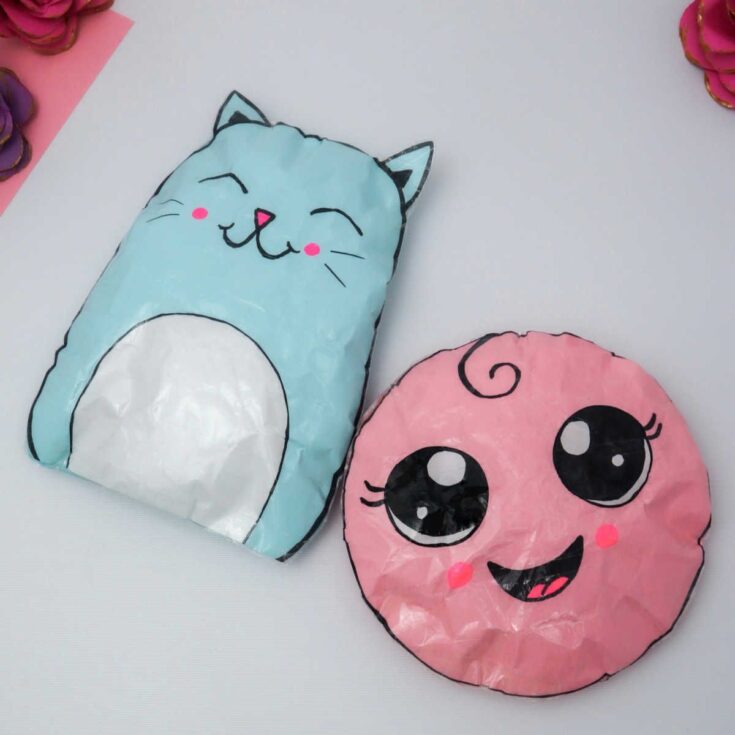

These cute paper squishies are so easy and fun to make! A perfect DIY project for the little ones to get busy with!
Materials
- 2x colored paper sheets
- White paper
- Black marker
- Transparent tape
- Toy filling
- Small plastic bag (optional)
Tools
- Glue stick
- Scissors
Instructions
- Grab your craft or construction paper, a marker, tape, and a pair of scissors to get started.
- Either draw your cartoon squishy or download and print a pattern online. You should also cut out the back of the cartoon squishy in the same outline.
- Draw and cut out the different parts of the cartoon—like the ears and the belly. Don’t forget the eyes, nose and mouth!
- Once you’ve cut out the different components, it’s time to tape the entire squishy in place using clear scotch tape. Be extra careful around the ears and other tricky corners!
- Leave the ends of the cutting open—you will be stuffing the squishy through this gap.
- You can stuff the squishy as is, or fill a small plastic bag with it and shove it into the gap you left open.
- Finally, tape the opening close and carefully secure the tape in place to fasten off. Your squishy is ready!